Anyone handy with Mosaic tiling?

Page may contain affiliate links. Please see terms for details.

Will

Hardcore MB Enthusiast
SUPPORTER
Joined
Jan 21, 2003
Messages
13,994
Location
Surrey
Car
GL63 AMG / 190E 2.5-16 / Porsche 911
Hi gang,

Been doing a bit of DIY this week at home, currently finishing off a dowstairs W/C / cloakroom.

All the difficult stuff is done - all stripped out, new floor, re-plastered ceiling, new lights and extractor, new radiator plumbed in, plumbed in for outside tap etc.

Boxed in some pipework and the toilet had to come forward slightly (old type was a low-level type with flushpipe, soil pipe was too far forward for a modern close-coupled to fit back to the wall etc.

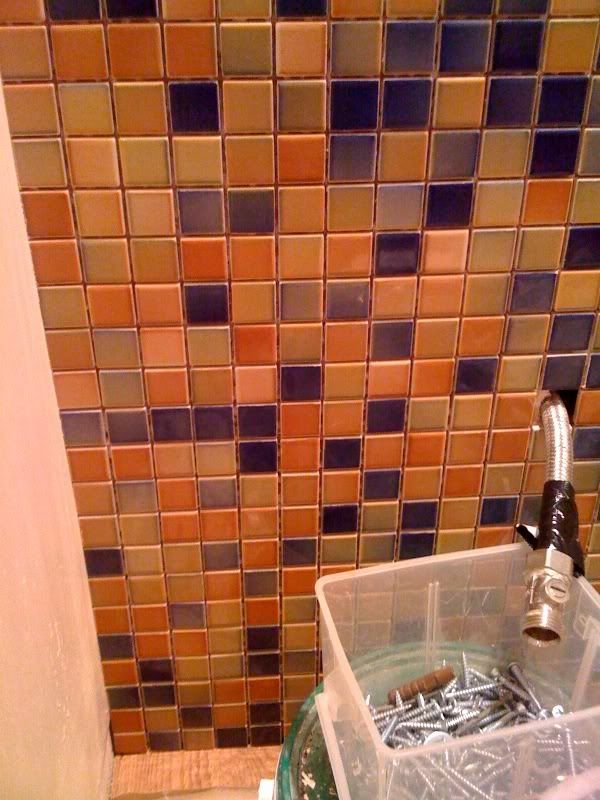
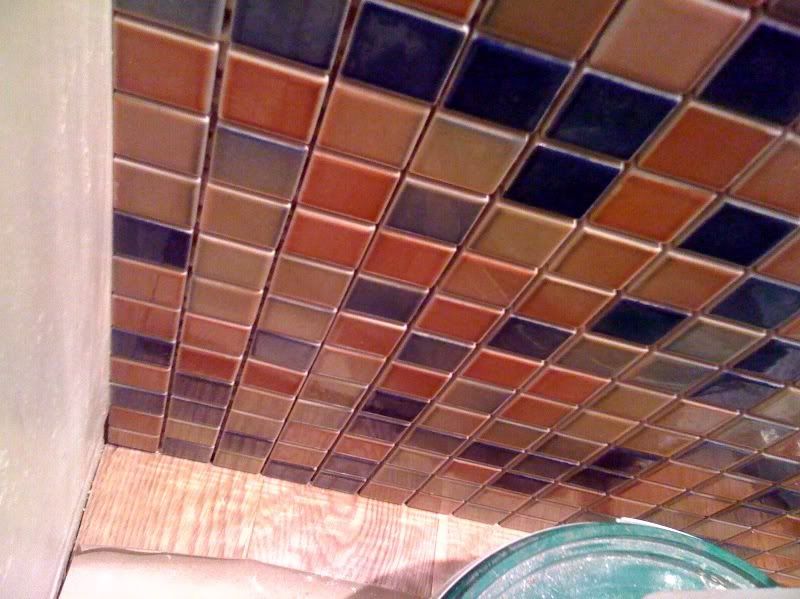
Anyway, now doing a bit of tiling. So far it's going well - I've gone for some mosaic tiles (still need to paint the walls)

tiles.jpg


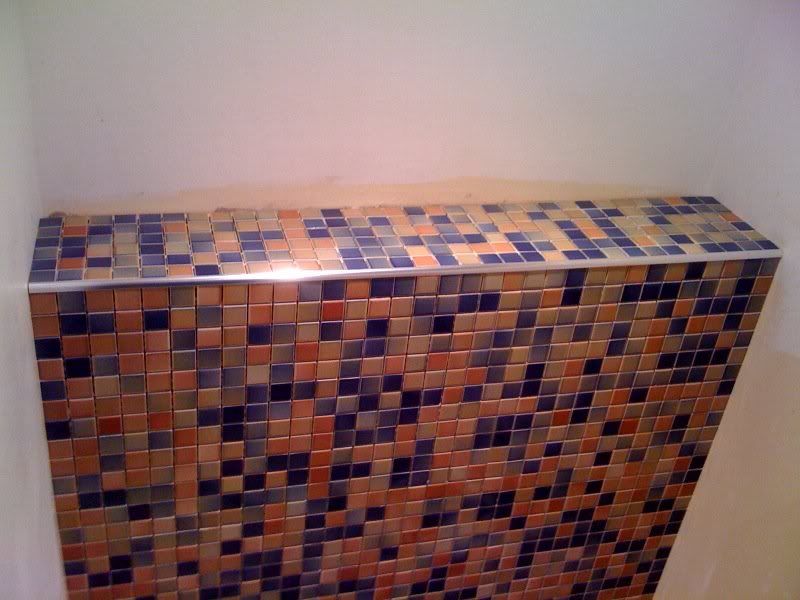
Luckily, I've been jammy so far in that they fit 100% perfectly with 1mm spacing side to side with no cuts :bananna:

But, I will need to make some cuts soon :eek:, what's the best way of cutting small tiles like these?

They're about 25mm square. I've cut the odd tile in the past with those scoring things that you then snap off the rest etc, and even cut a couple of floor tiles with an angle grinder in the past - but I've never done a lot of tiling or any mosaic stuff.

So, onto the widespread minefield of experts we have here @ Mbclub for your suggestions! :)

Cheers,

Will
 
firstly, i am not a tyler but my Father was a marble mason - later tiler
so comments only:

They look good - very lucky there fitted wall to wall:cool:

i think the trick with mosiac tiles is setting out - measure to see how many mesh panels you'll need to the each wall edge/corner - i presume its a dado.
you will have some 2D play if you keep tile centres at max - 1mm is a tad shy me thinks.
for tyling around pipes etc try leave whole tiles on the mesh where possible - and then do the cuts. Hand tile pincers are probably best/safest method for the individual tile cuts.
If you do have to use a power tool say an angle grinder, then maybe best to leave them attached to the mesh? - Note: make sure use Gloves and Goggles at all times!!!

Just one comment - as said above, the tiles look great at present and act as a nice feature - suggest that you maybe consider how the room will look with additional walls in such a strong colour - no offence intended:)
 
Cheers Roger,

It's only a very few tiles in total really.

Basically, that's the main bit in the pic above which will be behind a toilet/cistern (not yet grouted btw), then there's a few that will run around some boxed-in piperwork low down on the wall - ie, only about 20-25cm high and maybe 7-10cm deep.

The 1mm spacing is how the tiles come on the mesh it seems - used some normal wall tile spacers temporarily in places to keep everything squared up and perfect. It's probably only 1.5 sq/m total.

So not to overpowering really overall - not sure what colour(s) yet for the other walls. Any suggestions!

Anyway, I've got some pincer-type tile cutters now, so I'll try on a couple of spare tiles to see how they go.

Cheers,

Will
 
Last edited:
Colours ....mmm..

maybe pastel shades? - Magnolia (08 B 17?), duck/light Blue, or
salmon pink would be warm (it looks abit like a woodpigeons breast)

i like the metal trim - how it sets-off the tiles and catches the light - taps/fittings to match perhaps?

lighting is everything -maybe a couple of spots casting light to the corner or off a wall mirror, or on a nice piece of glass bling (e.g. vase) would be good

Also, tip - always paint your cielings matt white;)
IMHO - walls should be vynil silk or eggshell for practical reasons (cleaning) they can be painted matt too which is nice.

i do like contrast old/new, dark/light, etc
 
Agree about the eggshell comments lol.

If the cuts are for fit near the boxing you could be "creative" with the edging strip, or maybe a small timber beading to take up the difference? or put a flat profile edging in said corner?
 
Hi Will,

The tiles look pretty well fitted so far. My initial thoughts were that 1mm was a bit too smal, but if thats what they are on the mesh then that is what they should be all round.

When we did my sisters bathroom, we used an electri table top tile cutter - I know it may seem an over kill , but they cost about £25 and no doubt would be used in the future.

Alternative is depending on how much you need to cut, it may be possible just chip into the plaster a very small bit and use a whole tile.. just a thought .. depending on beading or sealant it should cover any uneveness that may occur.

Just some thoughts - good luck!
 
Cheers for the tips :cool:

I managed to pop out to Homebase and just got some tile 'nippers' and a scribe.

Seems to work quite well, light scribe over the small tile and they nip cleanly along the line.

Very little wastage so far (1 tile I think!) so it seems to be a good method.

Just takes quite a while as there are 33 tiles accross, and this is the first lot of cuts only :eek:

tiles2.jpg

tiles3.jpg


I'm off tomorrow and it's a quiet job so I think I'll keep going until I've had enough.

Would ideally like to get this back bit and the far corner done so I can fit the toilet tomorrow afternoon after grouting the tiles.

The ceiling is all done (replastered, two halgoen dowlighters and an extractor fan), painted in Dulux matt white, just the walls to paint (mostly prepped and a light mist coat of white applied).

Why do these quick jobs always, always take a little longer than you expect!

Will
 
Cheers for the tips :cool:
Why do these quick jobs always, always take a little longer than you expect!

Will

cos no doubt you're working in the smallest room in the house with no "spread-out" room.... ;)
 
cos no doubt you're working in the smallest room in the house with no "spread-out" room.... ;)

You're right, it's tiny in there (about 80 x 160?) and you get an aching back/knees after a while...

Will
 
that big?

bigger than ours, which i plasterboarded.....and its a step down into it (ouch)
 
that big?

bigger than ours, which i plasterboarded.....and its a step down into it (ouch)

Yep, massive! ;)

What do we reckon on colour then? Some good suggestions there from Roger :) Ceiling is obviously white (and already painted).

Duck egg blue (I've already got a tin), or one of the lighter colours from the tiles?

Floor is oak if that helps.

Will
 
blue has a tendency towards coldness. maybe something neutral like a strong creamy magnolia or gardenia would work well
 
How jammy am I - all the way to the bottom with not a single cut needed and perfect spacing! :bannana:

tiles6.jpg

tiles5.jpg


Quite relieved, it went easier than expected :cool:

Still have to do the much shorter/smaller boxed pipework tomorrow, but at least I can grout this back bit :)

Good point about blue being quite a 'cold' colour, although I do have in my mind very light/duck-egg grey-blue perhaps?

Or otherwise I'm trying to think of the yellowy/orange/light terracotta colour that might go with the rest of the tile colour - not too keen on it all 'salmon' if you know what I mean.

Will
 
you could pick out the very pale green - tranquil and not controversial or garish...
did you create the cistern boxing to fit the height of the tiles? or was it really a fluke? normally you wouldn't work down a wall, i take it the mats are so light they didnt slide?
 
It was a complete fluke: :D

I did that boxing in ages ago, this is one of those jobs that always gets put off etc. Only bought the tiles the other day.

I agree about going down a wall - but figured that I wanted the external edge (metal strip) free of cuts so did it that way. As it turned out, it wouldn't really have mattered too much. Yep, the tiles are quite light (6mm thick) and they stayed put pretty well - started them off erring on the high side, within a minute or two they settled just right.

Will
 

Users who are viewing this thread

Back
Top Bottom