Audio-10 tape to MP3

Page may contain affiliate links. Please see terms for details.

Dieselman

Banned
Joined
Jul 13, 2003
Messages
34,206
Car
Peugeot 403 Convertible
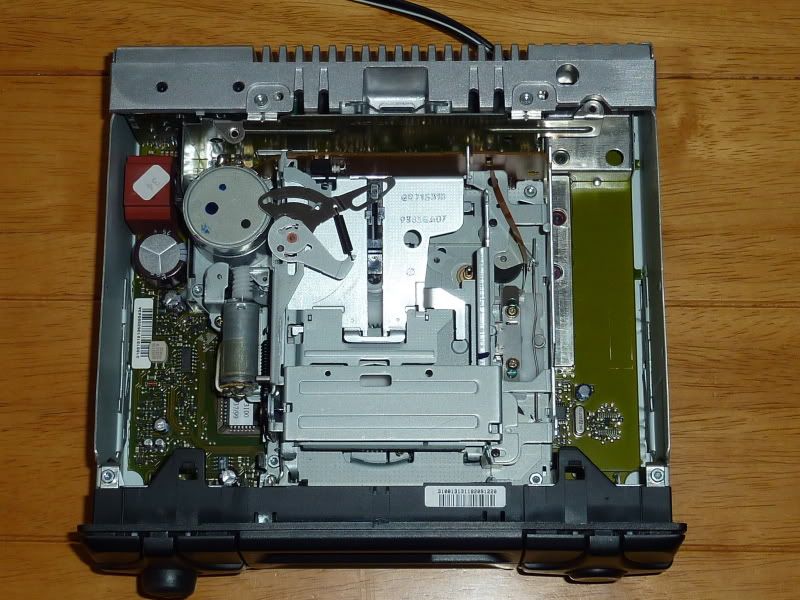
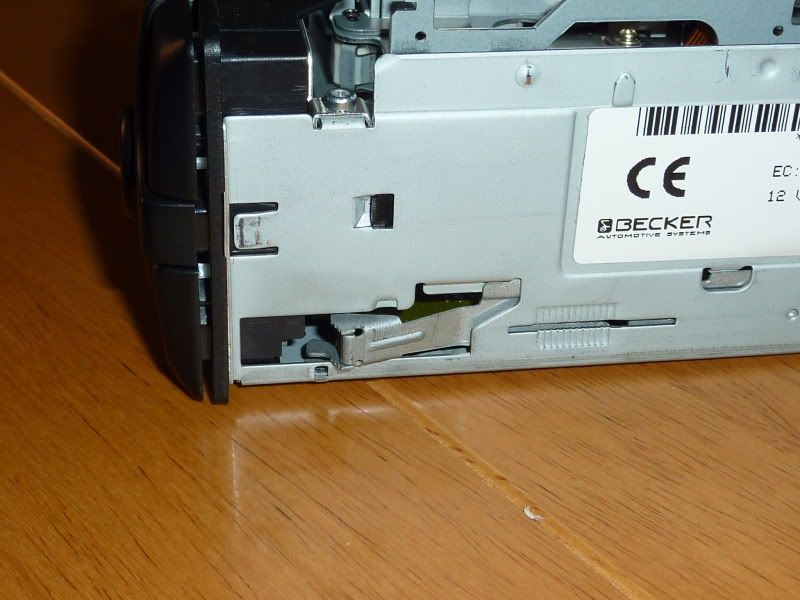
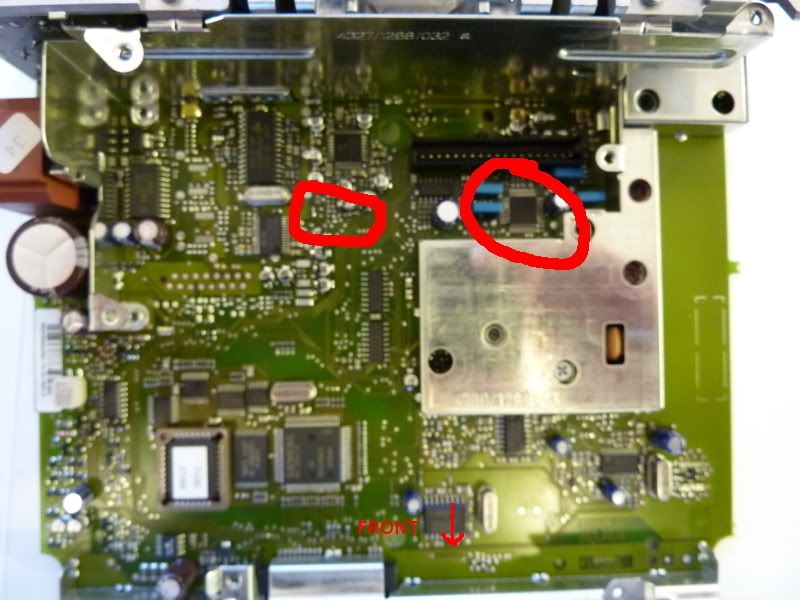
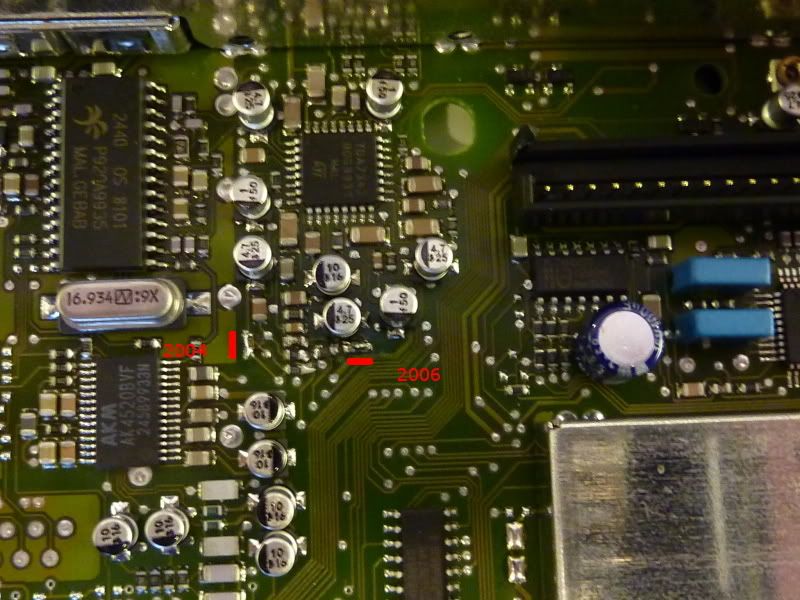
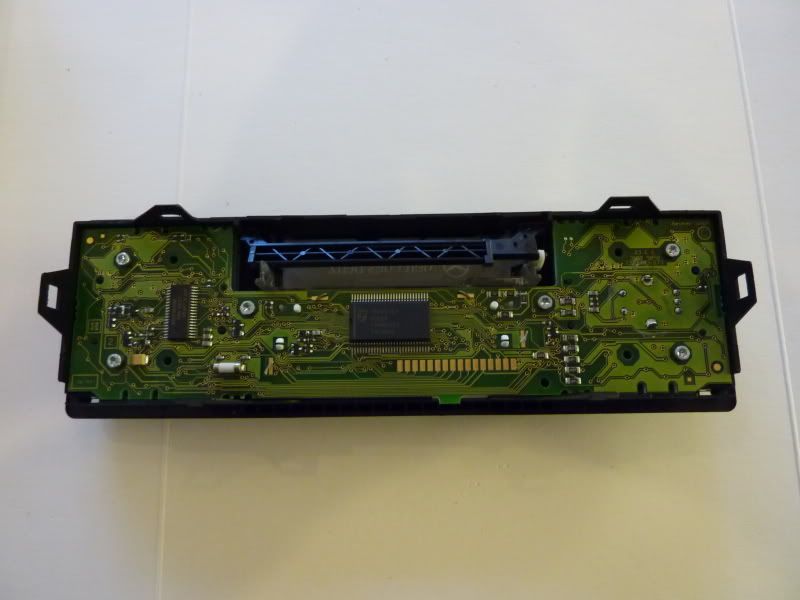
Recently I performed an upgrade to my standard Becker Audio-10 to enable it to play an MP3 player.
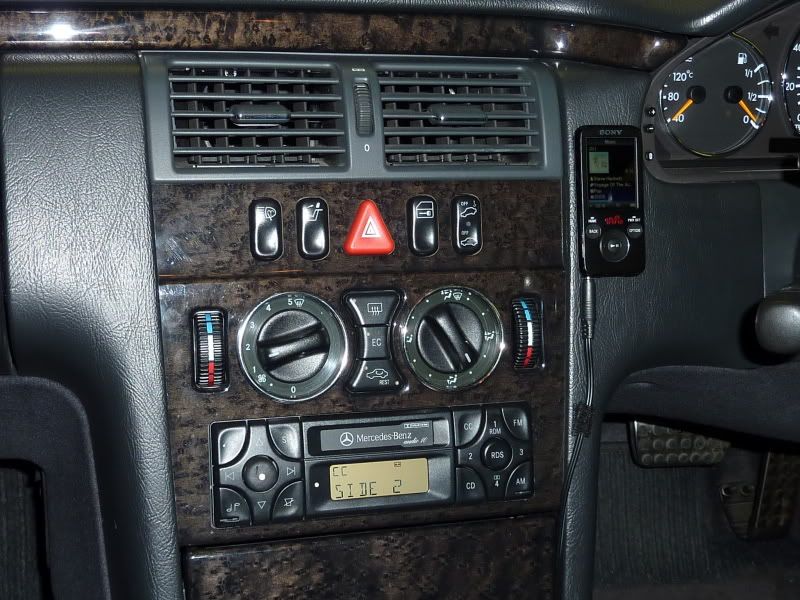
The tape is sacrificed (but reversibly) and as I already had a cable with appropriate 3.5mm jack, all it cost was the cost of a Walkman. :)

Nice cheap upgrade for anyone with an Audio-10 tape unit, which do have pretty reasonable sound quality.

I mounted it on the dash as opposed to the glove-box for access when driving.

It's now been Adam proofed as well...;)

MP3player.jpg
 
How did you do it, Dieselman? And what adapter did you buy?
 
I saw this in Torquay, and its a seriously neat and tidy install - except for the Velcro holder :p .

Sounds great though and keeps the stock MB look, Garish, modern CD headunits just dont look right.
 
I assume you have used one of those casssette convertors but just installed it within the head unit rather than through the cassette flap?
 
How did you do it, Dieselman? And what adapter did you buy?


I would also really like to know this!

A how-to would be great!
 
How did you do it, Dieselman? And what adapter did you buy?

I assume you have used one of those casssette convertors but just installed it within the head unit rather than through the cassette flap?

I would also really like to know this!

A how-to would be great!

It's a bespoke installation straight onto the main board of the Audio-10. There is no adapter, just the 3.5mm jack flylead soldered onto a couple of tracks and some other bits done.

It took me all day to suss it, but in reality it's half an hours work. Basically you need to find the 'Line In' tracks AFTER the tape player Pre-Amp, solder on, cut the tracks to the pre-amp, bridge a couple of resistors to increase the gain, cheat the cassette mechanism so it thinks there is a cassette ready to play...and last but not least defeat the Eject button (Adam..;)).

I'll do a 'How To'..

Means taking it all apart again....:doh: :D
 
Good work! Hmmmmmmmm, wonder if this could be done with my Audio 10 CD, do you think the main board will be similar?

How on earth did you identify the "line in" tracks on the board?!

EDIT: Should add that mine is the D2B fibre optic job I think - not sure if this makes a difference?
 
Last edited:
The problem with a CD unit is it detects a whether a CD is being played otherwise it ejects. Also the conection would need to be after the DAC.
Mine is fibre too, so no go on that score.

If there is an external AUX connection that would work.

I was lucky and obtained a circuit diagram (that took half a day), but as long as you can identify the Audio Controller and work backwards it should be possible.
 
Last edited:
"How to guide" please Will, I will definitely consider doing this.

Welcome back by the way:thumb:
 
Yes, hadn't thought about it needing to have a CD playing. Maybe I will check out e-bay for and audio 10 tape player to work on instead.

If it weren't for the blasted steering wheel controls I would have put in an aftermarket unit a long time ago.

No aux-input on the back of my Audio 10 CD, already checked that :(
 
The Audio-10 tape units are better units anyway as they are Becker 3100 as opposed to Alpine.
 
Can't wait for the "how to" :)
 
Could be profitable - the Audio 10 CDs are fetching good money on e-bay. I can "downgrade" to a tape and if it works get rid of the Audio 10 CD.

Woohoo.
 
Could be profitable - the Audio 10 CDs are fetching good money on e-bay. I can "downgrade" to a tape and if it works get rid of the Audio 10 CD.

Woohoo.

DM could charge for this service :)
 
How To. Audio-10 tape to mp3.

As requested here is the How To for this mod, I'll try to make it as clear as I can but ask if unsure.

Remove the headunit from the car and take to a workbench.

Lift off the top cover and remove the cassette unit by undoing the four silver Torx screws and lifting out.

Tapeunit.jpg


Remove the front bezel and control panel by releasing the tabs at the sides and underneath the unit.

Releasetabs.jpg


On the top side undo the two screws holding the main board support bracket then turn the unit over and remove the screws holding it through the base and lift the board out.

Boardscrews.jpg


Locate the pre-amp (CXA2510Q) and attenuation resistors (R2004, R2006).

Boardtop.jpg


Solder fine wire over the attenuation resistors.

Gainresistors.jpg


Now check for continuity to pins 7 (left) and 24 (Right) of the pre-amp from the resistors.

Preamptrack.jpg


Turn the board over and locate the tracks between the resistors and pre-amp, solder the phono lead on and the earth shield onto pin 5 of the cassette unit connector. Red = right channel.
Then cut the tracks between the new connections and the pre-amp.

Boardconnections.jpg


Boardconnectionsclose.jpg


Carefully build the board back into the case using tape to ensure no chafing or shorting.


MOVING TO THE CONTROL PANEL.

Pull off the on/off knob and remove the screws from the control panel to separate the board.

Dsplayscrews.jpg


Locate the Eject switch contacts and tape over. Rebuild the front panel and refit to the case.

Ejectcontacts.jpg


Re-install the cassette drawer and power up the unit. You will need the CODE at this point.

Slide the black plastic cassette backstop in the centre of the cassette drawer rear-wards and the unit will motorise down and the heads will position as if to play.

Tapeunit.jpg


Switch off, fit the top cover, re-install the unit into the dashboard and route the 3.5mm jack cable.

Connect mp3 player and turn right up, switch on the head unit and select Compact Cassette to listen.
If requiring the radio use the FM or AM buttons and the CC will stop but not eject, ready for use next time.
 
Last edited:
Nice and simple then Will:wallbash::doh:

No way will I be able to do that without putting the soldering iron through the board, or breaking the cassette mechanism.

Will you do a mail order service?:devil:
 
Now it's sussed it's pretty easy really. I had to take it all apart so you could have the photos. :D

I will have a look when I am feeling brave!!

I have a normal 3.5mm to 3.5mm jack cable, I assume I just cut the end off one of those, and it should suffice. I am still a little unclear on exactly how it is wired though.:eek:
 

Users who are viewing this thread

Back
Top Bottom