Boot badges

Page may contain affiliate links. Please see terms for details.

A250 Bennyboy

Active Member
Joined
Mar 16, 2016
Messages
862
Location
Northwest UK
Car
A Class A250 w176
Sorry if I've posted in wrong section :confused:

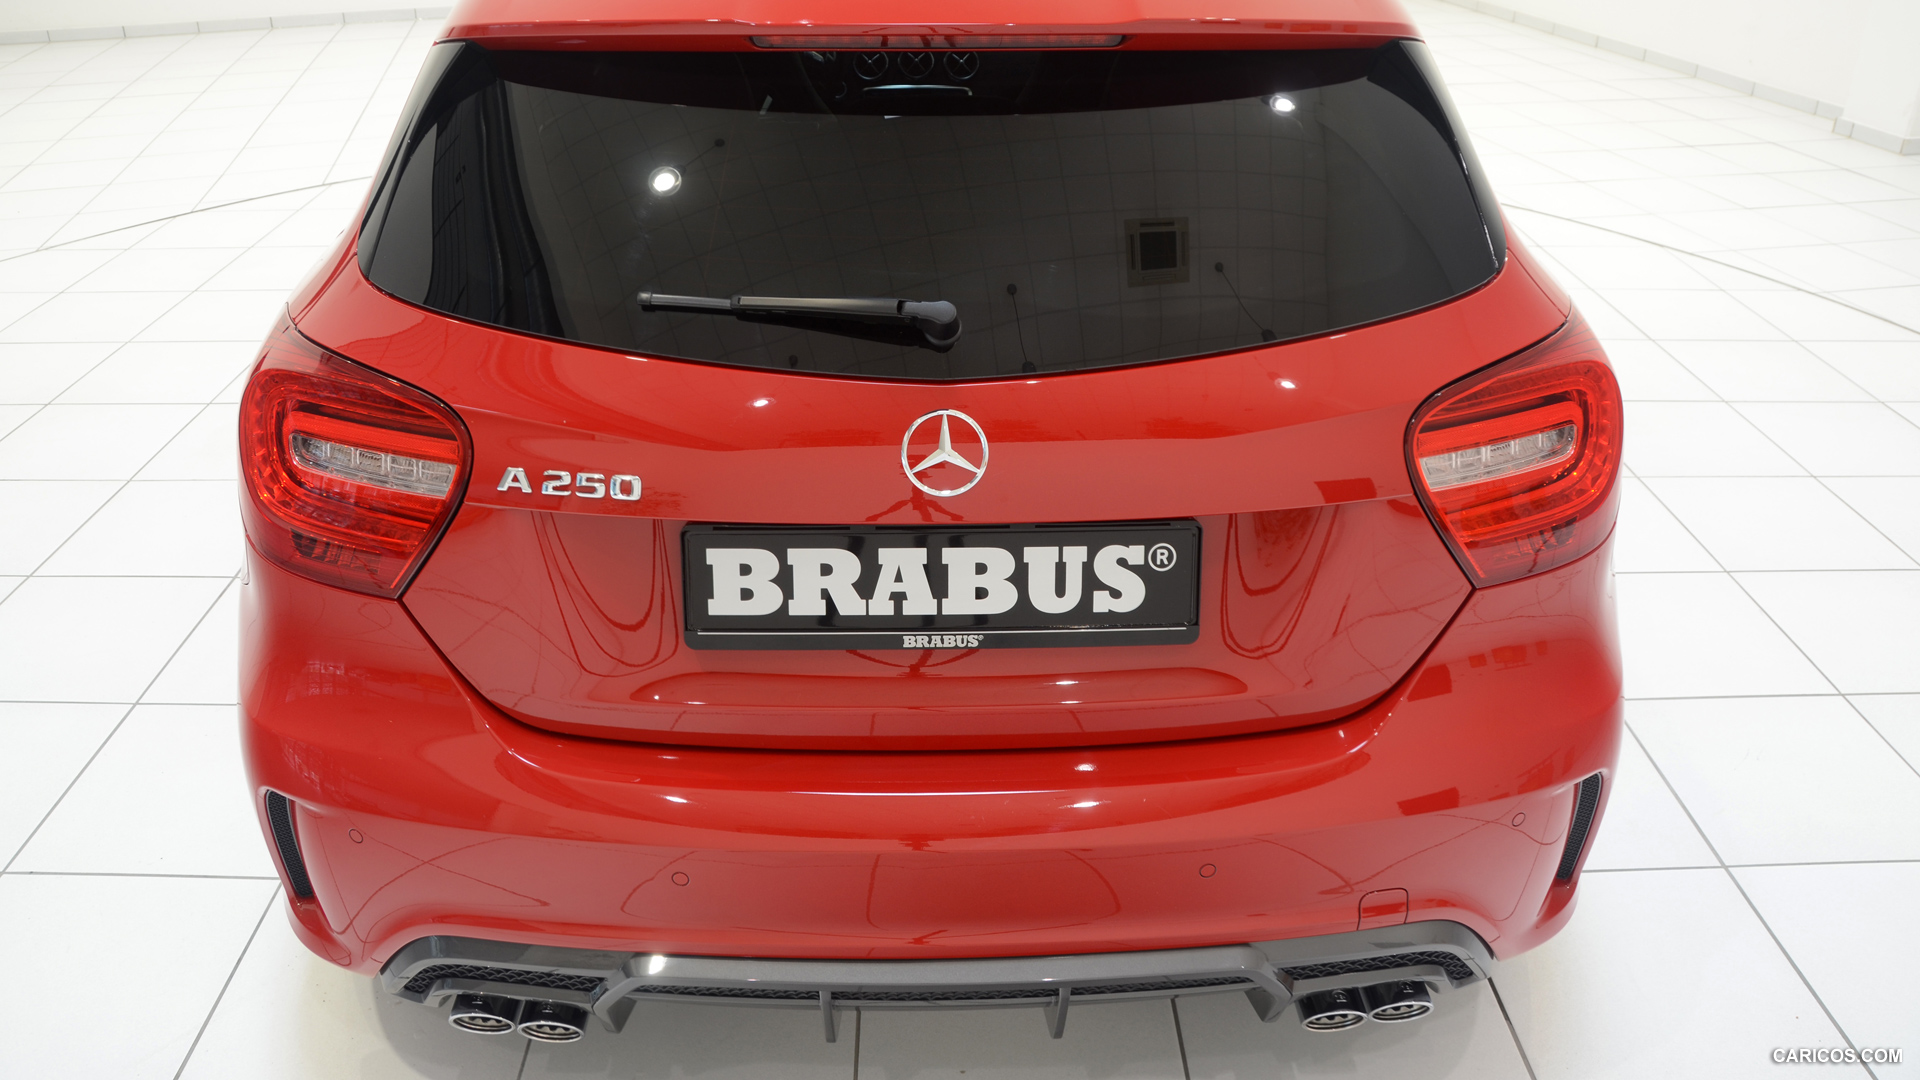
Got myself the black A250 badge and swapped it for the chrome ones, was trying to remove my boot star so I could plastic dip it black but it's such a close fit I can't even fit fishing line behind it with out flexing it, before I start trying to remove it I need to know if it's quite flexible was going try dental floss but doubt this will be much better than fishing line.
I've read about it being held in place with three pins and need cable ties one for each star pin three ties in total, but just trying prize it from the body enough to get a cable tie under is going flex it quite a bit and worried I might snap it.
Is it made of an alloy of some dicription or is it a brittle plastic. Or are the flexible and can take a bit of pulling about.
Cheers in advance for an help tips and replys :thumb:
 
Sorry for not posting a solution, but where did you get the badge from? That looks really nice, sets off the boot nicely
 
You have the spacing wrong on the badge - if your bothered by this type of thing, should be a larger gap between the A and the 2: :)

2013_brabus_mercedes-benz_a-class_12_1920x1080.jpg
 
You have the spacing wrong on the badge - if your bothered by this type of thing, should be a larger gap between the A and the 2: :)

2013_brabus_mercedes-benz_a-class_12_1920x1080.jpg
I spaced them all 3mm but looking at yours I should of done the A 5mm and then the 250
Going do the chrom badges i took off in black capital A gloss black and the 250 in matt Red and dubble sided 3M tape stick them to the front splitter, or might source some 10mm letters and numbers and do them Red and stick them where my fogs should be?
Cheers :thumb:
 
I thought that the whole point about plasti dip was that you didn't have to remove the badges.
 
I thought that the whole point about plasti dip was that you didn't have to remove the badges.
You'd get loads of over spray mate
Need remove scrotch bright and alcohol wipe primer colour paint and lacquered in finish you won't IE matt satin or glossssssss, probably going down the gloss rout.
Also at a later date I'm going fit conards in gloss black hut back end only?
not got A45 so thinking it's going kook daft with the aero kit on the front? But liking the look of the conards fitted to the back.
This is going to set back end of perfectly I think:confused:
Cheers :thumb:
 
I thought badges were held on by double sided and badges prided off by weakening the adhesive bond with a hot hair drier. A technique used by car detailers I believe so they can machine polish the car?
 
I thought that the whole point about plasti dip was that you didn't have to remove the badges.
Platic dip takes a bit of practice but key 8s not to add to much in each coat, light coats and leave to dry before adding 2nd coat, probably need no more than 3 layers of coat, then top coat of lacquer? High gloss/satin or flat matt black
 
I thought badges were held on by double sided and badges prided off by weakening the adhesive bond with a hot hair drier. A technique used by car detailers I believe so they can machine polish the car?
Hot water and sponge works just as well, heat water as hot as your hand can handle and hold over badges/glue you need to loosen/soften for about 2 mins, then using dental floss or credit card, prize badges off using side to side motion or if using fishing line/dental floss sawing motion ease peasie
Cheers:thumb:
 
Car should look much better with the black logo :)

You could darken the reverse light cluster next ;)
 
Car should look much better with the black logo :)

You could darken the reverse light cluster next ;)

Was thinking that myself probably get a chomilan dark tint, and have a go with this, will need hair dryer warm it up to get it around the curves
Cheers:thumb:

Dental flos should get my star badge off the body enough so I can fit cable tie behind.
Going have a go in a min, I'll let you know how I get on :thumb:
 

The badges I took off I scotch bright and sprayed them Red, handy tip put the dubble sided tape on first it's a right fiddly jobbie
Was thinking of using the black A with the red numbers and putting them on my bottom splitter?
Can always remove if it's a bit OTT
Cheers
 

Got my wing badges today, going remove the Sport wing badge and replacing them with these
Also found out the easy way to remove boot star badge
Used a plastic bag and small cable ties job done easily
Cheers
 

The badges I took off I scotch bright and sprayed them Red, handy tip put the dubble sided tape on first it's a right fiddly jobbie
Was thinking of using the black A with the red numbers and putting them on my bottom splitter?
Can always remove if it's a bit OTT
Cheers

All black looked good to me. :)
 
All black looked good to me. :)

I didn't put them on in the end, looked wrong on my splitter
They was the ones I took off the boot, wire wooled them and had a play about with them, did them all black but still looked a bit OTT on the front.
Maybe some smaller ones 8/10 mm would look OK but the ones from the boot to big
 

Users who are viewing this thread

Back
Top Bottom