i_york
Active Member
I just acquired an SL55 and one of the first jobs to tackle was the heater only blowing cold air (not ideal this time of year!) If you have these symptoms, or if the heater only blows hot, the heater control valve is very likely the culprit.
Tools you'll need for the job:
New heater control valve (p/no A2308300084, £45 from Mercedes)
15mm, 13mm and 10mm sockets
Wiper arm puller
Water pump pliers
Time you'll need for the job: 1-2 hours.
Put the bonnet up into the service position using the catch on the passenger side bonnet hinge:
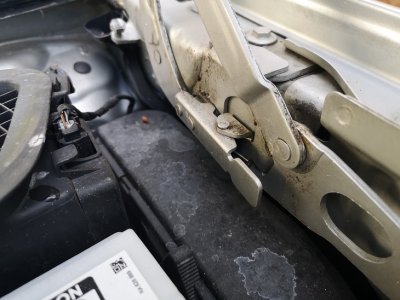
Remove the wiper arms (3 x 15mm nuts under protective plastic covers). The arms need a puller to remove from their stubs
Remove the scuttle panel (this just clips in place)
Remove the windscreen wiper assembly (3 x 13mm nuts):

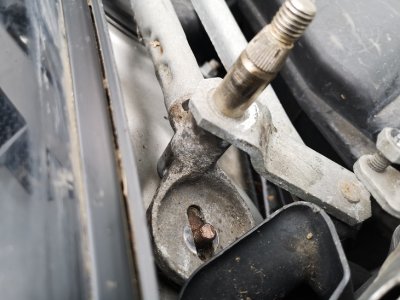
I also removed the following bracket (2 x 10mm bolts) to make this easier:
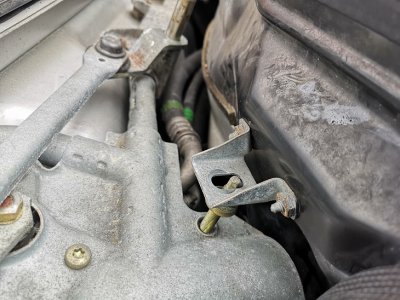
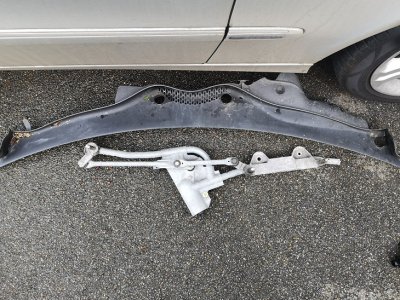
Note the wiper assembly may need a gentle pry to release it from the threaded studs, depending on the degree of corrosion present.
The heater control valve is now visible on the driver's side adjacent to the master cylinder reservoir:
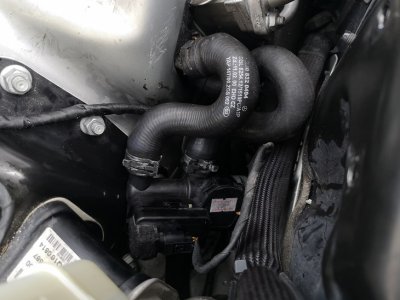
Remove the electrical connector.
Now comes the awkard bit due to the cramped conditions... using water pump pliers, reach-in and ease the hose clamps back on each of the 4 hoses that connect to the heater control valve
Remove all 4 hoses from the heater control valve (no need to clamp them off) and remove the old valve
Install the new heater control valve and run the engine to check for leaks and correct operation before reassembling the wiper assembly, etc.
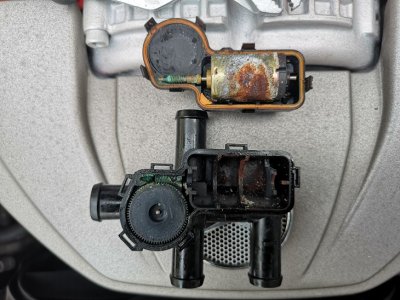
This is what the inside of my old valve looked like:
Tools you'll need for the job:
New heater control valve (p/no A2308300084, £45 from Mercedes)
15mm, 13mm and 10mm sockets
Wiper arm puller
Water pump pliers
Time you'll need for the job: 1-2 hours.
Put the bonnet up into the service position using the catch on the passenger side bonnet hinge:

Remove the wiper arms (3 x 15mm nuts under protective plastic covers). The arms need a puller to remove from their stubs
Remove the scuttle panel (this just clips in place)
Remove the windscreen wiper assembly (3 x 13mm nuts):


I also removed the following bracket (2 x 10mm bolts) to make this easier:


Note the wiper assembly may need a gentle pry to release it from the threaded studs, depending on the degree of corrosion present.
The heater control valve is now visible on the driver's side adjacent to the master cylinder reservoir:

Remove the electrical connector.
Now comes the awkard bit due to the cramped conditions... using water pump pliers, reach-in and ease the hose clamps back on each of the 4 hoses that connect to the heater control valve
Remove all 4 hoses from the heater control valve (no need to clamp them off) and remove the old valve
Install the new heater control valve and run the engine to check for leaks and correct operation before reassembling the wiper assembly, etc.
This is what the inside of my old valve looked like:

