How to change a centre console lamp that's gone (E320 / W210)

Page may contain affiliate links. Please see terms for details.

Cliff_G

New Member
Joined
Feb 11, 2004
Messages
13
Location
Herts
Car
E320 1997
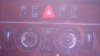
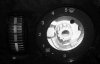
Just bought an E320, 1997. One of the centre console dash panel lights has gone, so in the dark I can only see the RH temperature setting wheel and nearby switches, but not the LH one.

As there doesn't seem to be any source of workshop manuals for this vehicle, and knowing the damage one can do taking a dash apart without knowledge, can anyone help to get me started! I don't mind paying service bills at dealer prices (well, I do, but...), however, lots of squids an hour to change a bulb seems a bit OTT.

TIA
 
Booyakasha Cliff ;)

Welcome to the most helpful MB forum on the web.

Bad news is, if the 210 heater control unit is the same as the 202 (me thinks it is) then you will have to take the dash apart a little bit in order to get to it, and then take the unit apart a little bit more to get to the bulb. I seem to remember there is a tutorial for this somewhere on here as you are not the first person to have a bulb fail in this area - so will try and find it for you using the search facility :D

S.
 
Answer

OK, here's a how-to, gleaned from many posts here and elsewhere, for which thanks.

This applies to those models where the centre panel console has two heater control knobs - one for fan speed and one for air direction/selection. Outboard of these are the two front-passenger temperature control wheels, between them are the heated rear screen and aircon Economy switch.

This cluster of controls is lit by only two bulbs - one behind each of the rotary fan /air direction switches, and the light to the outer, inner and upper switches carried by plastic light conduits.

To replace one of these bulbs, first set the rotary switch to point outwards - to the NS for the NS switch etc. Then carefully pull the rotary knob off - fingers just behind the flange will help.

You will see the control detent mechanism, but the switch pre-positioning mentioned above reveals a small white plastic cover, in a sort of flat-sided diamond shape, no larger than 15 mm tall x 10 mm wide, at the side to the outboard side of the car. If it is not obvious, rotate the knob again until it is. This cover is retained by the larger of the two clear plastic pillars, the other hole being unpillared (at least on my car it was - maybe it broke before that!).

This plastic cover hides the bulb. It is not obvious that the bulb is behind there - but take the rotary switch off the side that is working, turn the car side-lights on, and you'll see it light up behind there!

The plastic cover is a soft plastic, and will bend a bit and not break, but don't force it. Take a small electrical screwdriver to the end at the large retaining pillar and gently lever it out. The bulb is revealed.

Take a piece of small tubing that fits snugly over the bulb you have bought, and slip it over the bulb, and withdraw it. I actually did this with tweezers, but be careful as if you break the bulb....

The bulb is a standard behind-panel 12 V 1.2 W wedge-base bulb. However, if you buy one of these from any old auto shop, some of them are less well dimensionally-controlled than the Merc ones. Try and buy one with a plastic formed base, not an all-glass bulb. Mine was all-glass and eventually fitted, but not easily.

Ensure the contact wires are streaming up the bulb neatly and parallel, then insert the bulb using your tubing or tweezers. The axis of the bulb is vertical - initially it can look like it ought to go with the flat bit horizontal, but not so on mine.

Carefully press home and re-assemble - having tested it works Before you reassemble.

£££'s saved.

HTH

----------------------

Keywords:

E-Class W210 bulb bulbs replace heater controls centre console centre panel switches fan control air direction control
 
Excellent detailed HowTo Cliff !! (Feel free to add pictures if you like ;)) - we'll move it to the new "HOWTO" section in due course.

S.
 
I've just used this thread to replace a blown bulb.
Thanks Cliff G.

Here are two photographs to use for reference.


JonnyC

PS the bulb cost £1.39 from Halfords, product code 286.
 

Attachments

  • merc dash small 01.JPG
    merc dash small 01.JPG
    43.2 KB · Views: 366
  • merc dash small 02.JPG
    merc dash small 02.JPG
    51.8 KB · Views: 351
Also used this thread to replace both bulbs and attached another sharper pic to contribute. It was a pig to pull the dials out - used both hands and got finger nails under the dial where it overlaps the numbering as circled. The bulb itself is even more piggy to get out! Under the circled flap hides the bulb. I wish I had these tubing you guys mention about - I had to use tweezers and took me solid 20 mins trying many times to pull it out. As it just kept slipping on the smooth glass. In the end this did it - starting with as good a grip as you can, start wriggling it side to side several times whilst edging it outwards. After a few of these, it will finally came out sigh with no breakage. Was all glass type both filaments blown. Replacements from MB were A$3.30 each A0025440294 and slightly higher rated 13.5V 1.2W with white plastic base and much smaller bulb head to the original. Big smile on, Very happy with its lighting - anything's fine once you see it all lit :bannana:
 

Attachments

  • P3033054.JPG
    P3033054.JPG
    30.3 KB · Views: 372
Last edited:
Just to add my experiences.

If you put a cloth (rag or handkerchief will do) over the rotating knob and use a pair of pliers (or a water pump wrench) to grip it then it comes off very easily. Always have the rotating knob indicator (white mark) at the top when you remove it so you know where to replace it when finished.

I then used a pair of long-nosed pliers to grip the bulb. If you are careful then there should be no major worry and the bulb comes straight out in a jiffy. Put the new one in the same way and Bob's your uncle.

One question though, is the AC/rear window demist switch lit by the same bulbs? I only ask as the illumination is still very poor in this switch cluster.

Dead easy job, all done in 10 minutes in the Halfords car park!
 
Hi all I've tried changing the bulbs on mine but it looks like the supply is not there.
Where are these lamps fed from?
 

Users who are viewing this thread

Back
Top Bottom