how to change air filters on W211 E280CDI (facelift)

Page may contain affiliate links. Please see terms for details.

rascalmaster

MB Enthusiast
Joined
May 5, 2010
Messages
1,413
Location
harwich, essex. UK
Car
Brabus D5 (E280 CDI) Avantgarde, E280 CDI Sport Estate, E320 Avantgarde now sold
hi all.

of late I felt my car was lacking a certain 'go' and couldnt help feeling perhaps the air filters might need changing...

so, went up to mercedes and bought the set (MA642 094 0404). only got a 15% discount :( but hey ho... £23.80 later; I was back home and ready for a rumble. :cool:

here's how i fared...
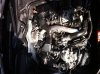
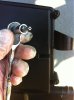
pop goes the cover :)
 

Attachments

  • photo-4.jpg
    photo-4.jpg
    226.5 KB · Views: 276
  • photo-5.jpg
    photo-5.jpg
    229.4 KB · Views: 276
the filter boxes are down each side of the engine.

they are connected from the top of both boxes, by a big black plastic manifold, to the turbo inlet in the centre.

at the bottom there is an inlet air hose connected.
 
basically;

the air filter boxes are removed from their location and then opened to reveal the filter in each.
we slacken off the jubilee clips on the top manifold, so it can be easily slipped off, when we remove the boxes.

the boxes themselves are held on by 2 screws. the one to the front is easier to get to and this will when adequately slackened; come off in your hand.
the rear screw is a little harder to get to, but designed to remain in the box when fully slackened ( so it doesn't fall into the engine bay).
the boxes have little prongs underneath which have a ball at the end of each so it can be located in position with a corresponding socket. dont worry this just lifts off when you come to remove the box.
 
Here's the jubilee clip on the manifold connecting to the air filter box on drivers side
 

Attachments

  • image-3875473563.jpg
    image-3875473563.jpg
    93.3 KB · Views: 294
assuming we're tackling the driver's side first (bit easier as more room)...
 
Here's the forward 'screw'

Ok ok don't blast me; not sure what the technical description is lol
 

Attachments

  • image-1734493705.jpg
    image-1734493705.jpg
    88.6 KB · Views: 273
... But u use one of these to get it off... :)
 

Attachments

  • image-1319815906.jpg
    image-1319815906.jpg
    81.9 KB · Views: 273
Then slacken off the rear one (it is designed not to come off)
 

Attachments

  • image-1618504983.jpg
    image-1618504983.jpg
    96.4 KB · Views: 258
This is the air intake hose that connects to the lower part of the box... It is not clipped and you can now jiggle the box to fee it and manually pull/ jiggle off the manifold and intake hoses...
 

Attachments

  • image-1075891613.jpg
    image-1075891613.jpg
    91.7 KB · Views: 257
You need one of these (not even going to try cooking up names for this lol) to loosen the 4 screws (one visible in pic) and open the filter...
 

Attachments

  • image-43263679.jpg
    image-43263679.jpg
    86.8 KB · Views: 253
Oops... just took a closer look and realised 2 are visible :)
 
Take out gunky filter, clean box if required, replace new filter and screw box shut.

ps wife's 210 boot is ideal work bench, lol
 

Attachments

  • image-776385225.jpg
    image-776385225.jpg
    96.7 KB · Views: 238
  • image-1771935342.jpg
    image-1771935342.jpg
    91.9 KB · Views: 235
You can see the prongs I had mentioned earlier... when you replace the box; locate these correctly, and the box will line up nicely.
Fix everything back and move over to the passenger side.
 

Attachments

  • image-4143673455.jpg
    image-4143673455.jpg
    72.2 KB · Views: 231
Passenger side air filter box is very similar...
There is a sensor? attached to the top of the box though, so I disconnected this
;-)
 
err... looks like i've used up my quota for attachments!! :(

was only going to show a pic of the sensor and of the filter as they are different on each side, but this will become apparent when you open them :)...
 
err... looks like i've used up my quota for attachments!! :(

was only going to show a pic of the sensor and of the filter as they are different on each side, but this will become apparent when you open them :)...

Excellent - that was one (two) grubby filter.

It has to be money well spent :thumb:
 
Looks a little fiddley but well worth it, thumbs up from me and I will be ordering some next week!
 
surprising how much difference the oil/ and filter and air filter change has made to the car...
smoother gear changes, sharper acceleration, lower idling, better economy...
... and it's the most basic of things... lol
 

Users who are viewing this thread

Back
Top Bottom