BigDusty
Active Member
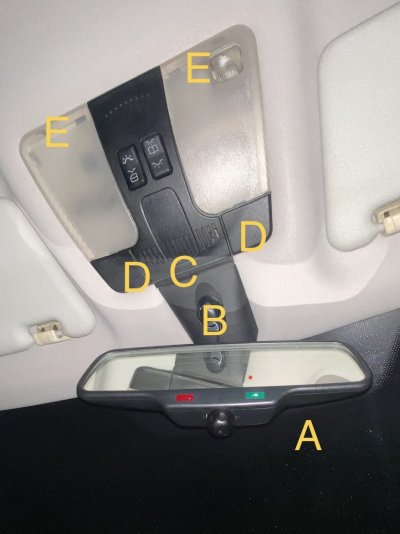
Removing the mirror was very easy as it is only held in place by a spring pushing back on two pins (Photo). I used a screwdriver to prise the mirror from the ceiling of the car.
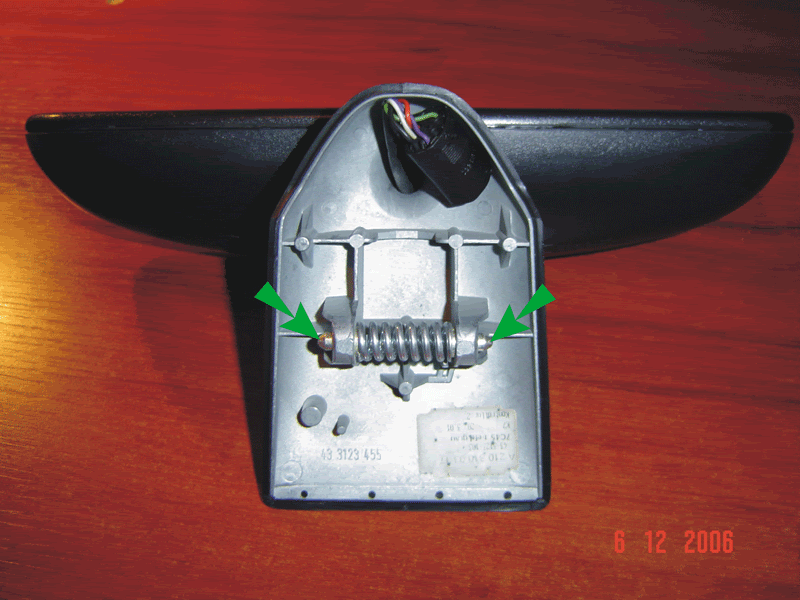
To dismantle the mirror the best tool I could find was this very blunt knife, it was smoothed edged (not serrated) and at one point not too curved.
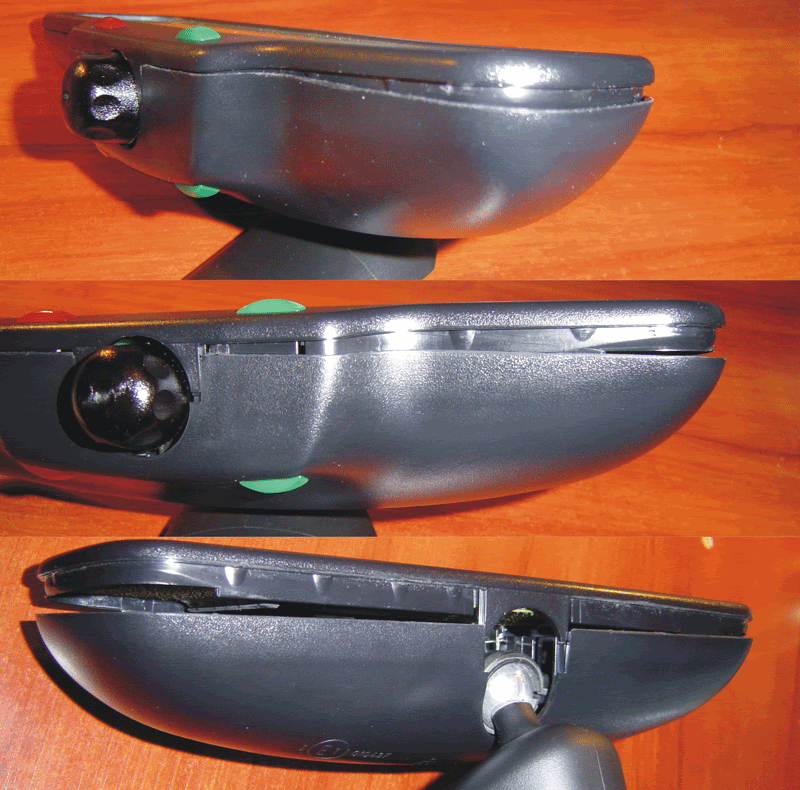
I started to prise open the mirror at one end and slowly worked my way round. I will confess it was far from easy and was very fiddly but I was amazed how strong the plastic was as I had to be quite forceful at one point. Once it has started to open it does get a little easier but it still had its stubborn moments. (As suggested by Dieselman) it may be a good idea to place the mirror in a WARM oven (when its cooling down) to soften the plastic making it less brittle).
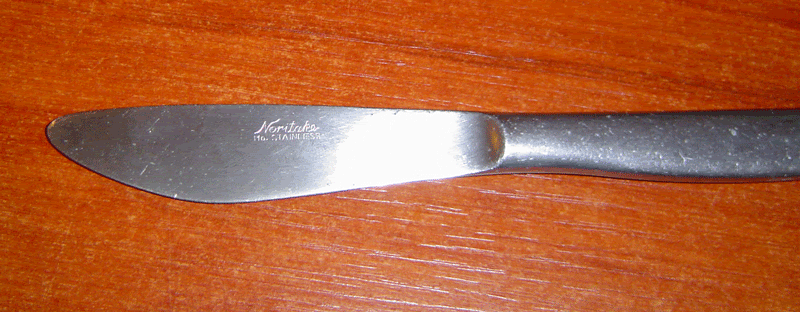
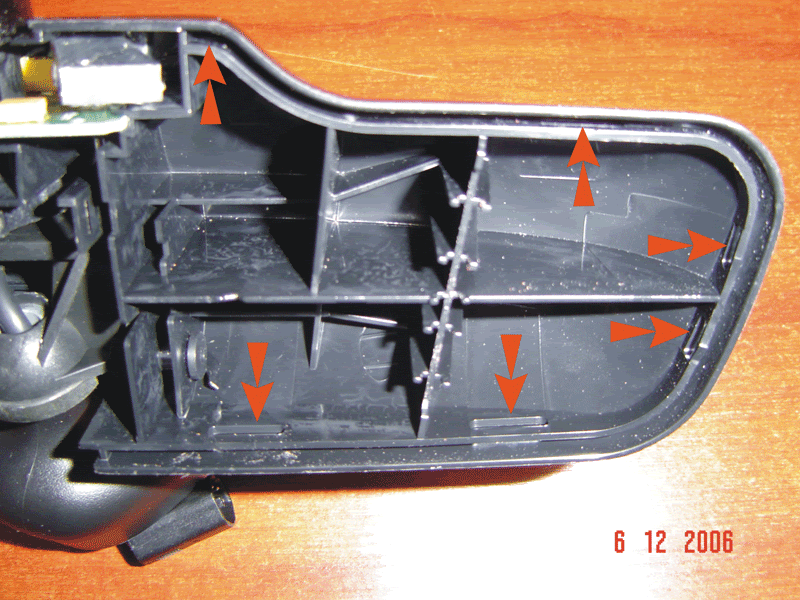
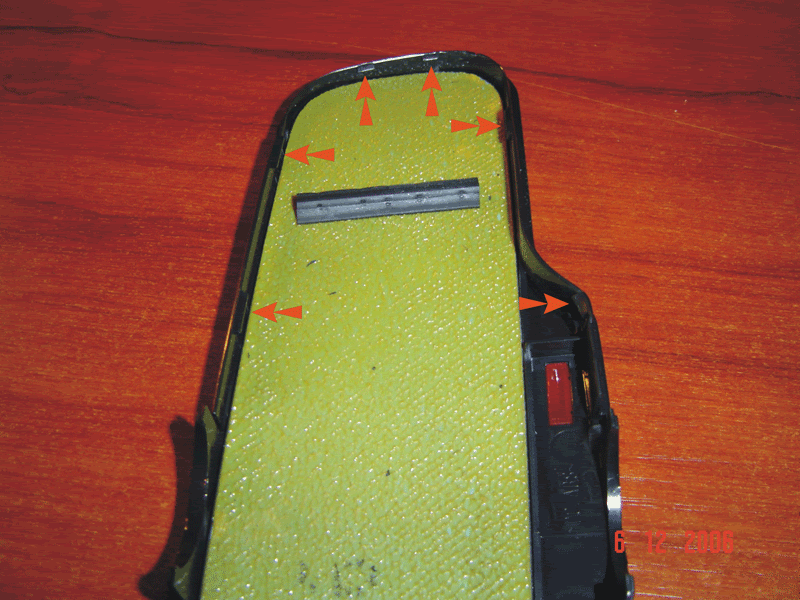
The next two photos will show you exactly where the clips and slots are located. There are six each side making a total of 12 around the mirror.
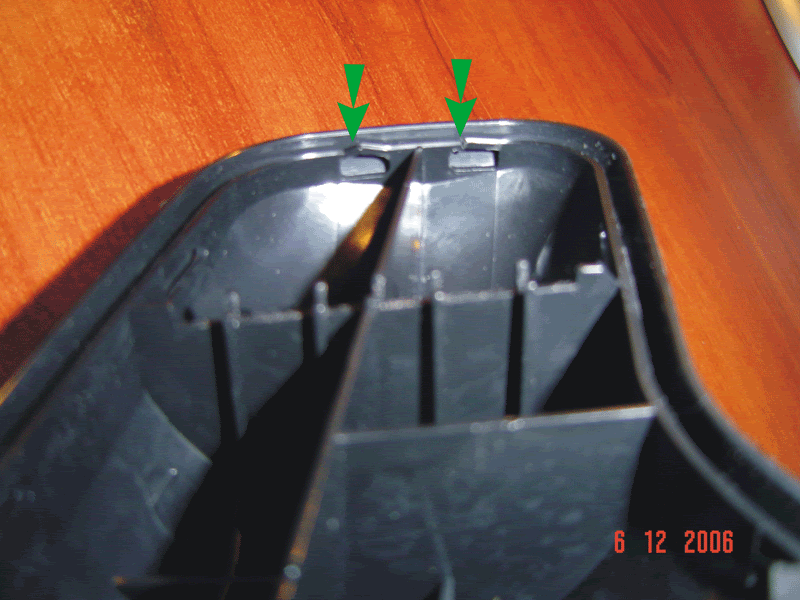
Unfortunately, it didn’t matter how careful I was there was some damage as you can see in the next photo. Also, you will find it very difficult not to damage the edge of the mirror when prising it open but once opened I used some fine sandpaper to smooth the damaged areas and now the edges look fine again.
There maybe a number of reasons to dismantle these mirrors, mine was because I wanted to know why the anti-glare mechanism had become lose and rattly.
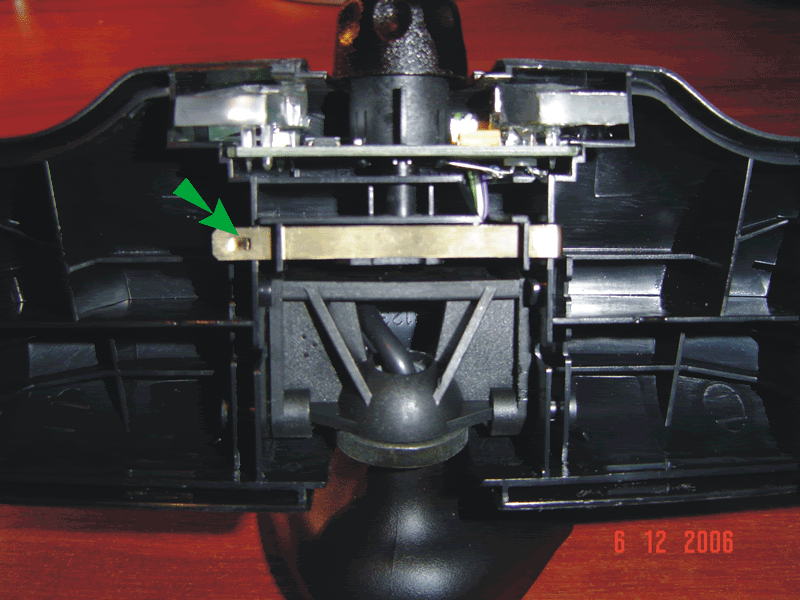
Looking at the photo the Bow spring had slipped out of place, the left arrow showing where the spring should be slotted.
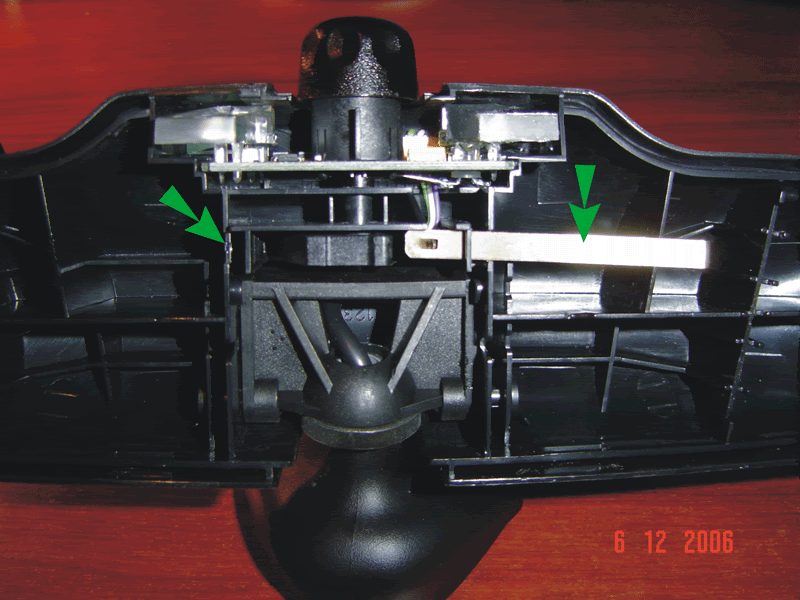
You can now see the Bow spring back to how it should be. The arrow points out an indentation, this is to prevent the spring from moving. I managed to adjust this indentation to stick out more to stop the bow spring from sliding out of its slot again.
I reassembled the mirror which was very easy and even though some of the slots were damaged the mirror fitted together neatly and tightly and seemed good as new.
Fitting or clipping the mirror back into place inside the car was a little tricky. I first tried to simply push the mirror back into place but to no avail, that spring holding those two pins back had allot of torque . The way I did it was to get one of the pins in position so that the mirror was going back in at an angle, then I used a flat headed screwdriver to push the second pin into place.
Obviously these mirrors were not designed to be dismantled but as you can see it can be done. For the sake of fixing a loose spring I have saved myself well over £100 on a replacement mirror.
Cheers
BigD

To dismantle the mirror the best tool I could find was this very blunt knife, it was smoothed edged (not serrated) and at one point not too curved.

I started to prise open the mirror at one end and slowly worked my way round. I will confess it was far from easy and was very fiddly but I was amazed how strong the plastic was as I had to be quite forceful at one point. Once it has started to open it does get a little easier but it still had its stubborn moments. (As suggested by Dieselman) it may be a good idea to place the mirror in a WARM oven (when its cooling down) to soften the plastic making it less brittle).

The next two photos will show you exactly where the clips and slots are located. There are six each side making a total of 12 around the mirror.


Unfortunately, it didn’t matter how careful I was there was some damage as you can see in the next photo. Also, you will find it very difficult not to damage the edge of the mirror when prising it open but once opened I used some fine sandpaper to smooth the damaged areas and now the edges look fine again.

There maybe a number of reasons to dismantle these mirrors, mine was because I wanted to know why the anti-glare mechanism had become lose and rattly.
Looking at the photo the Bow spring had slipped out of place, the left arrow showing where the spring should be slotted.

You can now see the Bow spring back to how it should be. The arrow points out an indentation, this is to prevent the spring from moving. I managed to adjust this indentation to stick out more to stop the bow spring from sliding out of its slot again.

I reassembled the mirror which was very easy and even though some of the slots were damaged the mirror fitted together neatly and tightly and seemed good as new.
Fitting or clipping the mirror back into place inside the car was a little tricky. I first tried to simply push the mirror back into place but to no avail, that spring holding those two pins back had allot of torque . The way I did it was to get one of the pins in position so that the mirror was going back in at an angle, then I used a flat headed screwdriver to push the second pin into place.
Obviously these mirrors were not designed to be dismantled but as you can see it can be done. For the sake of fixing a loose spring I have saved myself well over £100 on a replacement mirror.
Cheers
BigD
Last edited:

