Rear Suspension

Page may contain affiliate links. Please see terms for details.

JOHNO978

Active Member
Joined
May 31, 2011
Messages
130
Location
WIGAN
Car
Mercedes C180 W203 Mercedes C280 W 202
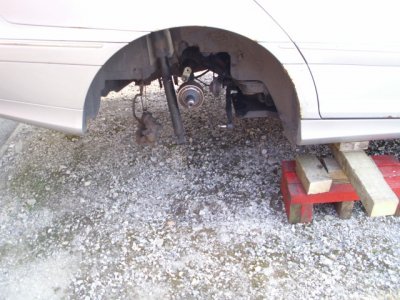
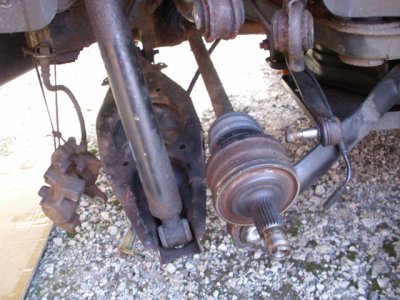
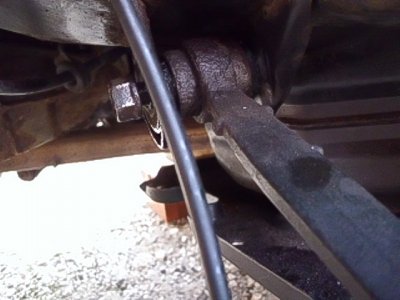
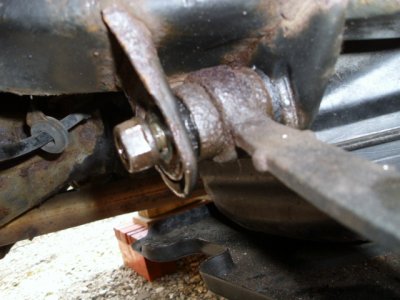
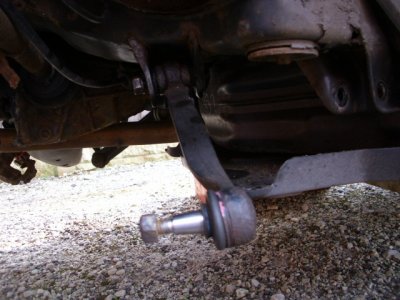
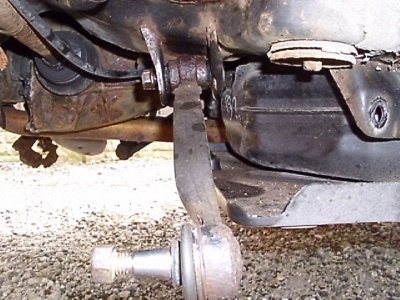
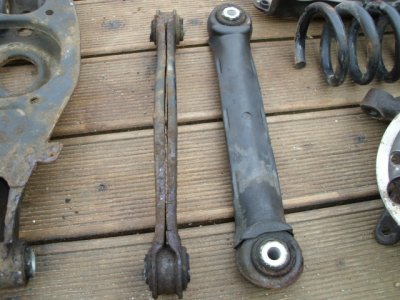
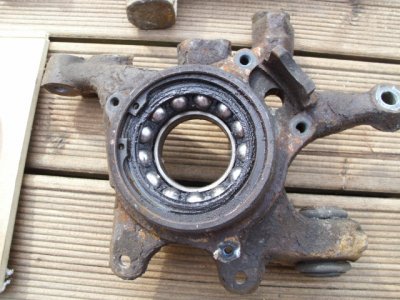
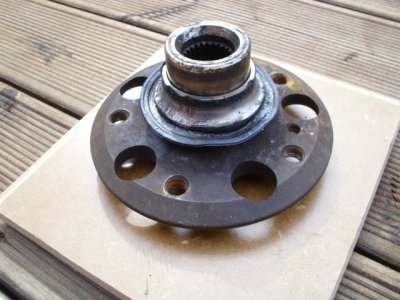
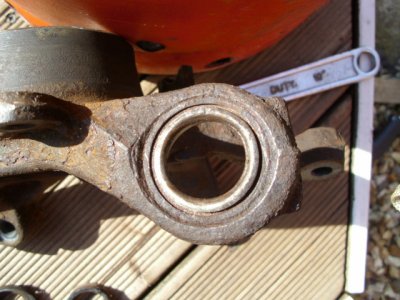
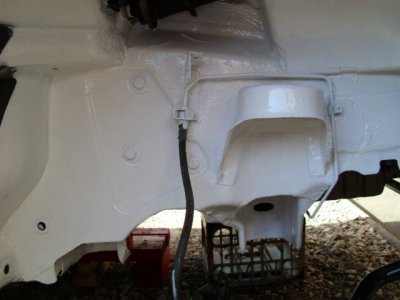
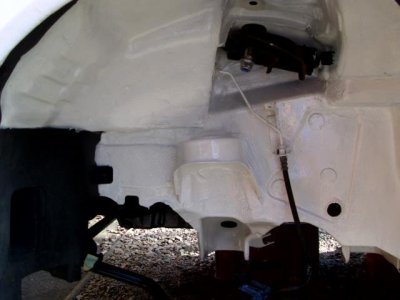
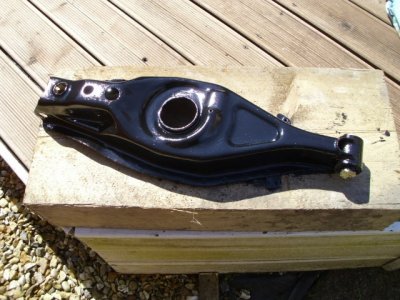
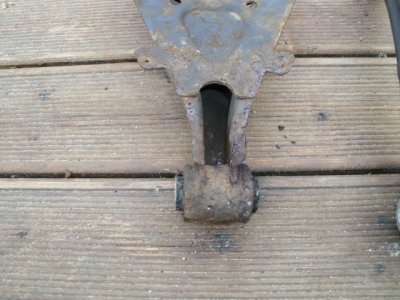
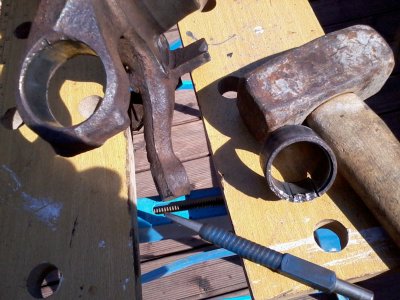
A few weeks ago I posted that I was going to change the rear drop links and ARB Bushes..I said that there was no ARB on the car..2002 C180 W203 Eng 111951 Vin WDC203035..I can confirm that there is no ARB on the car.The rear suspension looks really bad with rust, there was no nasty noises and it handled very well but I decided to strip it all down and renew all the parts.there are parts that I cant get off..one is towards the front of the subframe where the bolt seems to be in the wrong way round and the other is the part that has the balljoint at the top of the hub..I hve the nut off but the bolt will not come out despite giving it a good hammering with a lump hammer...I left the nut on...it seems to be welded to the bushing..these are the onlt 2 parts Im having trouble with...any ideas would be gratefully accepted...Ive thought of heating this particular part up as It will be renewed...the other is for me a head scratcher and I dont have much hair left to scratch...the photos are the parts Ive taken off today..you will see why I think they need replacing..DSCI0001 (1).JPG DSCI0001 (2).JPG DSCI0001.JPG DSCI0002 (1).JPG DSCI0003.JPG DSCI0004.JPG DSCI0005.JPG DSCI0006.JPG DSCI0008.JPG
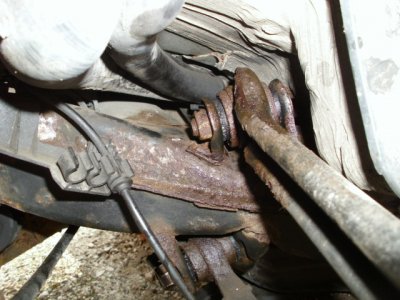
 
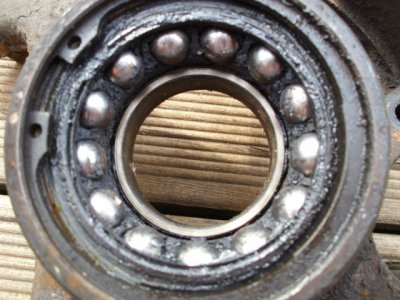
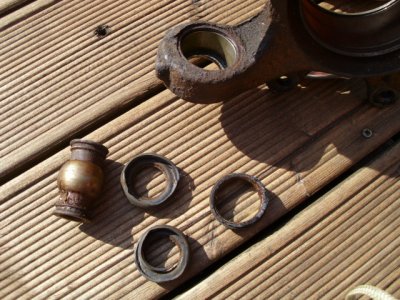
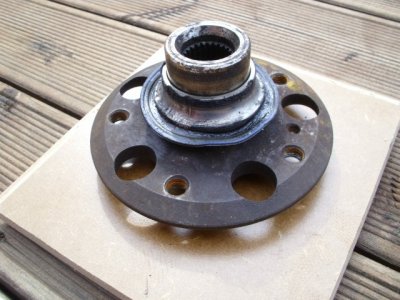
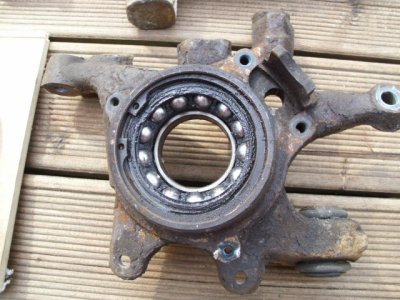
A little more done, Managed to separate the hub and this is what I found..needless to say all the bearings will now be changed as I come to them... DSCI0001.JPG DSCI0002.JPG DSCI0003.JPG
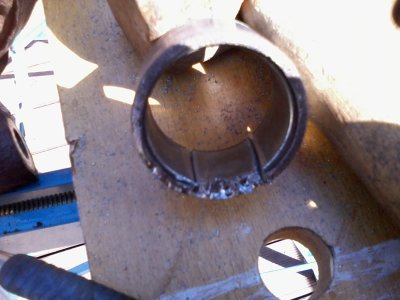
 
I usually use a grinder on the bearing part that is stuck to the hub.
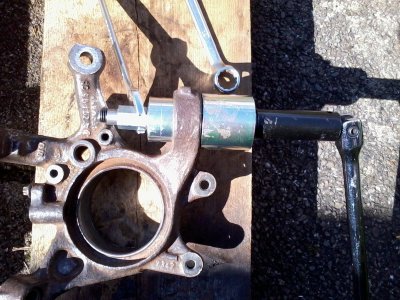
Carefully grind a slot without going through to the hub then use a chisel to expand this and pop it off.
Thank you..I think thats the way it will have to be done, I have a puller but the way things have been with this car up to now Im sure it wont do any good..its a battle every inch of the way....I like a challenge..Ive got one now...
 
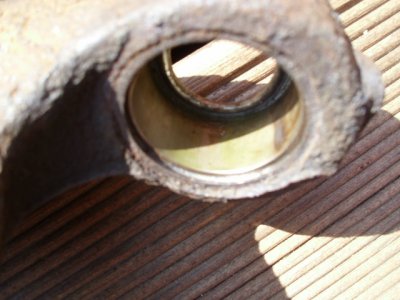
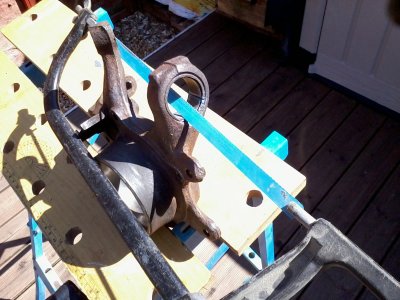
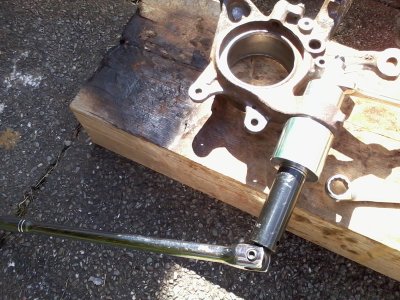
Would I be right in thinking that this is the rest of the Bush left in the wheel carrier/Hub...I had the heat it up to get the rest out and pound it with a socket and hammer...but this wont move at all...its number 20 on the diagram. Has anyone ever managed to remove the top strut that is bolted in backwards to the subframe...Not covered in the Haynes and cant find any info about it....I may have to leave that in and just clean it up...there ia no play at all....any help appreciated.... pmcgsmurf...I made 4 cuts and just tapped with a punch on each cut and the race fell off...DSCI0002.JPGDSCI0003.JPGDSCI0004.JPG
 
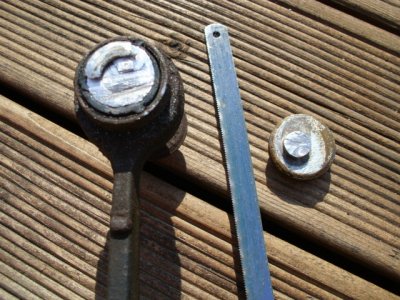
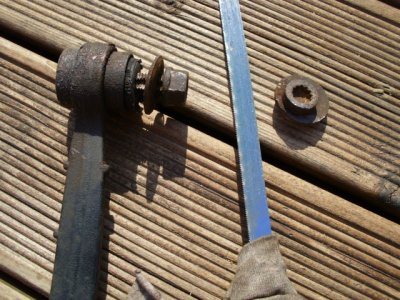
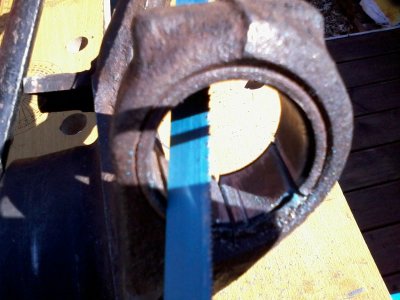
This took me 4 hours today....the bolt has seized to the inner of the Bushing...The only way was with a Hacksaw blade...very high techDSCI0002.JPGDSCI0003.JPGDSCI0003.JPG
 
We have this issue daily. We have to cut them off too. I remove the subframe as it make it so much easier. You can then de-rust the whole area and cover with under seal. On our instagram page there are some pics. You will need a tool to replace that trunnion bush. You can use a threaded bar and some sockets if you don't want to buy one.
 
We have this issue daily. We have to cut them off too. I remove the subframe as it make it so much easier. You can then de-rust the whole area and cover with under seal. On our instagram page there are some pics. You will need a tool to replace that trunnion bush. You can use a threaded bar and some sockets if you don't want to buy one.
Thank you,I was kind of thinking that the subframe would need to come off..a really stupid way to put that bolt in, how it was never picked up and altered I shall never work out....But dropping the subframe would be a good way to go as all the back end would be like new..its looking rather tatty right now. Ive done the Bushings with the threaded bar and socket on my C280, but I think I shall just buy the proper tool as the front suspension is being done aswell...so now I just need to get the remainder of that bushing out..plenty of heat and a good pounding, what Im learning on this side will definately help when I do the passenger side..This started out just changing the rear brake pads..then saw how bad the dust sheilds were...and it went from there...keep me busy for the next 10 weeks of lockdown......:rolleyes::rolleyes:
 
My friends C43 had an arm snap off the subframe while he was driving. Check all the welds!
I have been checking on the lugs as Ive taken each component off...at first glance the all look ok...but after a good cleaning they may look different...Ive just been looking at buying a replacement..and to be honest some look worse than mine..I shall keep looking for a decent one....This was the Standard I got my C280 W202 up to..this is the front..cant find the rear ones...a lot of work ahead of me...C280 1.jpgC280 2.jpg
 
Last edited:
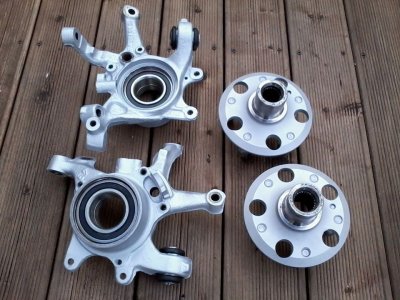
Ive managed to refurbish a few parts, a lot of work with a chipping hammer plus a medium punch and my Dremel snake attachment. I used different grinding Burr`s and mini sanding drums....fitting the wheel Bearings were not much of a problem, I used the old Bearing and a Hammer to ease it in as I dont have a press, The Bushings were harder even with the right tool, I had to use a 900mm extension bar to get then fully home..The Black is Hamerite Smooth...2 coats 2 days between coats....The Silver is Hycote High Temperature Spray. Im not sure what to do about the Brake Calipers as they look in a bad state at the moment...I will probably get new ones...Ive still to drop the subframe, Diff and Drive shafts...Im thinking of Cutting the Exhaust as it would make life a little easier, I can get a joining pipe for that purpose and my MOT Tester said it would be fine...not a lot of progress Im afraid but Im going nowhere untill June probably..I just thought I would update my post....LOVELY ARM.jpgCRAP ARM.jpgCRAP FLANGE.jpgLOVELY HUB.jpgCRAP HUB.jpg
 
Great work so far. IMHO ? just buy new rear calipers they are not very expensive, just give them a clear coat of something nice to help with their 'shelf life ' . It is my intention to (at some point) drop the rear sub frame on my C55 for similar work, (If I get around to it) I will make sure to give all the new link arms etc a further coating of clear coat/protection before installation.

Keep the photos coming :thumb:
Thank you, I think I shall be getting New calipers as everything else is new apart from the parts in the pictures, I may even get Braided Flexi Brake hoses,... In the next week,.... weather permitting as Im doing all this work on my driveway...I will be dropping the Diff and the Driveshafts, Then what I want to try is to cut the bolt that is impossible to get out without dropping The subframe... with my Multi Tool and a carbide tipped long reach Metal Blade, If it works I shall use one of the old bolts and weld 2 nuts together then see if its possible to refit the arm and tighten it to the right torq.....if it does work it may help others that are having the same problem and wont mean dropping the Subframe...mine is shot anyway but I just want to try...
 
I’m following this with interest as it is something I’m considering in the future.
 
I’m following this with interest as it is something I’m considering in the future.
I can honestly say that every nut and bolt has been a battle..If you have seen the photo`s from the begining you will understand why..its shocking, I found that the Trunnion bushes were the hardest to get out and put back..in fact I got the centre of the bush out only after adding a lot of heat..that left the outer still in..what I did was thread my hacksaw through and make 2 parallel cuts..this eased of the tension enough for me to drift it out with a punch..when part of the wheel bearing stayed fixed to the shaft on the flange I did 4 diagonal cuts with the grinder..plasma disc....then tapped the offending part round so it spun itself off..only took a few mins and didnt need to hit it with any force...Im going to buy a few cans of PB Spray this next week as The subframe bolts look dodgy...I dont want any to snap off....sods law one will though...2020-04-27 14.17.44.jpg2020-04-27 14.18.00.jpg2020-04-27 14.34.53.jpg2020-04-27 14.35.10.jpg2020-04-30 10.43.41.jpg2020-04-30 10.43.58.jpg
 
I can honestly say that every nut and bolt has been a battle..If you have seen the photo`s from the begining you will understand why..its shocking, I found that the Trunnion bushes were the hardest to get out and put back..in fact I got the centre of the bush out only after adding a lot of heat..that left the outer still in..what I did was thread my hacksaw through and make 2 parallel cuts..this eased of the tension enough for me to drift it out with a punch..when part of the wheel bearing stayed fixed to the shaft on the flange I did 4 diagonal cuts with the grinder..plasma disc....then tapped the offending part round so it spun itself off..only took a few mins and didnt need to hit it with any force...Im going to buy a few cans of PB Spray this next week as The subframe bolts look dodgy...I dont want any to snap off....sods law one will though...View attachment 95449View attachment 95450View attachment 95451View attachment 95452View attachment 95453View attachment 95454
Welcome to our world every day!
 
Welcome to our world every day!
I would love to have a small unit with a 2 post lift right now...one thing for sure is Im learning something new every day with this Car.....The joy`s of buying Old Cars....🙄🙄
 
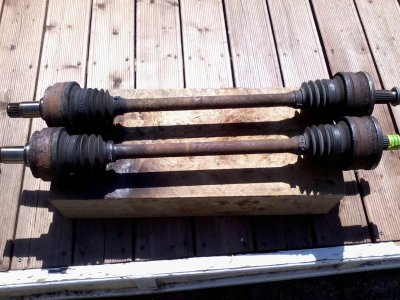
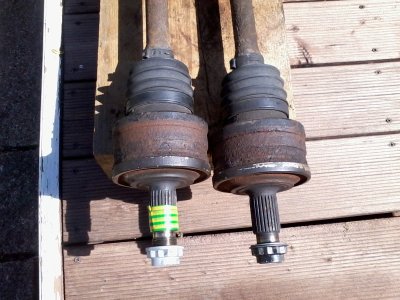
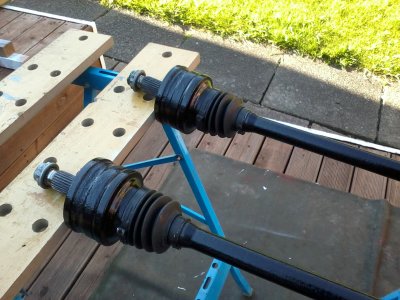
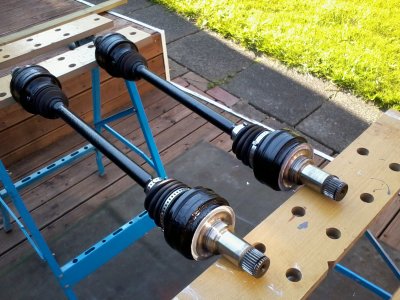
Managed to get a little more done this week, I cant go at it like I would like to, the Old body wont let me..anyhow I got Drive shafts out..eventually...and like everything else it was a mess..Got it cleaned up and had my mate the MOT Tester to come and have a look..gave the ok so I set about making them presentable...this is the result..Turned out not too bad..2020-05-05 13.10.18.jpg2020-05-05 13.10.26.jpg2020-05-06 17.42.08.jpg2020-05-06 17.42.14.jpg2020-05-06 17.42.26.jpg
 
Have you fitted new reluctor rings to the driveshafts?
No...would I need to do so...when Everything was cleaned up ..all looked fine..Advice most welcome..
 

Users who are viewing this thread

Back
Top Bottom