W210 centre console button retrofit

Page may contain affiliate links. Please see terms for details.

M.A.94

Active Member
Joined
Mar 2, 2016
Messages
307
Location
Newcastle upon Tyne
Car
2001 Mercedes E320 CDI (W210) OM613
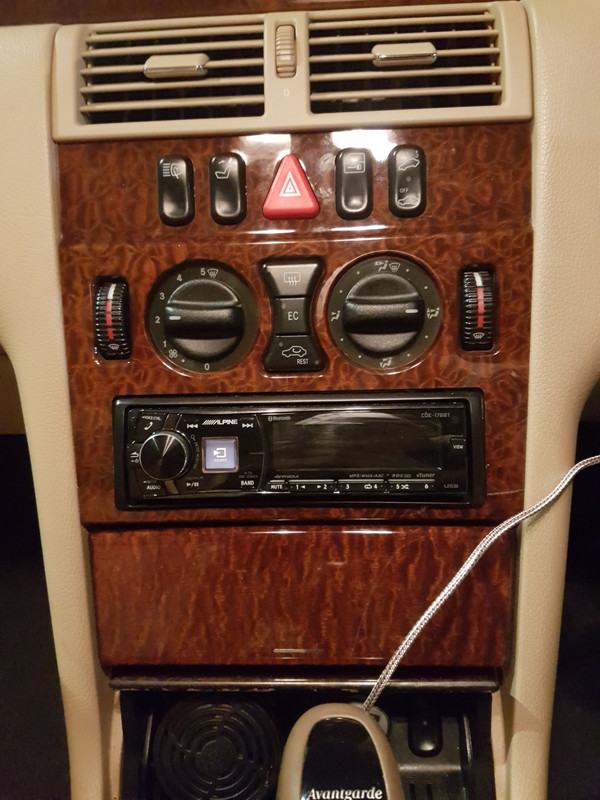
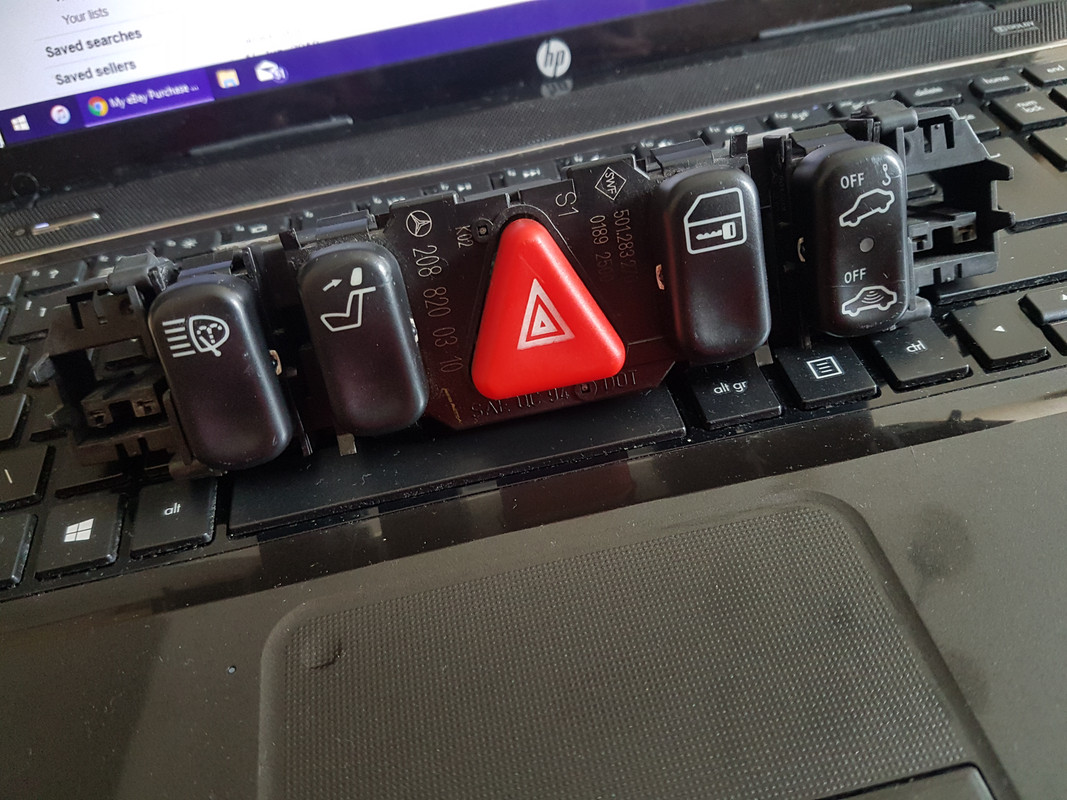
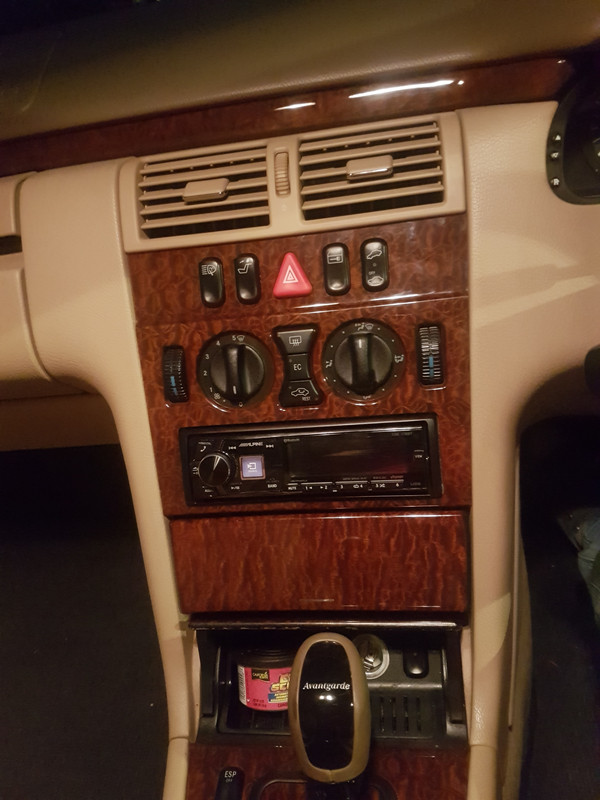
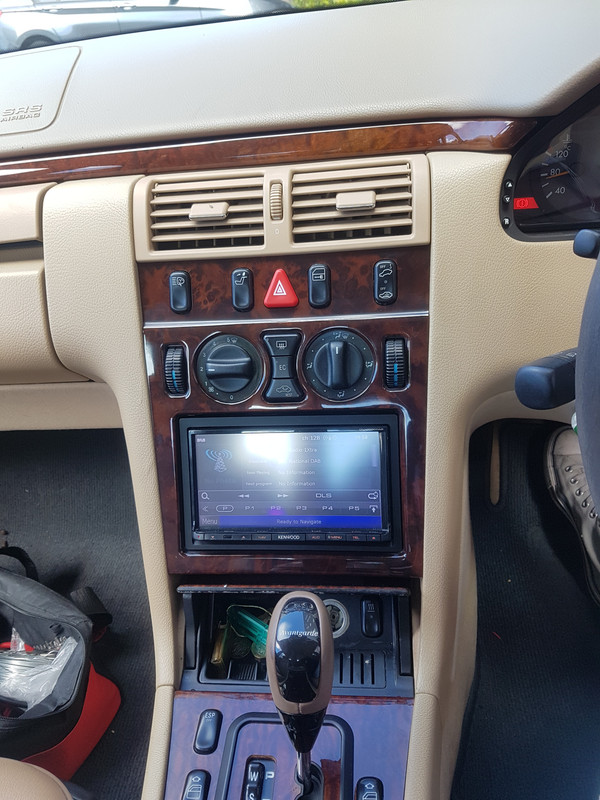
The buttons found in the centre console of a w210 in line with the hazard light switch seem to be all one module.

I was wondering if there is anyway to space the buttons in the image below:

20180607_210929.png


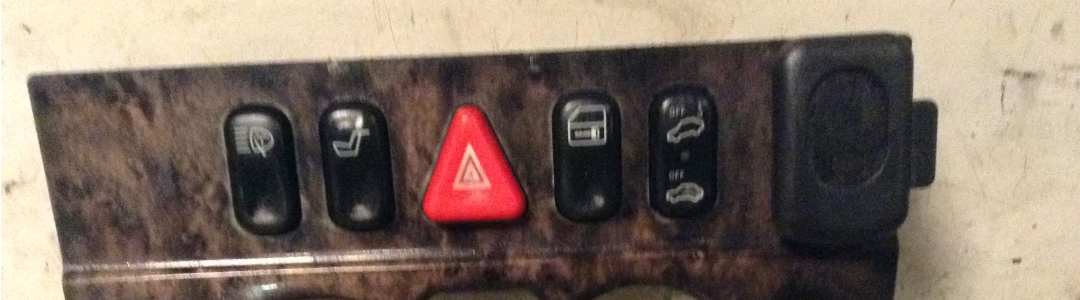
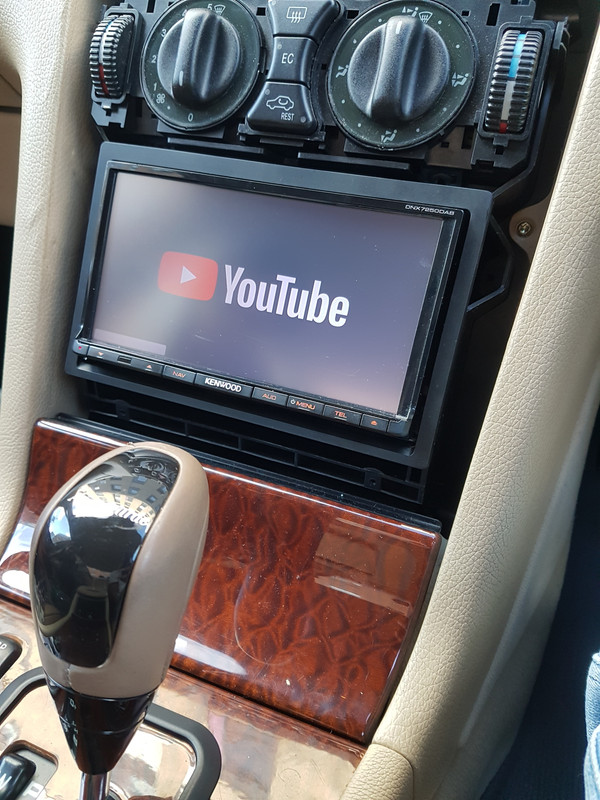
To make them fit in the surround in the image below:
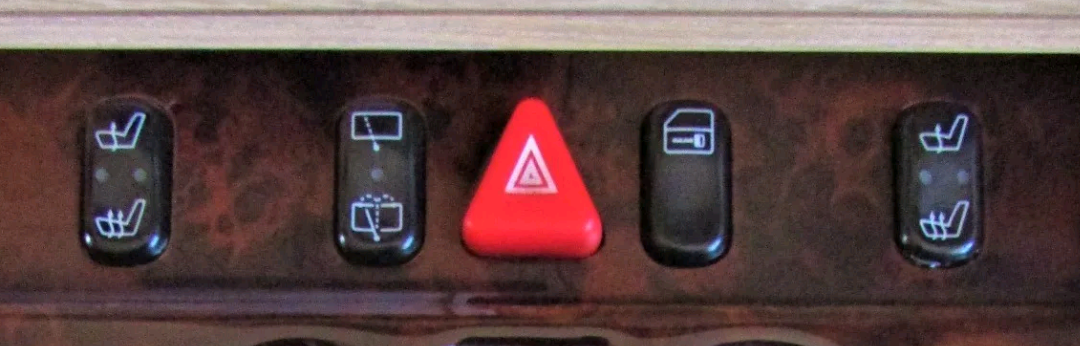
20180607_210810.png
 
Afraid not unless you can redesign circuit boards and re-create it from scratch.
 
What about drilling 2 new slots in the trim. I know you can get blanks to go in the 2 extra holes but where can I get them from.
 
The PCB isnt moduler though, you can change the buttons around but they wont work.
 
The PCB isnt moduler though, you can change the buttons around but they wont work.


What I'm thinking is using my current circuit board (buttons), drilling 2 extra holes in the new fascia so that the buttons can fit through and then the two additional holes which are left over (the ones which are spaced out) I can put blank buttons in them?

Below are images of what I'm dealing with. The whole point of changing the wood is to accommodate a double din headunit.

What the car has at the moment:
20180607_233400.jpg


What I'm hoping to put in:
20180608_013204.png
 
Just wondering has anyone drilled into the wooden trims to accomdate for extra buttons?
 
on my w202 i just looked on ebay for a replacement with the extra holes cut out
 
on my w202 i just looked on ebay for a replacement with the extra holes cut out

Thanks just seen this.

I've figured that w210's with this colour trim and manual heater controls are super rare to come across with a double din trim fascia. I come across the electronic heater control version all the time which is no good.

I've had a look at the buttons which are currently on my car and it seem the buttons which need moving can be moved to fit the new surround with little work.

So now I keep my fingers crossed and wait for the trim to arrive. Already got the back reinforcement cage etc so I'm all set there.

The headunit I've got is a dnx7250dab if I remember correctly.
 
how about getting the trim in any finish then having all of your trim hydrodipped in a wood finish so it all matches?
 
out of curiosity, where are your heater controls going?
 
Origional location of buttons:
20180615_113657.jpg


New location of buttons:
20180615_113711.jpg


The actual black module only supplies 12v when the cars lights are turned on to illuminate the buttons. The actual connection for the buttons to function is a wire which needs to be plugged in making it easy to move buttons around..

KillerHERTZ you were correct about the buttons being part of one circuit but this is only the hazard switch, central locking and rear headrest switch. Any additional buttons relelevnt to how the car is spec'd are good to move around.

Hope this helps others who want to get a double din fascia but like me couldn't find one with the buttons cut out in the right location. I kind of jumped in the deep end by buying it with 50/50 chance if it working out. Lucky it did.
 
Still waiting for the fascia trim due to delays with postage.. anyways today I got some free time so decided to get all the time consuming bits done.

Feeding wire for Bluetooth mic
Running nav antenna to rear parcel shelf
Attaching dab antenna to front windscreen

And the biggest job of all which was a total ball ache putting the the rear frame for the double din unit. What a pain in the A**

Was to frustrated to get pictures as I was going along but here's a pic of the old frame which had to be taken out. Picture taken midway through the job:

20180621_154635.jpg


A picture of the double din frame finally in and the headunit as it sits until the frame arives. It's fair to say I'm very eager when it comes to new toys:

20180621_183934.jpg


I've noticed there are many threads on this forum and other websites that show before and afters of people doing the double din conversion or they have a diy but don't go through the process of removing the rear frame.

If I knew it was this hard and time consuming I would have got some more pictured to help others out but all I'm going to say is anyone wanting to do this, take your time with the rear frame and remember where each screw was taken off from, as a lot of the dash and arm rest etc needs to be removed. Apart from this it's a very easy job.
 
Excuse the worn out steering... that is at the very end of my to do list.. I'll get to it some day :rolleyes:
 
Fascia arrived today finally got the job done.

Before:
20180617_231851.jpg


After:
20180622_145852.jpg
 
Fascia arrived today finally got the job done.

Before:
20180617_231851.jpg


After:
20180622_145852.jpg
Do you remember where you bought this fascia? I am searching on eBay since one week but nothing.
 

Users who are viewing this thread

Back
Top Bottom