Hi all, I've been having fun.
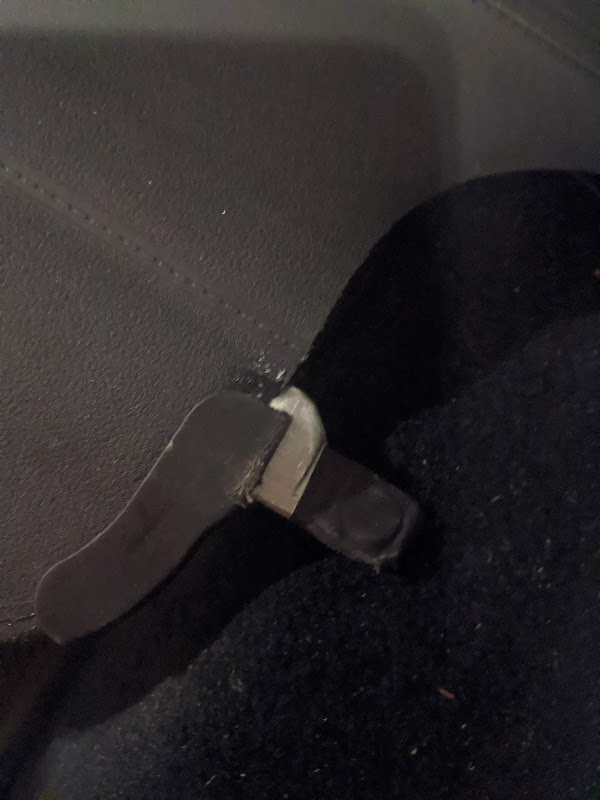
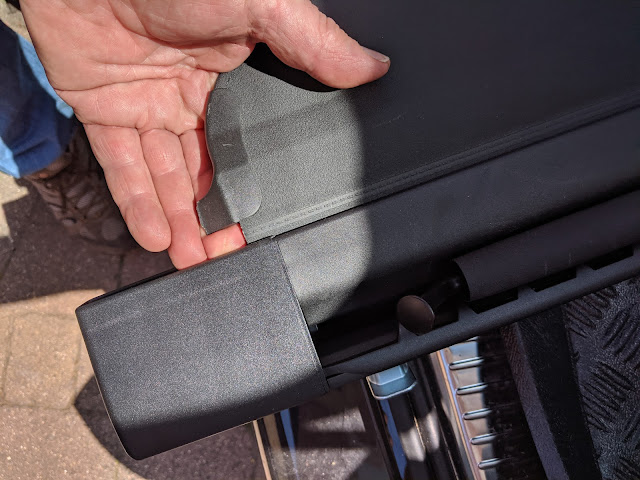
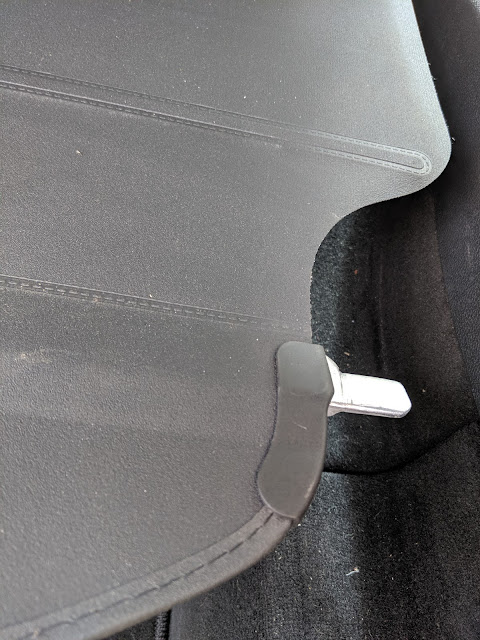
One of the lugs on the load cover broke, not sure how, my wife was using the car at the time. Car is under a year old, so I thought I'd have a try seeing what the warranty situation was like. On the phone everyone insisted that it was FAR TOO COMPLICATED (!!!) to understand on the phone, I would have to bring it in. When I did, surprise surprise, one hour later I am told it isn't a warranty claim (also, that I didn't have to come in, but hey ho)
In the meantime I contact parts, to be told that it isn't replaceable and the only option is a replacement unit for £710.
I've fired off a complaint to Mercedes customer service. In my view, if it isn't warranty, it isn't fit for purpose as a bill for £710 for a tiny bit of plastic that is clearly vulnerable and should be replaceable is not on. I haven't heard back, it has only been two days.
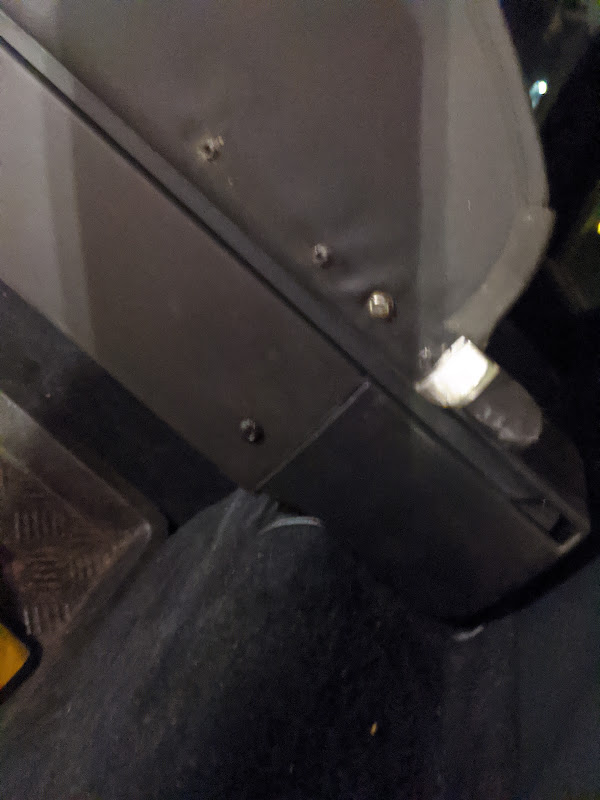
In the meantime, I've fashioned a substitute from a piece of 10mm aluminium, which I have made identical to the plastic and screwed to the cross bar. In the course of doing that I confirmed that the lug really should be replaceable, you can remove it with the single pop rivet.
And now, the cover doesn't lift. Can't find a fuse. Ho hum.
One of the lugs on the load cover broke, not sure how, my wife was using the car at the time. Car is under a year old, so I thought I'd have a try seeing what the warranty situation was like. On the phone everyone insisted that it was FAR TOO COMPLICATED (!!!) to understand on the phone, I would have to bring it in. When I did, surprise surprise, one hour later I am told it isn't a warranty claim (also, that I didn't have to come in, but hey ho)
In the meantime I contact parts, to be told that it isn't replaceable and the only option is a replacement unit for £710.
I've fired off a complaint to Mercedes customer service. In my view, if it isn't warranty, it isn't fit for purpose as a bill for £710 for a tiny bit of plastic that is clearly vulnerable and should be replaceable is not on. I haven't heard back, it has only been two days.
In the meantime, I've fashioned a substitute from a piece of 10mm aluminium, which I have made identical to the plastic and screwed to the cross bar. In the course of doing that I confirmed that the lug really should be replaceable, you can remove it with the single pop rivet.
And now, the cover doesn't lift. Can't find a fuse. Ho hum.
")