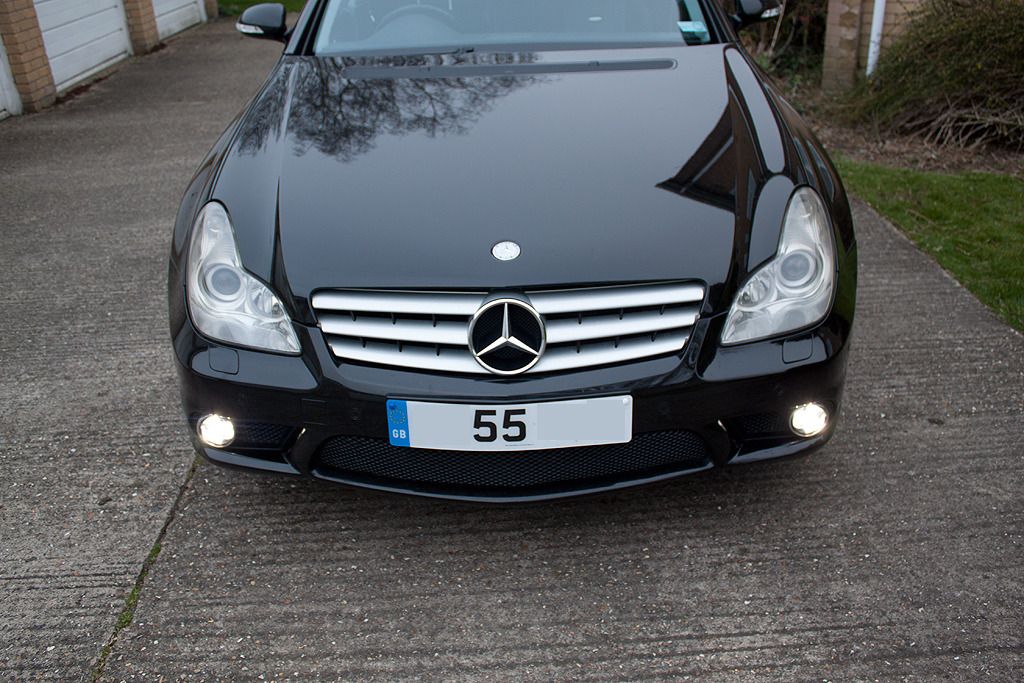
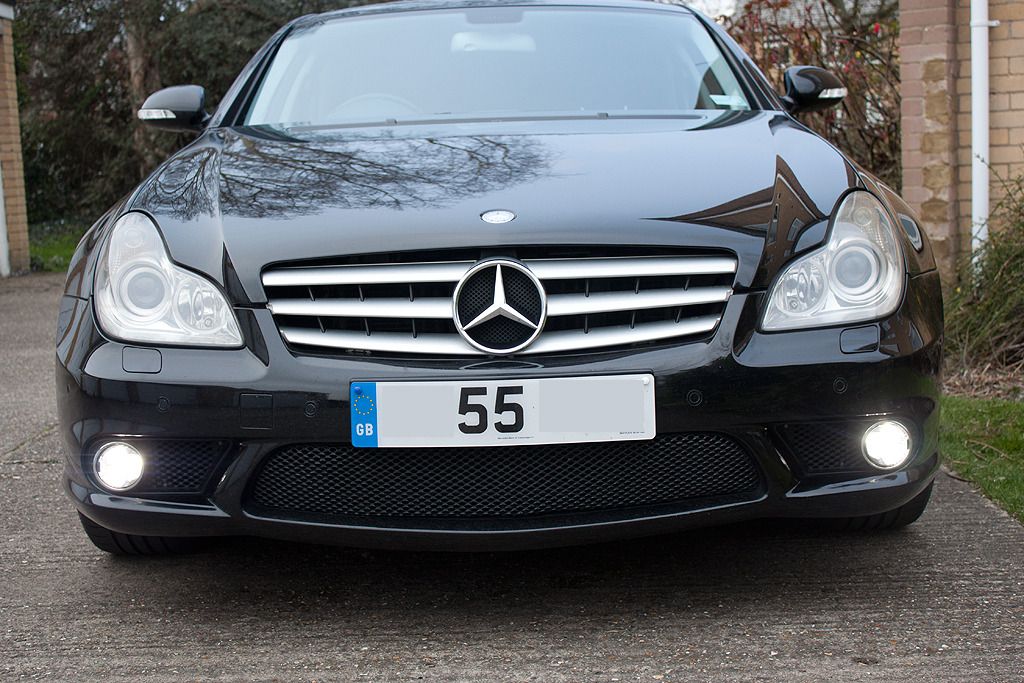
Following on from my CLS55 AMG thread HERE Since owning my W209 I have wanted to update the front of my car with some OEM style DRL's. As with all my mods (well, ignoring the recent Brabus front grill) I try to keep them looking as if they possibly came out of the factory with the modified included, with DRLs this isnt straightforward as most of you will have seen.
Aftermarket DRLs come in two flavours, 1st are the eBay cheap 'n' cheerful 'White' LED lights which are never white, but more of a purpley UV style output. As seen on Mk2 Vectra's, MK3 Mondeos and Corsa's around your local McDonalds Drive Tru's on a Saturday night.
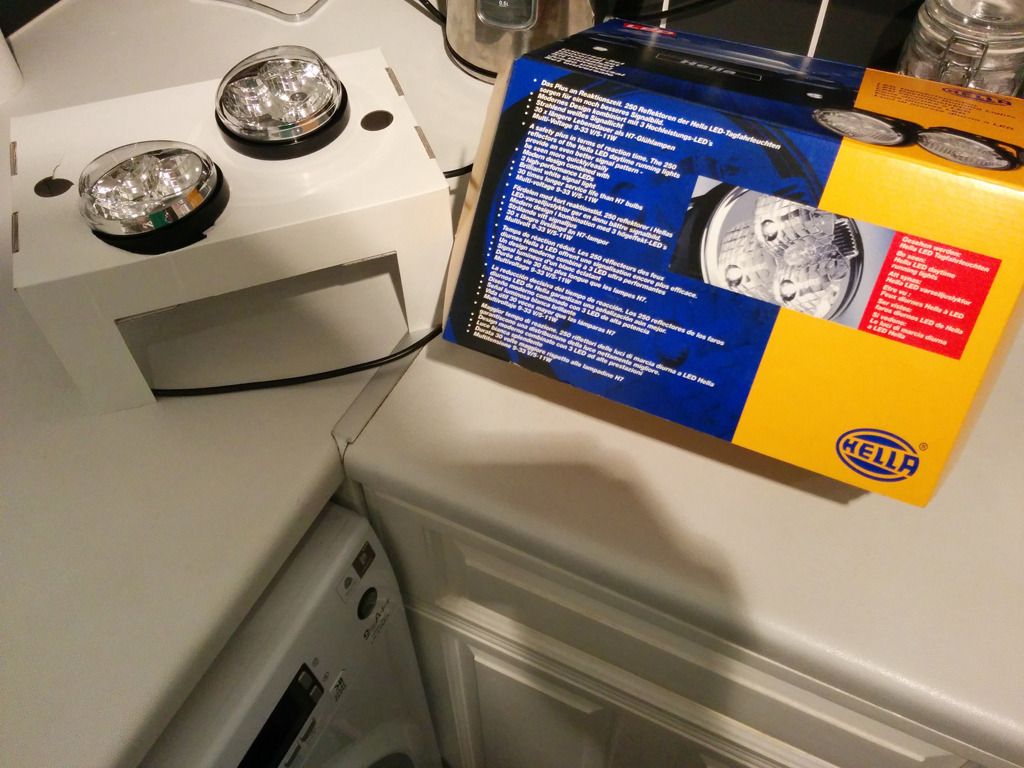
The second version are the very expensive OEM supplier branded products from manufactures such as Hella, Philips and Osram (ignore Ring units as they arent white enough).
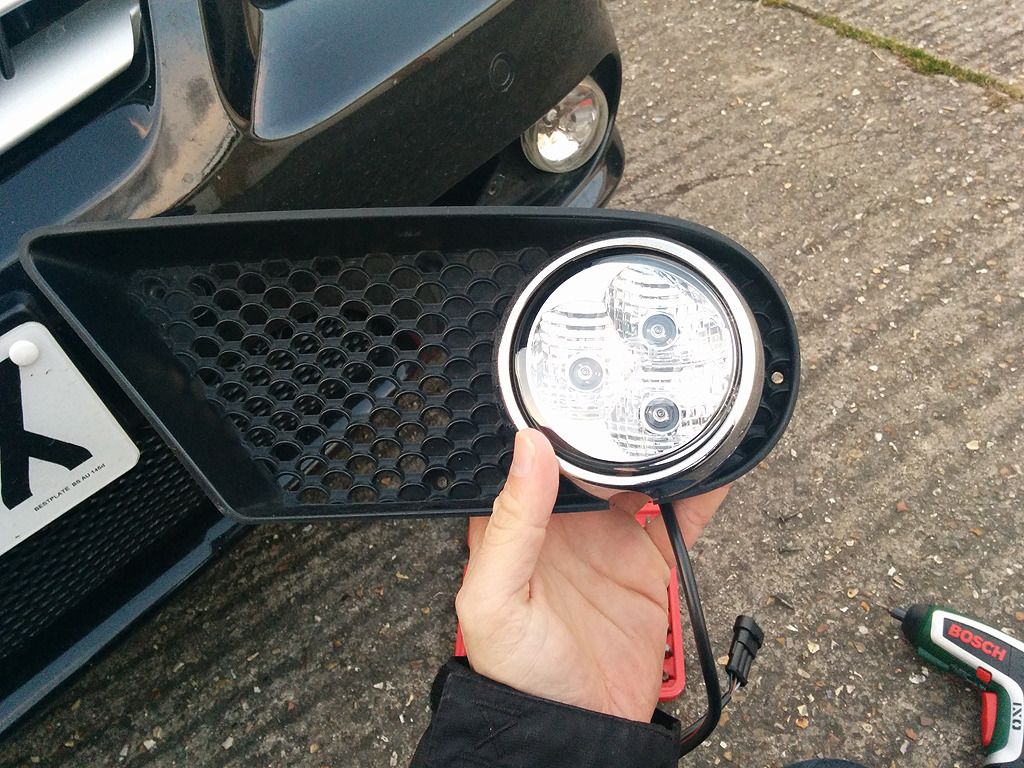
After alot of research, I opted for the 9" Hella circle model which were produced around 2-3 years ago. These units are rarer, dont appear to have been sold through your normal Auto parts suppliers (Hella themselves couldnt provide me with a UK supplier!) and only come with very basic installation instructions. I managed to source a set via eBay £170 delivered.
I took a slight risk as I didnt know for sure that they would fit, I measured the foglight surrounds on my CLS and they were the same, but you never can be sure.
They fit!
The previous owner of my CLS decided to fit some aftermarket Xenons to my foglights, meaning when the follow me home lighting comes on it looks like a small Nutron bomb has gone off each time. First up I had to remove all these aftermarket gubbins but removing both from wheels and their surrounding wheel arch liners.
With the liners off, I removed all the wiring and left just the original connectors, which I bagged up (in coin bags from my local bank!) together with cable ties to make them water tight.
Now, onto fitting the LED DRLs.
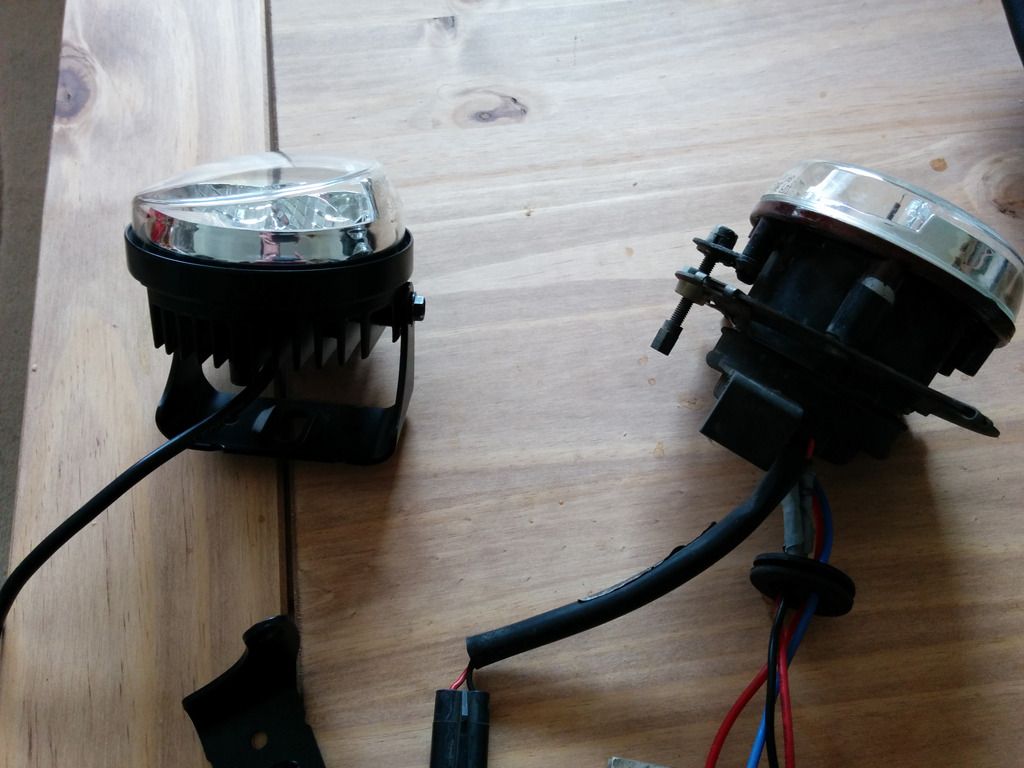
First up I had to find a way to fit them to my car, using the supplied brackets wasnt going to happen as my bumpers dont feel strong enough to support the weight of the DRLs, (they have a rear glass lense on each), so I took a look at the exisiting frames from the fogs. These include a dial for manually adjusting their height. Once I had removed this dial and untightened the torx screws the frame was free. luckly the DRLs had screw holes in on their backs which arent mentioned in the instructions. with the help of a drill, I was able to fabricate holes to fit the frames on snug.

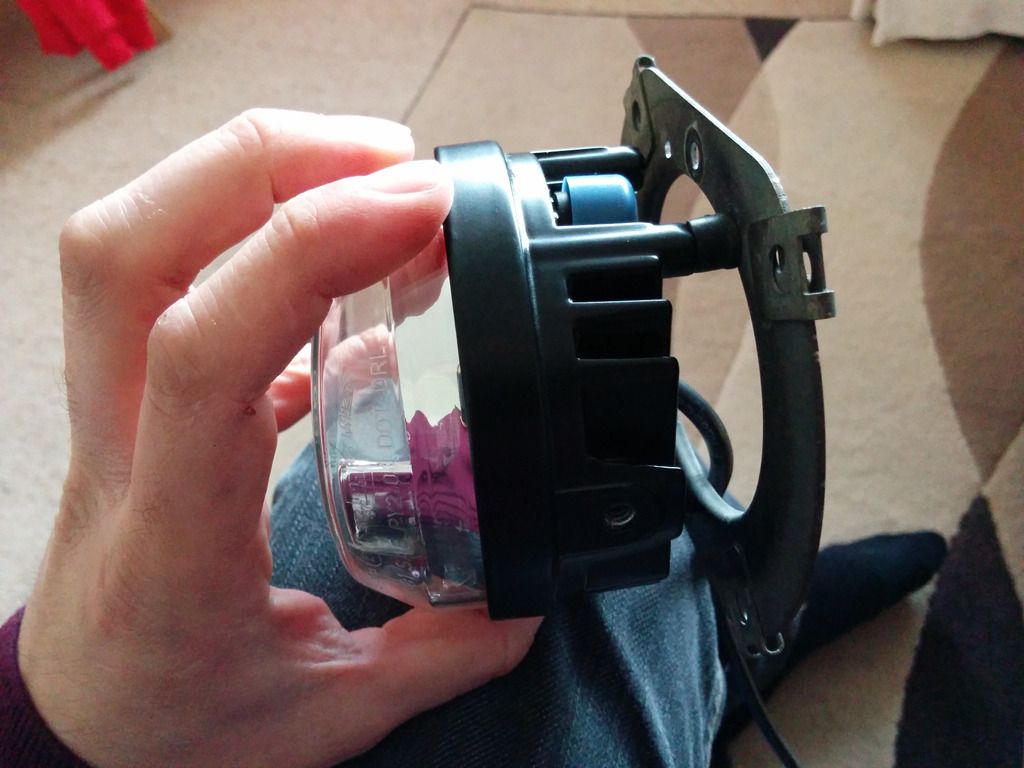
The DRLs are a slight wedge shape (by looking from above) as a result they dont fit 100% snug and cause the bumper grill/surround to bend ever so slightly, you can only see this if you get on your hands & knees. I will work on this and report back.
With both DRLs screwed into place on the front bumper and the surrounds fitting as plush as I can currently make them fit, its time to start with the supplied wiring loom fitment.
Passenger side of the car was a doddle, you simpley dangle the loom down and grab it from the foglight hole. Once there connect the connectors and use some cable ties to make sure the wires dont touch anything hot, or any moving parts. This is very important!
Over to the drivers side, it is so, so, cramped! I actually got my hand stuck at one point, upon rescuing it I managed to find a spare headlight rear cover which a previous owner must have dropped long ago, only to have re-ordered it from MB!
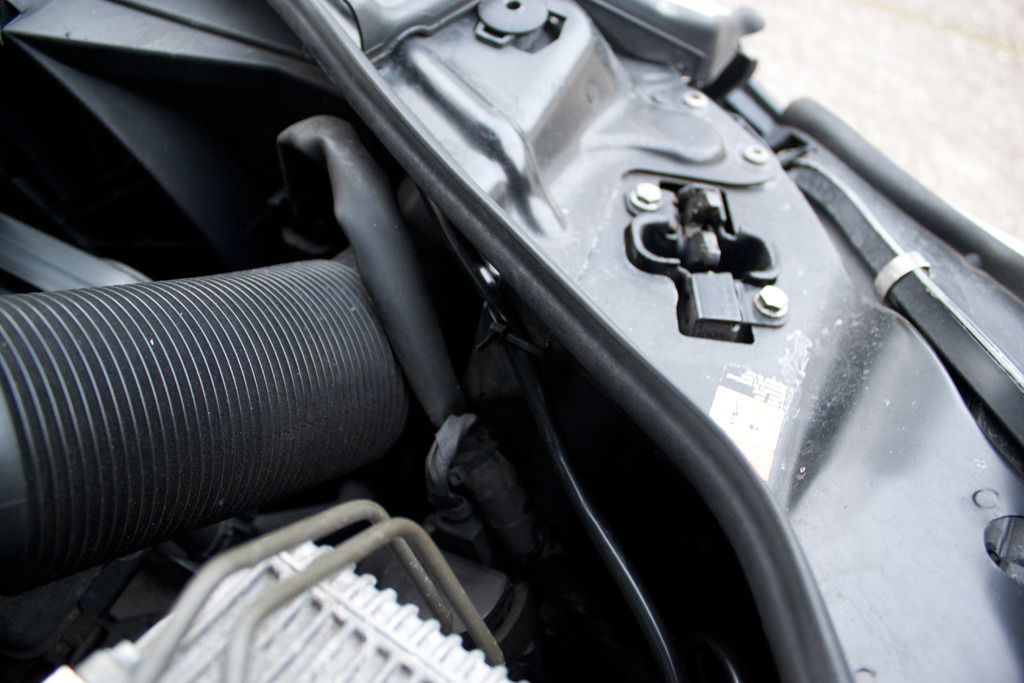
With both units connected up to the loom, its a case of working around the engine bay ensuring that the loom is safely tucked away with cable ties making it look as OEM as possible:
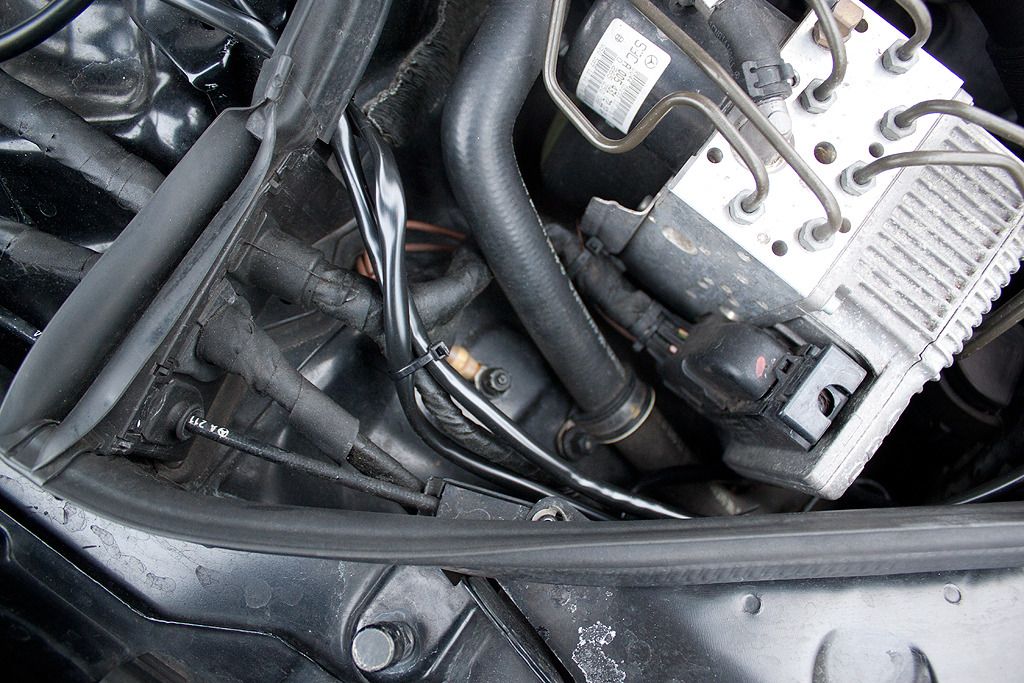
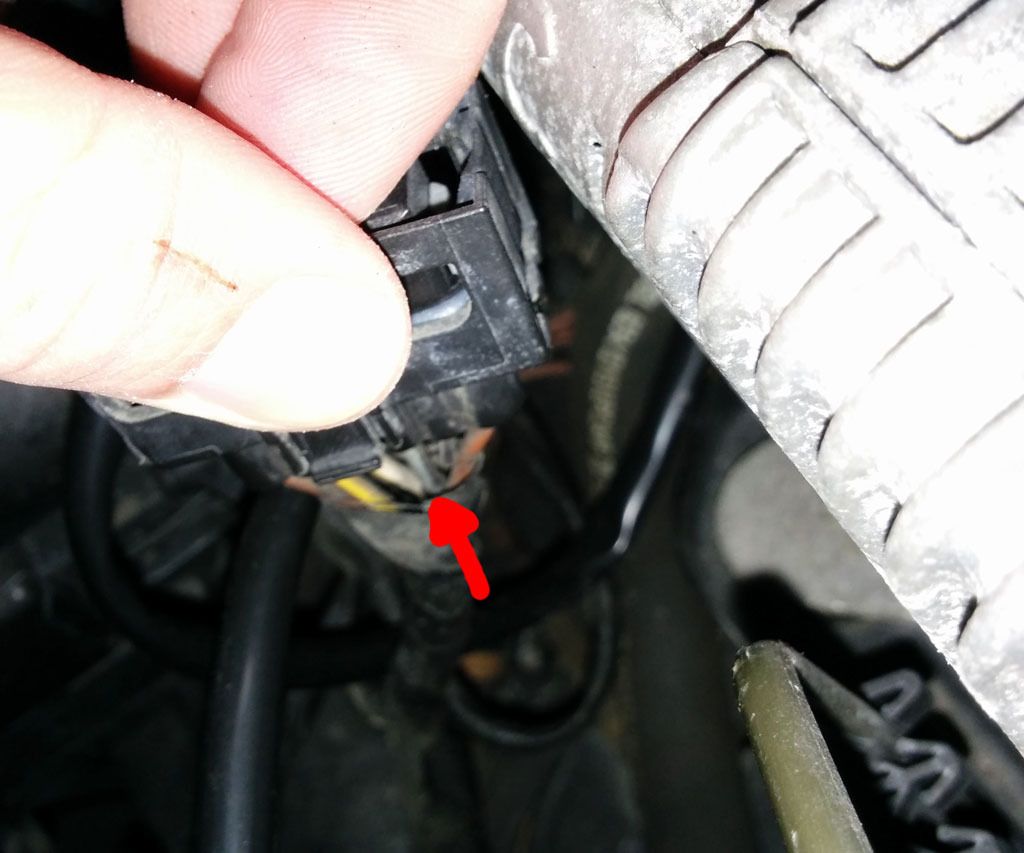
Until you reach the fuse box. The chassis covers the way to it, apart from there was 1 free small grommet available for some un-selected option at time of purchase. removing the grommet confirmed that the hole was far too small for the fat loom. So out once again with the Dremmel, filed it down until it was double the width (sparks flying everywhere at this point!). and eventually popped the loom through:

At this point, I realised that I needed to double back with the sidelight cabled, so that was pushed back through (the grey wire).
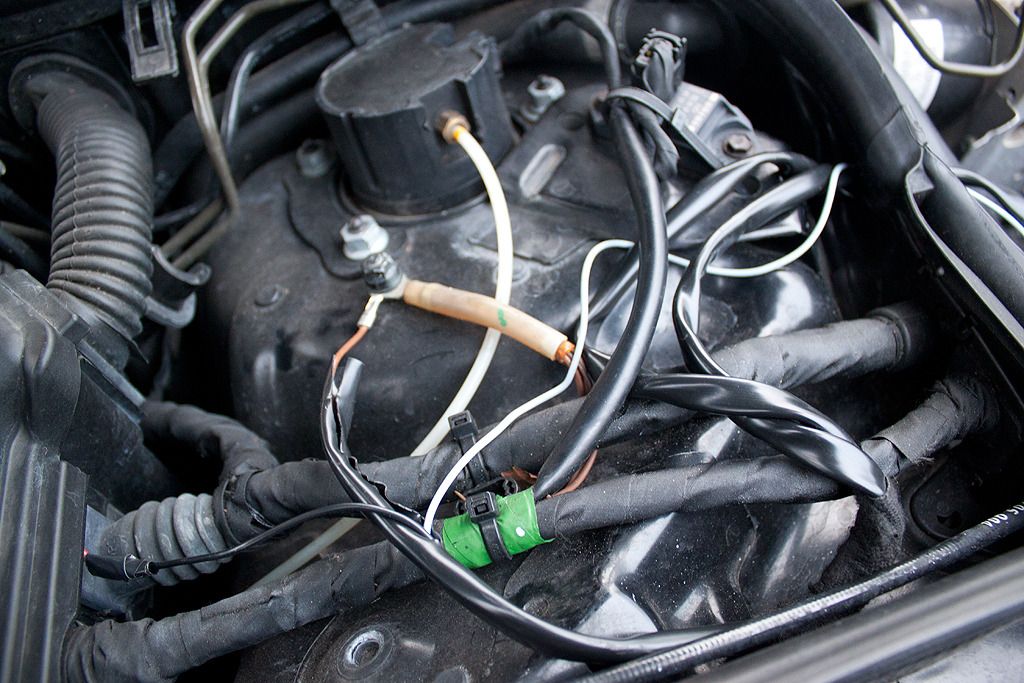
Earthed the brown wire to the local chassis earth point (as above) and then I was stuck with the actual live cable. How do I actually connect this to the fuse box I was wondering?
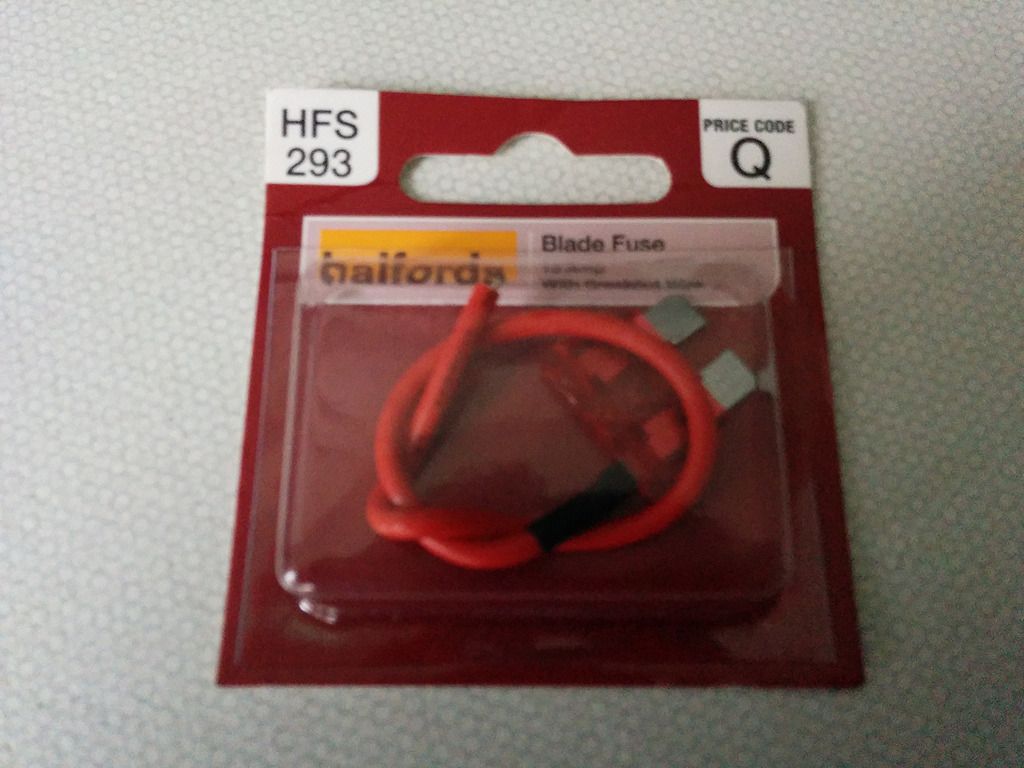
After searching online I decided to PM member: Ted who had been offering me wiring advice over the past week. He suggested I use a 'Piggyback Extrafuse' which were available off eBay for cheap. as its late Wednesday & Bank Holiday looming (no pun intended) I decided to take a look down Halfords.
They didnt stock these, but had the next best thing:
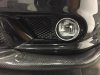
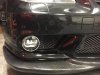
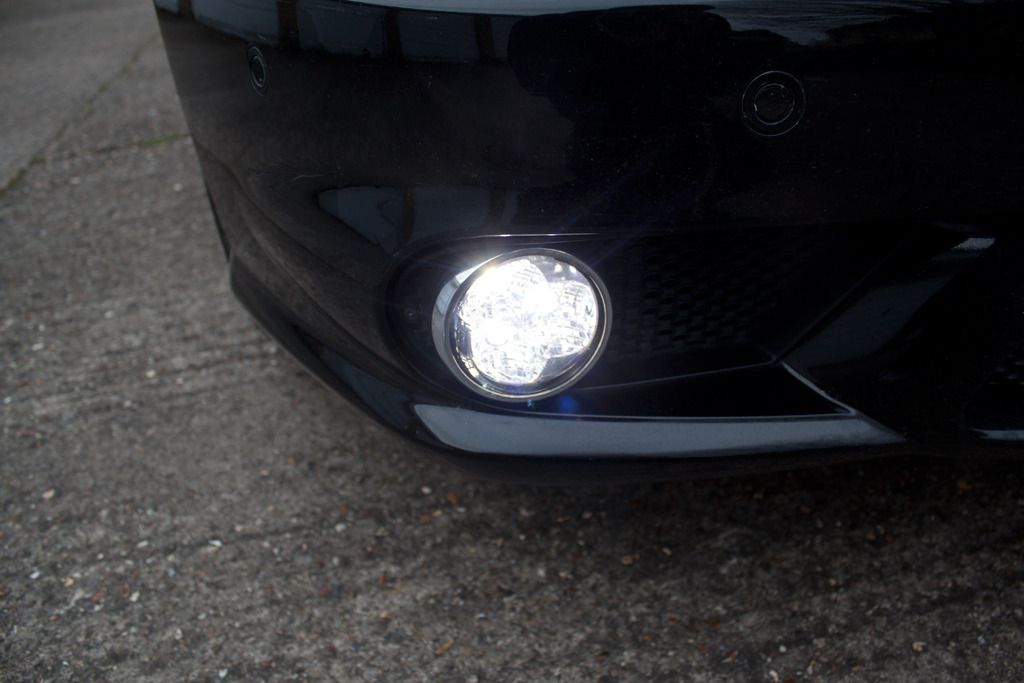
And it worked!!! - Difficult to photo im afraid
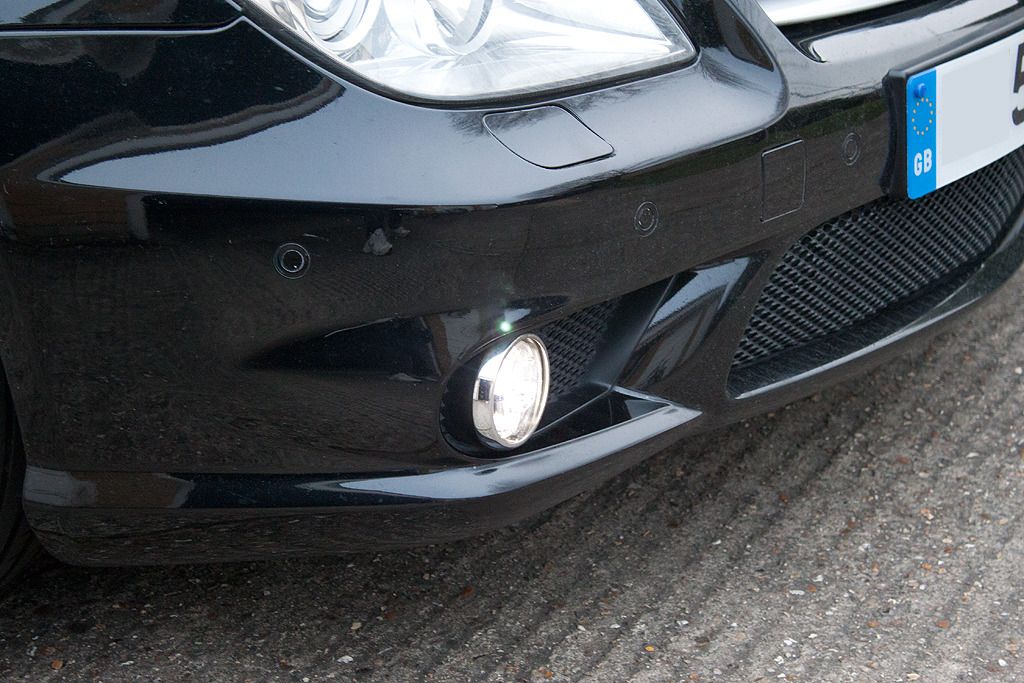
Note the Hella logo in the glass")
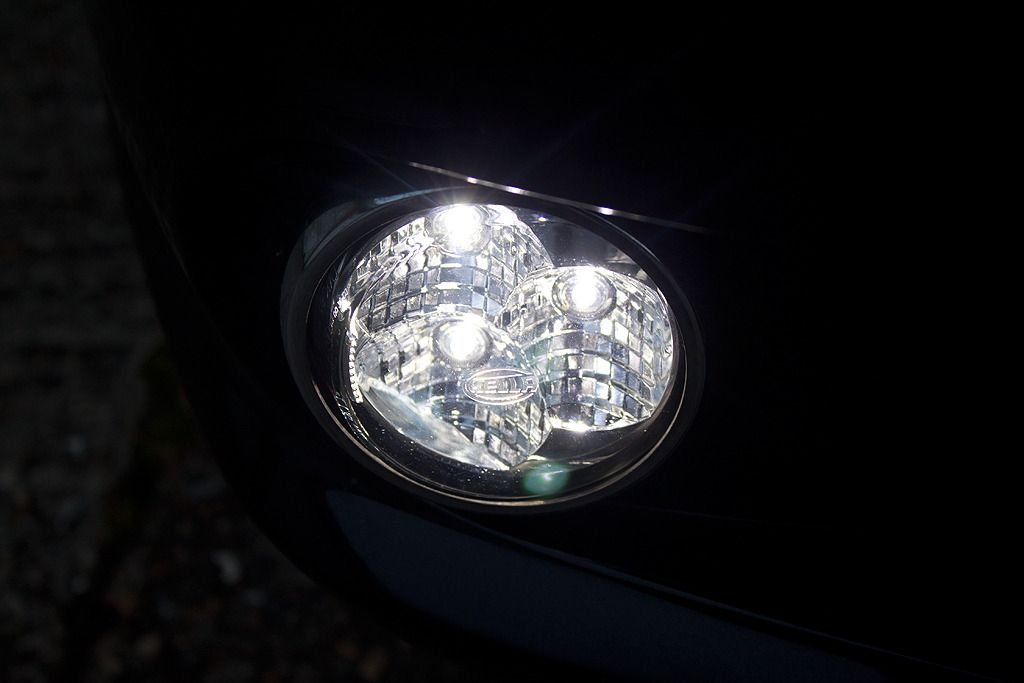
Whiter then my OEM Xenons:
I am yet to wire up the sidelights, So currently they are on all the time with the ignition.
Might need some help with that, out of the 6 pins of the main headlight connector my Multimeter reports that 4 have a current (with sidelights switched on). Any ideas? im guessing its the Grey cable in the loom?
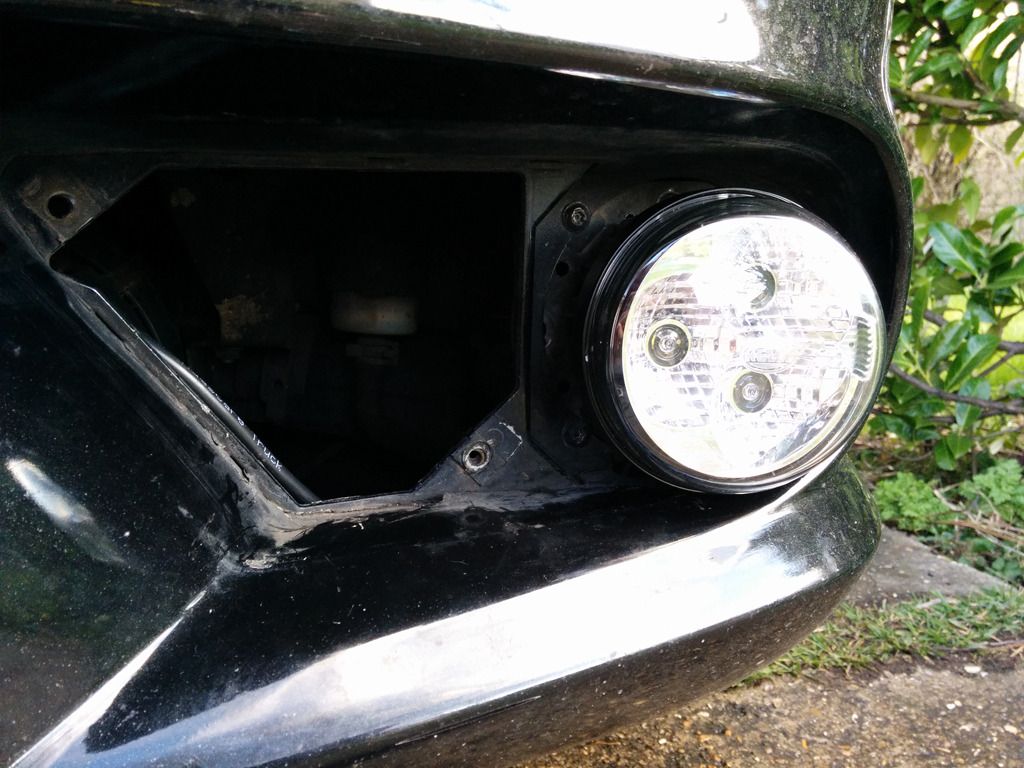
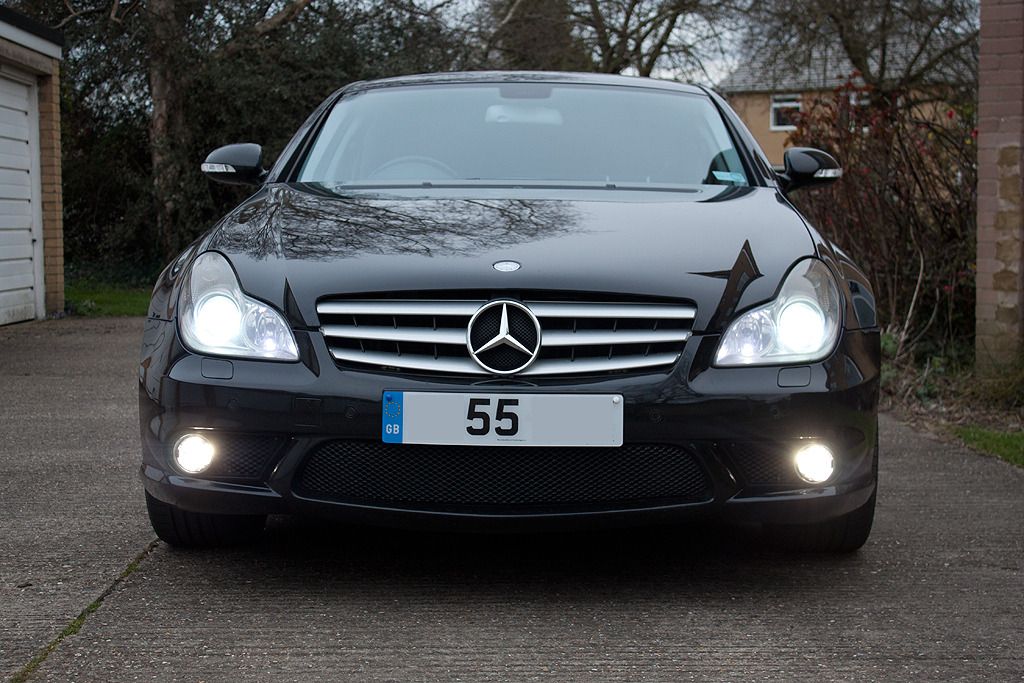
Very happy with the final result, in my eyes they look completely OEM, correct whiteness/brightness, position is correct and modenise the front of the W219.
Closest comparision are the Volvo's from around 1-2 years ago, before they started 'smoothing out' LED light lenses.
Opinions, questions welcome
Thanks once again to Ted for the wiring advice - My longest post in a long while, im off for a beer.
Aftermarket DRLs come in two flavours, 1st are the eBay cheap 'n' cheerful 'White' LED lights which are never white, but more of a purpley UV style output. As seen on Mk2 Vectra's, MK3 Mondeos and Corsa's around your local McDonalds Drive Tru's on a Saturday night.
The second version are the very expensive OEM supplier branded products from manufactures such as Hella, Philips and Osram (ignore Ring units as they arent white enough).
After alot of research, I opted for the 9" Hella circle model which were produced around 2-3 years ago. These units are rarer, dont appear to have been sold through your normal Auto parts suppliers (Hella themselves couldnt provide me with a UK supplier!) and only come with very basic installation instructions. I managed to source a set via eBay £170 delivered.
I took a slight risk as I didnt know for sure that they would fit, I measured the foglight surrounds on my CLS and they were the same, but you never can be sure.
They fit!
The previous owner of my CLS decided to fit some aftermarket Xenons to my foglights, meaning when the follow me home lighting comes on it looks like a small Nutron bomb has gone off each time. First up I had to remove all these aftermarket gubbins but removing both from wheels and their surrounding wheel arch liners.
With the liners off, I removed all the wiring and left just the original connectors, which I bagged up (in coin bags from my local bank!) together with cable ties to make them water tight.
Now, onto fitting the LED DRLs.
First up I had to find a way to fit them to my car, using the supplied brackets wasnt going to happen as my bumpers dont feel strong enough to support the weight of the DRLs, (they have a rear glass lense on each), so I took a look at the exisiting frames from the fogs. These include a dial for manually adjusting their height. Once I had removed this dial and untightened the torx screws the frame was free. luckly the DRLs had screw holes in on their backs which arent mentioned in the instructions. with the help of a drill, I was able to fabricate holes to fit the frames on snug.
The DRLs are a slight wedge shape (by looking from above) as a result they dont fit 100% snug and cause the bumper grill/surround to bend ever so slightly, you can only see this if you get on your hands & knees. I will work on this and report back.
With both DRLs screwed into place on the front bumper and the surrounds fitting as plush as I can currently make them fit, its time to start with the supplied wiring loom fitment.
Passenger side of the car was a doddle, you simpley dangle the loom down and grab it from the foglight hole. Once there connect the connectors and use some cable ties to make sure the wires dont touch anything hot, or any moving parts. This is very important!
Over to the drivers side, it is so, so, cramped! I actually got my hand stuck at one point, upon rescuing it I managed to find a spare headlight rear cover which a previous owner must have dropped long ago, only to have re-ordered it from MB!
With both units connected up to the loom, its a case of working around the engine bay ensuring that the loom is safely tucked away with cable ties making it look as OEM as possible:
Until you reach the fuse box. The chassis covers the way to it, apart from there was 1 free small grommet available for some un-selected option at time of purchase. removing the grommet confirmed that the hole was far too small for the fat loom. So out once again with the Dremmel, filed it down until it was double the width (sparks flying everywhere at this point!). and eventually popped the loom through:
At this point, I realised that I needed to double back with the sidelight cabled, so that was pushed back through (the grey wire).
Earthed the brown wire to the local chassis earth point (as above) and then I was stuck with the actual live cable. How do I actually connect this to the fuse box I was wondering?
After searching online I decided to PM member: Ted who had been offering me wiring advice over the past week. He suggested I use a 'Piggyback Extrafuse' which were available off eBay for cheap. as its late Wednesday & Bank Holiday looming (no pun intended) I decided to take a look down Halfords.
They didnt stock these, but had the next best thing:
And it worked!!! - Difficult to photo im afraid
Note the Hella logo in the glass
Whiter then my OEM Xenons:
I am yet to wire up the sidelights, So currently they are on all the time with the ignition.
Might need some help with that, out of the 6 pins of the main headlight connector my Multimeter reports that 4 have a current (with sidelights switched on). Any ideas? im guessing its the Grey cable in the loom?
Very happy with the final result, in my eyes they look completely OEM, correct whiteness/brightness, position is correct and modenise the front of the W219.
Closest comparision are the Volvo's from around 1-2 years ago, before they started 'smoothing out' LED light lenses.
Opinions, questions welcome
Thanks once again to Ted for the wiring advice
- My longest post in a long while, im off for a beer.
Last edited: