New to me car fixing continues....
Having jumped into older car ownership I fully expected to have to fix few niggles to get things ship shape, and I haven't been disappointed so far
Following on from my last thread of replacing the Crank Postition Sensor
http://www.mbclub.co.uk/forums/engine/193805-w220-s350-hot-starting-problem.html
The next on the list of jobs is to cure a problem whereby the drivers side heater output would slip into inferno mode whilst the remainder of the vents would be happily pumping out chilled air.
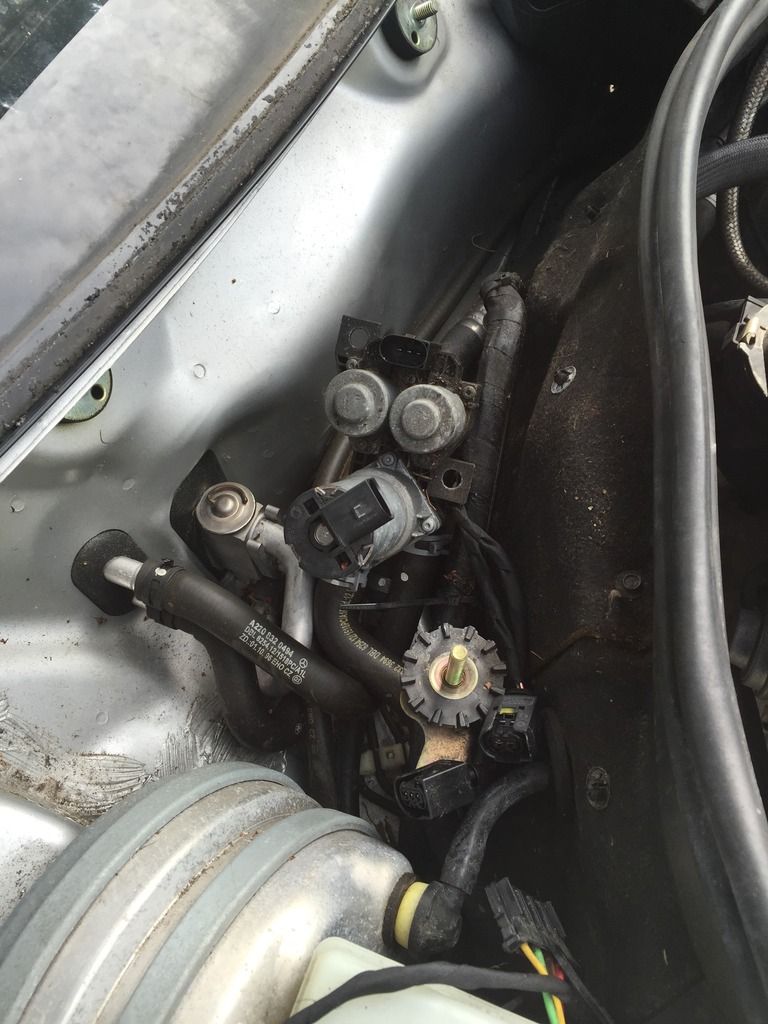
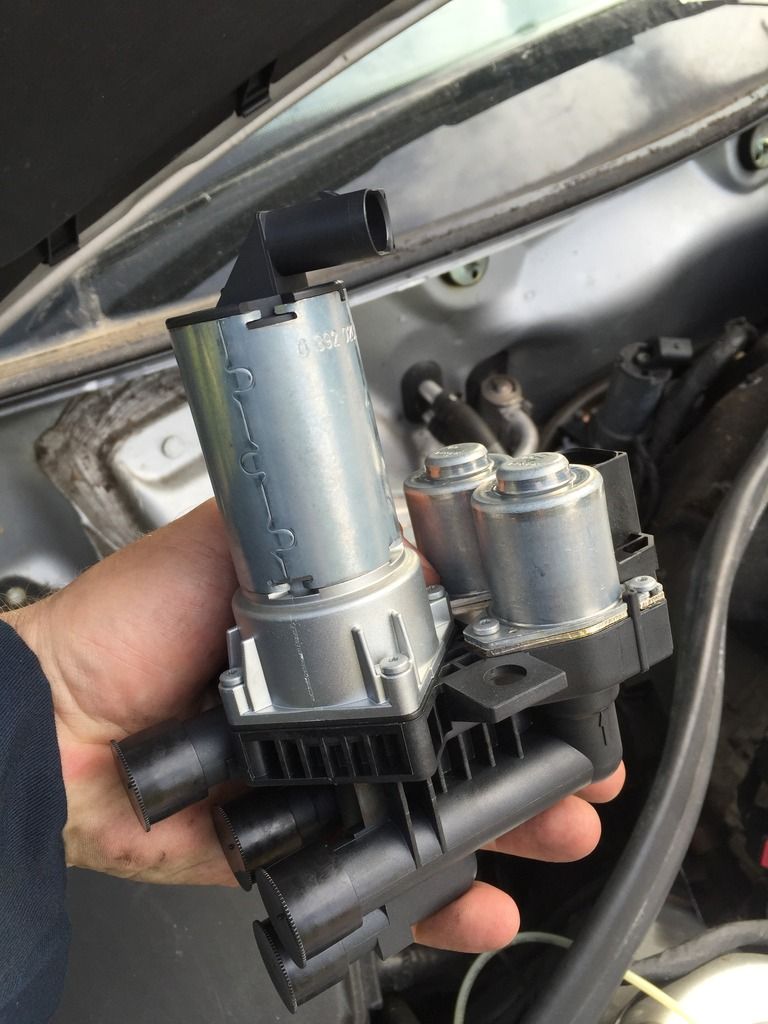
Having invested heavily in some advanced diagnostics (30 mins of googling!) the most likely culprit was the Duo Valve that balances hot/cold water for the left/right sides of the cabin.
There are a few DIY options listed once you start digging:
1. Give it to MB Main dealer, hand over wallet, problem resolved.
2. DIY, remove, clean, refit, cross fingers that it now works.
3. DIY, remove, clean, fit repair kit of O Rings and other seals (£60 from Taiwan), cross fingers that it now works and isn't a solenoid or the motor.
4. DIY, EBay used item, cross fingers that it works.
5. DIY, Purchase spare from MB Main dealer and self fit (£212)
6. DIY, Purchase from Inchape on line and self fit (£180)
Given that I'm running this in "frugal" mode, and I actually wanted a fix rather than have to do the job twice, I therefore went for option 6.
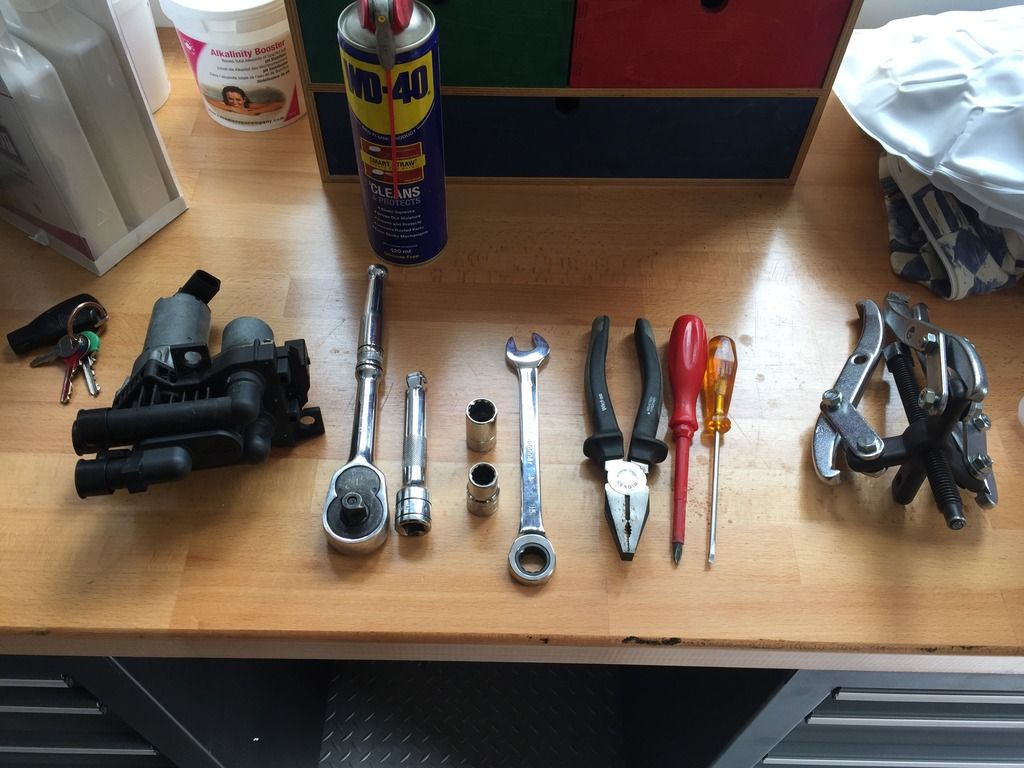
In essence the job wasn't particulary complicated, only took a handful of tools and 1.5 Hrs taking it easy!
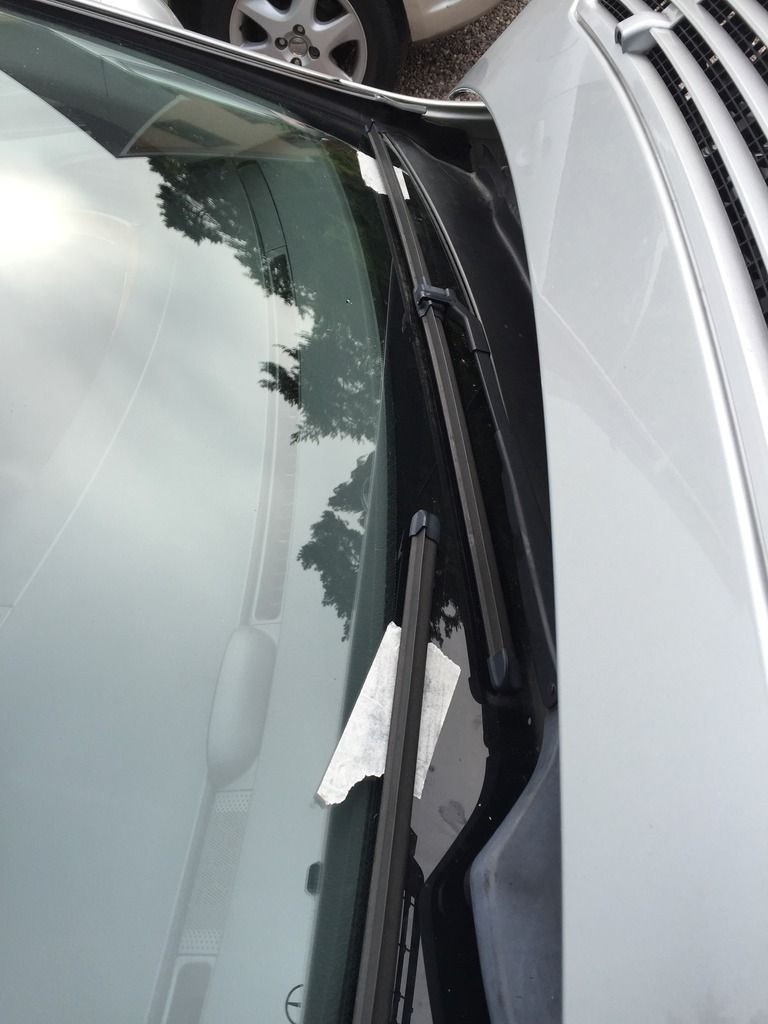
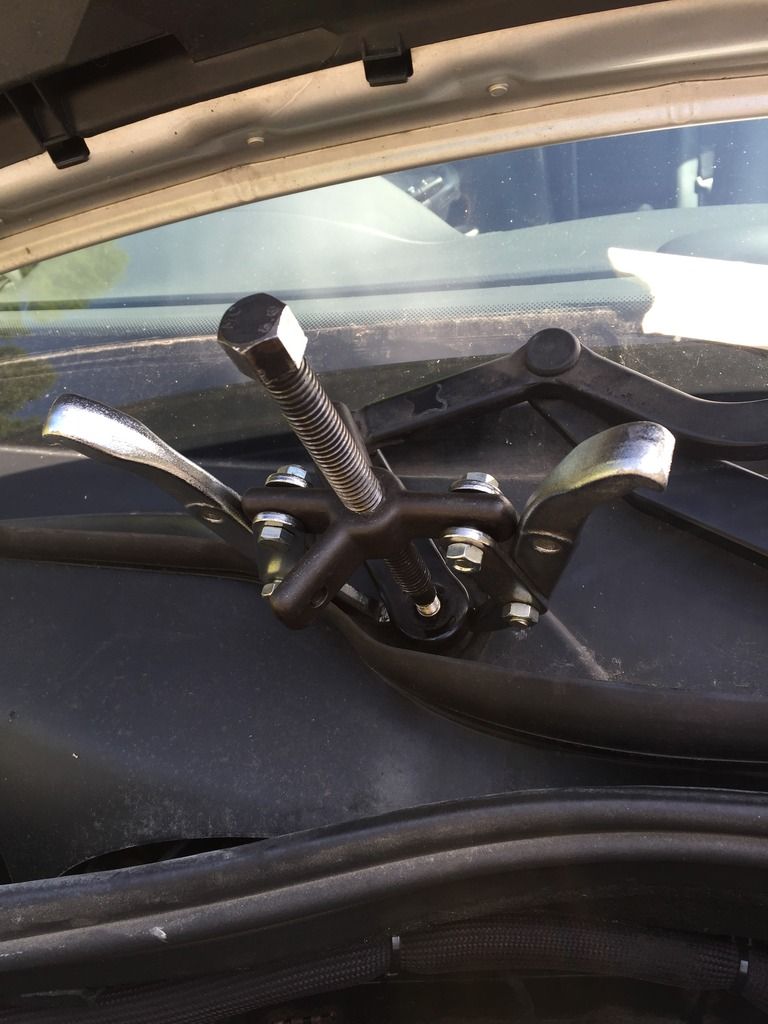
Remove the Wiper arms (I had to use a puller as the articulated arm was firmly stuck in place). Before you remove the arms put some masking tape on the windscreen and scribe the blade position onto the tape.
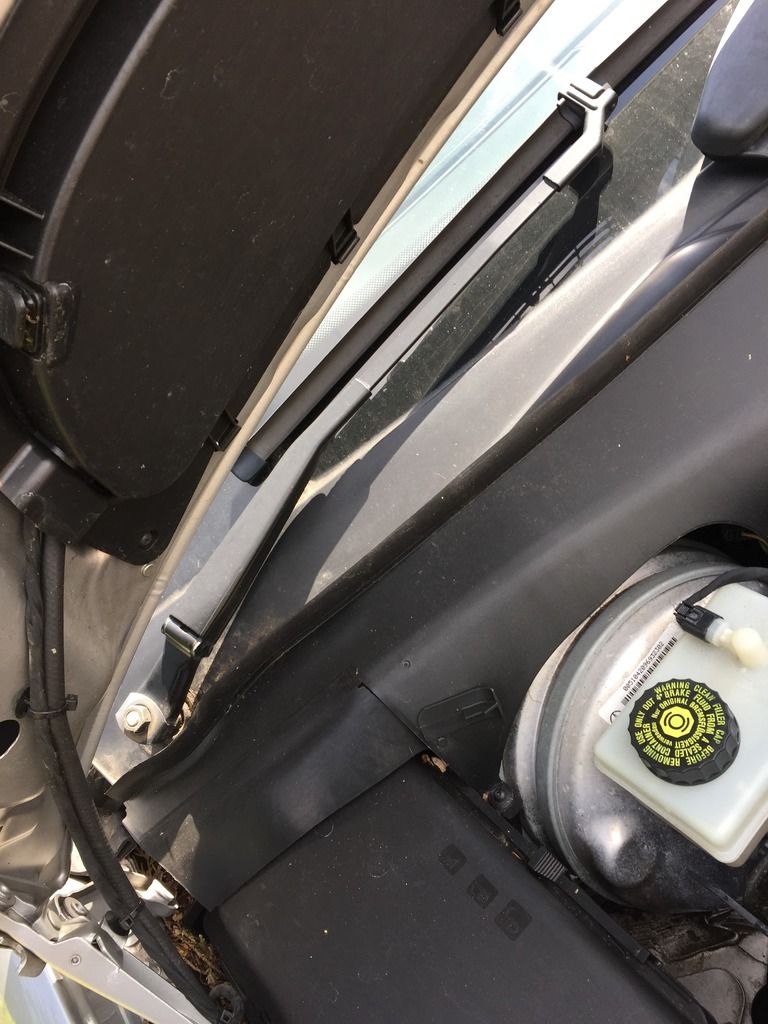
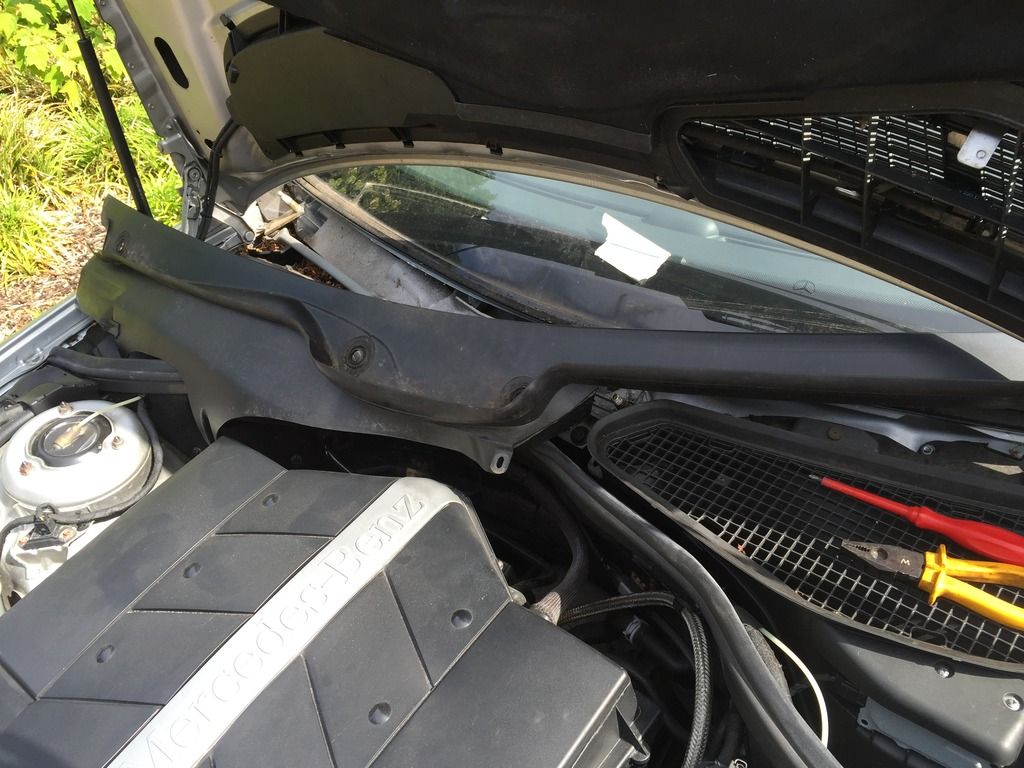
Remove the 4 plastic screws holding down the black plastic cover under the wiper arms.
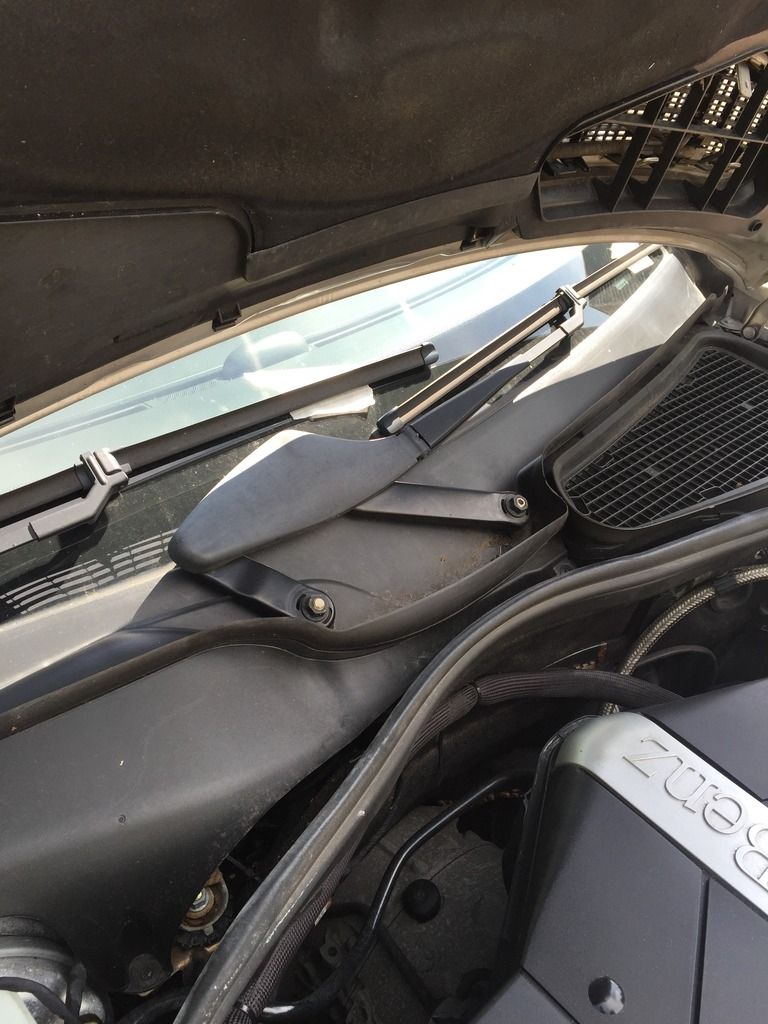
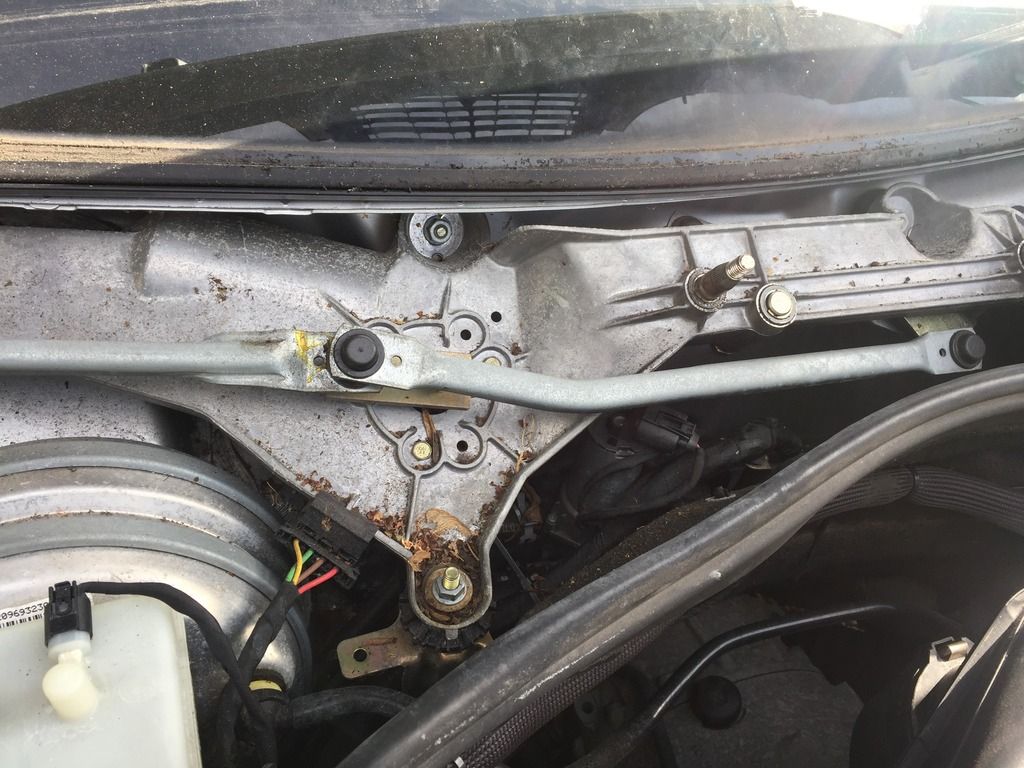
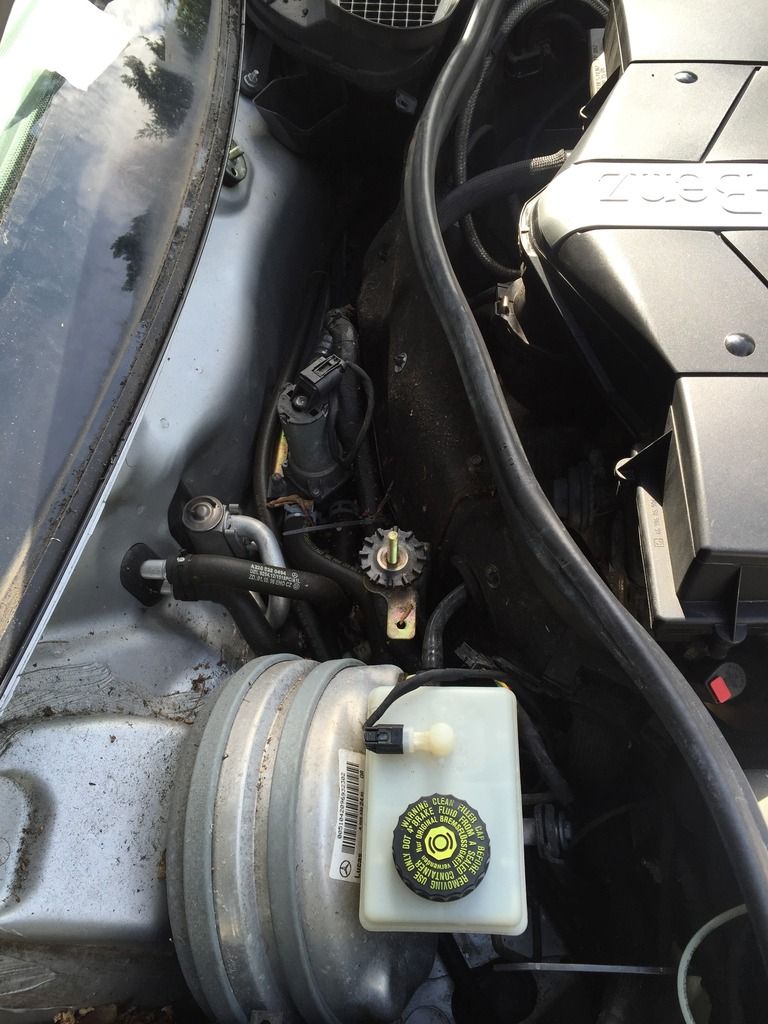
Remove the huge aluminium casting that holds the wiper motor (1 electrical connector, 4 nuts).
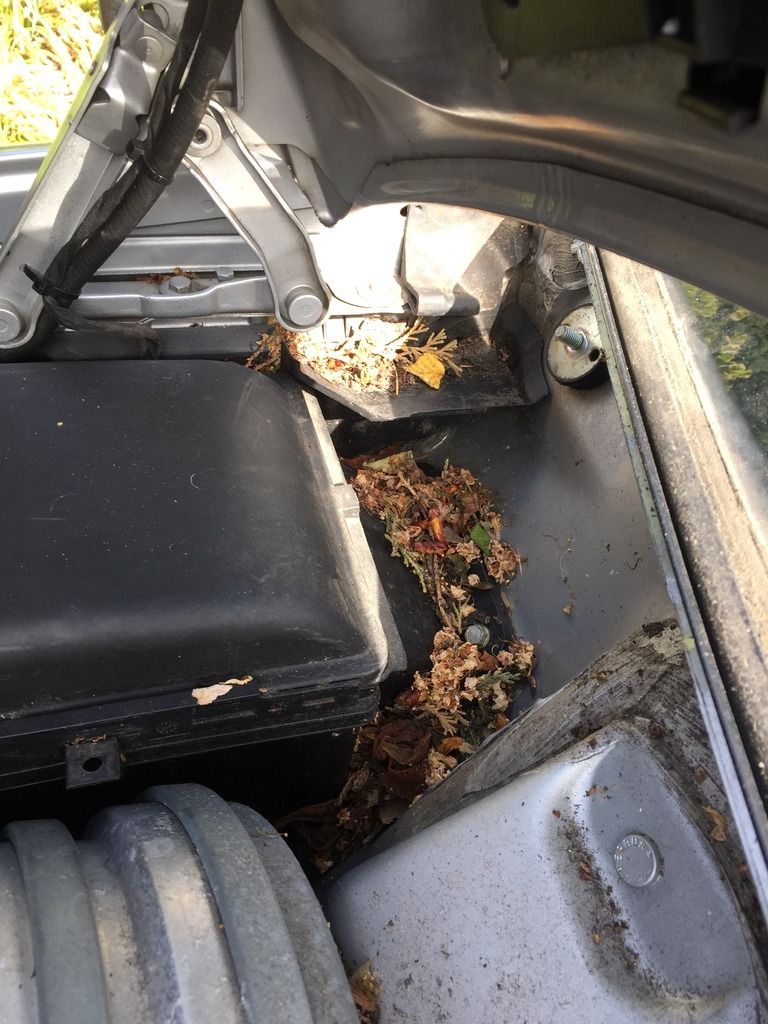
Remove 11 years accumulation of old leaves and detritus!
Duo Valve Replacement:
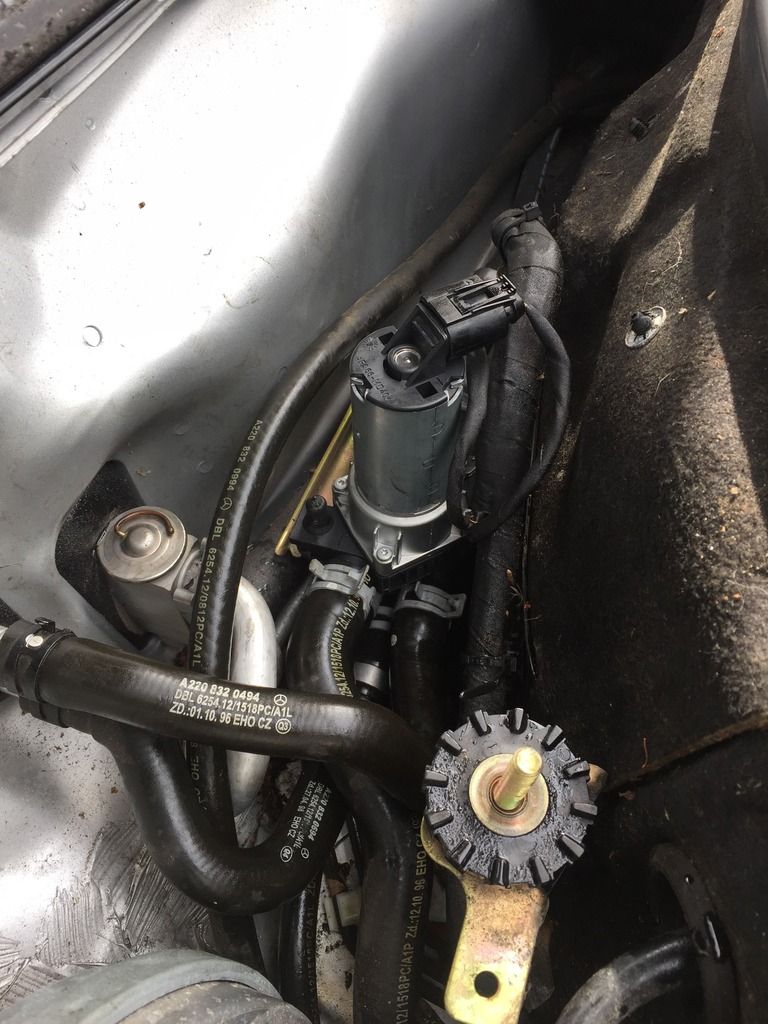
Remove the 2 electrical connectors
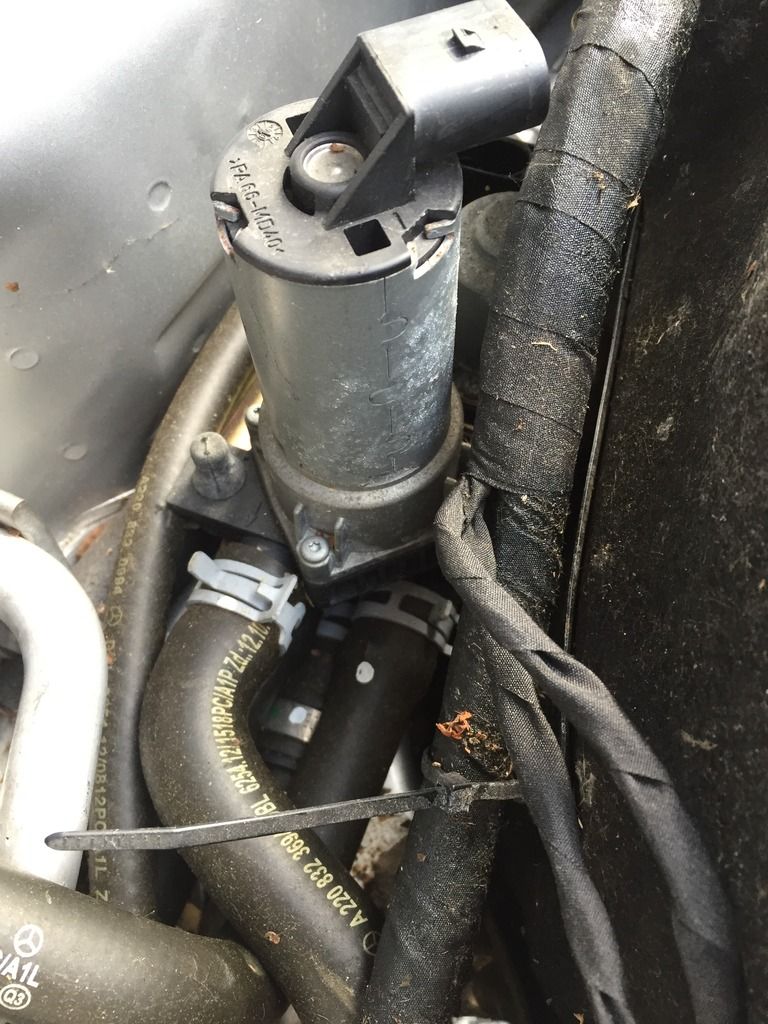
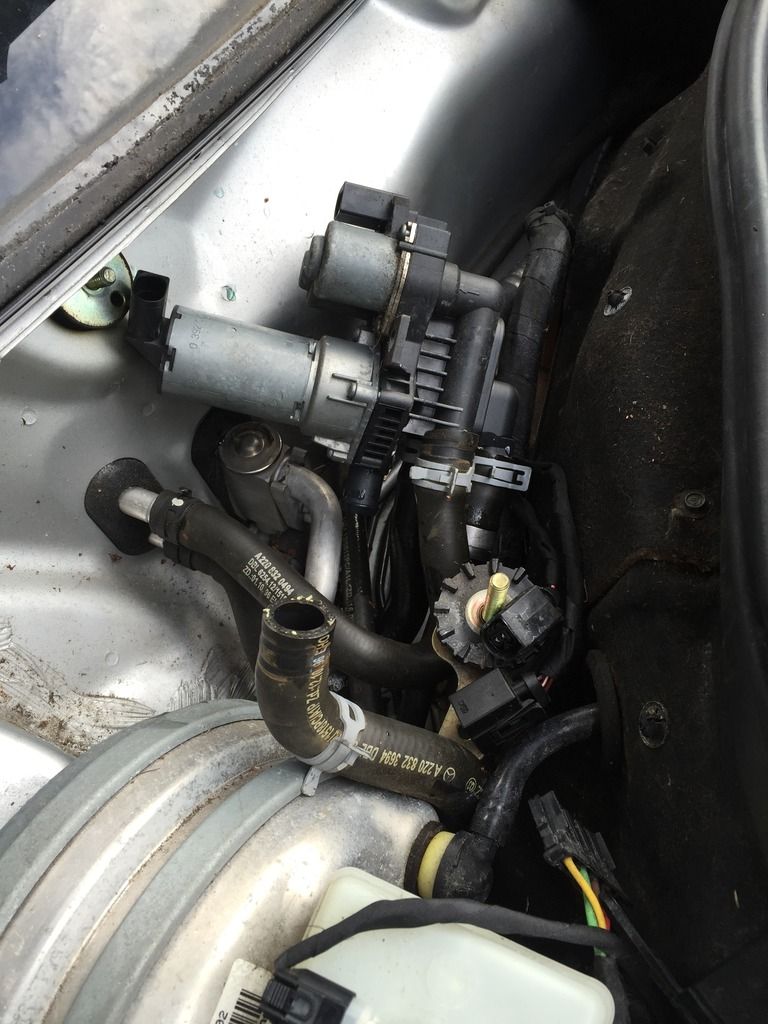
The valve unit is mounted on rubber bobbins, raise the unit to gently put the bobbins under tension, using a blunt object squidge the rubber bobbin back through the hole (work your way round bit by bit) - there are 3 of them to do, at that stage the whole unit can be raised a few inches to make removal of the hoses much easier.
Remove the hoses one by one.
I only lost aobut 250Ml of fluid doing this so no need to clamp hoses etc, just elevate the open end of the pipe that leaks coolant.
Chuck the old unit in the bin and fit hoses to the new unit.
Place the new unit (with newly fitted hoses) loosley back on top of the 3 rubber bobbins so that they just poke through thier respective holes.
Grab the rubber bobbin with a pair of pliars, hold the new Valve body down and pull up on the pliers, the bobbin will "pop" back into place (repeat for the other 2 bobbins).
Replace all of the other gubbins that you removed, not that you will need to line the wipers up using the tape you put on the windscreen at the start (you did....didn't you? ).
).
A bit daunting at the start but actually quite easy to do, and very satisfying now that it blows cool as it should again!
Regards
Jim
(Photo's to follow shortly)
Having jumped into older car ownership I fully expected to have to fix few niggles to get things ship shape, and I haven't been disappointed so far
Following on from my last thread of replacing the Crank Postition Sensor
http://www.mbclub.co.uk/forums/engine/193805-w220-s350-hot-starting-problem.html
The next on the list of jobs is to cure a problem whereby the drivers side heater output would slip into inferno mode whilst the remainder of the vents would be happily pumping out chilled air.
Having invested heavily in some advanced diagnostics (30 mins of googling!) the most likely culprit was the Duo Valve that balances hot/cold water for the left/right sides of the cabin.
There are a few DIY options listed once you start digging:
1. Give it to MB Main dealer, hand over wallet, problem resolved.
2. DIY, remove, clean, refit, cross fingers that it now works.
3. DIY, remove, clean, fit repair kit of O Rings and other seals (£60 from Taiwan), cross fingers that it now works and isn't a solenoid or the motor.
4. DIY, EBay used item, cross fingers that it works.
5. DIY, Purchase spare from MB Main dealer and self fit (£212)
6. DIY, Purchase from Inchape on line and self fit (£180)
Given that I'm running this in "frugal" mode, and I actually wanted a fix rather than have to do the job twice, I therefore went for option 6.
In essence the job wasn't particulary complicated, only took a handful of tools and 1.5 Hrs taking it easy!
Remove the Wiper arms (I had to use a puller as the articulated arm was firmly stuck in place). Before you remove the arms put some masking tape on the windscreen and scribe the blade position onto the tape.
Remove the 4 plastic screws holding down the black plastic cover under the wiper arms.
Remove the huge aluminium casting that holds the wiper motor (1 electrical connector, 4 nuts).
Remove 11 years accumulation of old leaves and detritus!
Duo Valve Replacement:
Remove the 2 electrical connectors
The valve unit is mounted on rubber bobbins, raise the unit to gently put the bobbins under tension, using a blunt object squidge the rubber bobbin back through the hole (work your way round bit by bit) - there are 3 of them to do, at that stage the whole unit can be raised a few inches to make removal of the hoses much easier.
Remove the hoses one by one.
I only lost aobut 250Ml of fluid doing this so no need to clamp hoses etc, just elevate the open end of the pipe that leaks coolant.
Chuck the old unit in the bin and fit hoses to the new unit.
Place the new unit (with newly fitted hoses) loosley back on top of the 3 rubber bobbins so that they just poke through thier respective holes.
Grab the rubber bobbin with a pair of pliars, hold the new Valve body down and pull up on the pliers, the bobbin will "pop" back into place (repeat for the other 2 bobbins).
Replace all of the other gubbins that you removed, not that you will need to line the wipers up using the tape you put on the windscreen at the start (you did....didn't you?
A bit daunting at the start but actually quite easy to do, and very satisfying now that it blows cool as it should again!
Regards
Jim
(Photo's to follow shortly)

