Wheel arch liner stud repair

Page may contain affiliate links. Please see terms for details.

Yogioes

New Member
SUPPORTER
Joined
Nov 1, 2018
Messages
20
Location
Renfrewshire, Scotland
Car
2000 R129 SL320
On removing the rear wheel arch liners from my R129 4 of the 6 studs sheared off.
One will be an easy repair as it took a 30mm circle of the panel with it so I can easily weld a bolt to the back of the repair panel. The area around the hole is still good metal.
I am looking for suggestions for the others. I don't think there is access to the back of some of them.
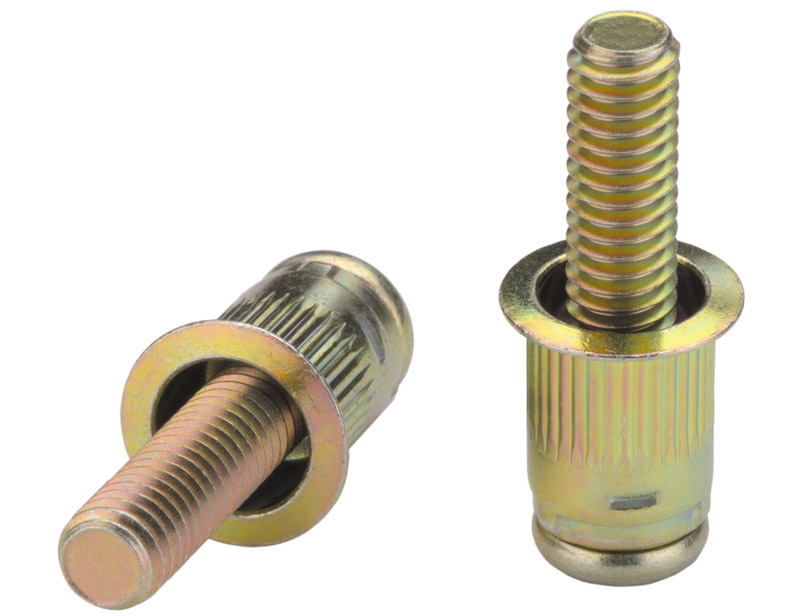
I have seen a possibility on a parts image for A 0009901210 as a parts kit repair but I'm not sure how that works.
My other option is to attempt to weld on a bolt to the wheel arch.
I'm sure I am not the first to have come across this problem so any suggestions are welcome.
Thanks

IMG_2086.JPG
 
Can you grind and drill the others to accept a threaded rivet? Either of these, depending on what suits you

AES.jpg


51AiCRdfvJL._SL1001_.jpg
 
The part number you linked too looks like a rivet nut etc. anyway A0009901210
 
I think the repair kit from Mercedes is basically a Rivnut with a screw in stud for one of those plastic nuts to go back on.

Where you can get a new Rivnut in I'd do this, just watch the metal around as the pressure to compress the nut could pull more metal away making the nut too small.

Clearly in the above one you will need to weld in a new piece of metal, I'd do this and just add another Rivnut too.
(I'm saying this quiet as my mate loves Rivnuts, I only have to mention one and he pops out like a Genie with tools in hand)
 
Hi,
Interested in this thread as I had a couple shear on my old AMG C class.
I google imaged the MB Pt. No. and like Moodi says looks very much like a riv nut.
If you scroll down the google image page there seems to be other similar solutions for Audi's, which simply look like a special pop rivet therefore not requiring a riv nut gun, I think these would be my chosen solution.
 
I checked the price of what appears to be the Mercedes rivet nut repair part.
£16.56 each
I need at least 4 so that's £66 and I still don't have the tool to rivet them in place.
So that has justified the purchase of a Sealey kit and some assorted rivet nuts in steel and aluminium.
I might try to get some hanger bolts, threaded at one end and self tapper on the other, or I'll just use bolts.

The option where the stud is part of the rivet nut looks good although I not sure that my tool will pull those in ok.
I did wonder if it is possible to pull them in with nuts, bolts, washers and a spanner or socket.

While doing my search on the internet I came across Rivnuts Sealcote version which looks very good. No through hole and the Rivnut seals against the panel.
rivnut-sealcote-blind-rivet-nuts-low-head-seal-feature1.jpg
 
I wish I had bought a rivet nut set years ago. What a great idea.

IMG_2148.JPG


This is the one fitted to the welded repair.

IMG_2112.JPG


There were two screws also missing from the front arch liner but they were already gone when I got there.
I had previously decided to leave them as it was but flushed with the success with the new tool I decided to sort those too.
On these ones I coated the hole and the rivet nut with Dynax UB before insertion.

I'm no looking for other places to fit rivet nuts!
 
Which dowel bits did you purchase? or did you just use a metal screw to insert into the rivet. Have got 3 or 4 to fix in various places (front and rear fender)

I did purchase one of the MB ones (around £10) as a reference but am not having much luck finding the exact ones online, I found some of these but they are too thick for the plastic nuts.
 
Hmmm, not sure what you mean by dowel bits?
I believe it is possible to fit rivet nuts using a bolt and washer to compress them into position. However, I recall watching a youtube video of someone doing that and it looked a bit awkward so I bought the tool for setting them in place. It pulls them into place without any rotational force as you may get with the bolt method.
I also bought some of the bolts / screws in your link but decided against using them. The bolt part would need to be fixed into the rivet nut somehow.

The tool has 5 sizes of thread attachments and I bought an assorted set in steel. I also bought a set in aluminium in case I struggled to pull in the steel ones. I used the steel ones.
The set of 165 pcs in steel cost £10.59 from Amazon.

I bought new plastic nuts for retaining the arch liners. I then used a combination of drills and a router to trim the hex section out leaving a small hole. I used stainless bolts through these to hold it all in place. The bolts were coated in copper grease in the hope of halting any dissimilar metal corrosion.

Hopefully that helps?

IMG_2160.JPG
 
That helps

I purchased the sealy tool as well, will drill out the old bit and pull in the new rivet nuts and will use a bolt instead, thanks for all the tips

I had to look twice and forgot you had to fix the rear wheel arch covering, I am doing the front but idea is the same

it looks very nice btw
 
Thanks, although pictures can be flattering. My recent attempts at DIY body tidy up were good at controlling the rust but the finish is not so good as the rattle can spray paint was a slightly different colour. The dark blue hides it well.
There is more info and lots of pictures on my Readers' Cars thread on PistonHeads titled Mercedes SL320 R129 - Part 2

I have enjoyed your posts about your ongoing maintenance, especially the one about the wings although I would be disappointed to only get 4 years before needing to do them again.
It is pretty much a constant battle to keep the rust under control although I have found this car to be a lot better than any other I have worked on. For the most part MB designed in the protection and it's just a few areas that let them down.
 
just read you pistonheads post, you and I are pretty much doing what I am doing, going round the car finding bits to fix, I started off with the 4x struts under the car (the run from the back to the side sills and 2x from the front centre of the car to the side sills) I then spotted some rust under the car where a rubber grommet, was missing, next the right side sill came off, ARB has come off, right wing, front bumper (which had a small crack on the right side, much smaller than yours) and fixed it with the same wayside stuff (great minds :) and some pop rivets. still not perfect but good enough for now.

My plan is to remove most of the surface rust from the front suspension, then move onto the left wing and left side sill and slowly start putting it all back together again, I am running out of space in the garage so may start putting the right side sill back on soon, also purchased lots of rubber grommets and plugs as most of them are split after 23 years
 
Finally got around replacing 4 of the 5 studs for the front wheel arch liner.

I had to use one of the expensive mb studs and the other 3 were standard of the amazon shelf parts.

at first I was a bit apprehensive drilling into the metal work but once you get started you cannot wait to do the next one.


0E8ED291-928C-4EBE-AC02-6245857CF88C.jpeg
Need to clean the area and apply some preventative rust treatment.
 
They are a joy to use. Such an easy solution to the problem.

I ground the remains of the old stud flat and drilled the hole for the rivet nut in the original location.
Have you chosen to put yours to the side of the old stud or is that just how it looks in the pictures?
 
Hi. 2 went at the same spot (I was able to drill from the other side and drill out the old remaining bit of the screw fixing) and the other 2 1cm to the side. Will try and grind down like you suggested when I come to do the other side.
I noticed the previous picture was pretty lousy.
Slightly better one of the £15 official mb part need to put some stone chip on to protect it further 7C903F45-A472-46B2-8C01-755C4379CEC7.jpeg
 
Hmmm, not sure what you mean by dowel bits?
I believe it is possible to fit rivet nuts using a bolt and washer to compress them into position. However, I recall watching a youtube video of someone doing that and it looked a bit awkward so I bought the tool for setting them in place. It pulls them into place without any rotational force as you may get with the bolt method.
I also bought some of the bolts / screws in your link but decided against using them. The bolt part would need to be fixed into the rivet nut somehow.

The tool has 5 sizes of thread attachments and I bought an assorted set in steel. I also bought a set in aluminium in case I struggled to pull in the steel ones. I used the steel ones.
The set of 165 pcs in steel cost £10.59 from Amazon.

I bought new plastic nuts for retaining the arch liners. I then used a combination of drills and a router to trim the hex section out leaving a small hole. I used stainless bolts through these to hold it all in place. The bolts were coated in copper grease in the hope of halting any dissimilar metal corrosion.

Hopefully that helps?

View attachment 100515
wow.. looks factory fresh!
 
Hi. 2 went at the same spot (I was able to drill from the other side and drill out the old remaining bit of the screw fixing) and the other 2 1cm to the side. Will try and grind down like you suggested when I come to do the other side.
I noticed the previous picture was pretty lousy.
Slightly better one of the £15 official mb part need to put some stone chip on to protect it further View attachment 101735

how did you get access "to the other side"? take the fender off?
 
how did you get access "to the other side"? take the fender off?
I had the fender off for some other repairs at the time but some of them you can do with the fender on (maybe all of them)2 of them are located next to the coolant reservoir and the fender
 

Users who are viewing this thread

Back
Top Bottom