thamesc180k
Member
hi again , can the headlights on my w203 be removed without removing the bumper? might polish/clean them.
thanks Karl
thanks Karl
Follow along with the video below to see how to install our site as a web app on your home screen.
Note: This feature may not be available in some browsers.
I don't think so. I did mine on my w203 coupe and the bumper had to come off. But honstly, it was a one person job to remove it, provided you had a bunch of towels or old sheets etc to prevent scratching when you removed it. Took about 10 to 20 mins, depending on how rusted the screws/bolts were that you reach through the wheel arch liners.hi again , can the headlights on my w203 be removed without removing the bumper? might polish/clean them.
thanks Karl
ok thanksI don't think so. I did mine on my w203 coupe and the bumper had to come off. But honstly, it was a one person job to remove it, provided you had a bunch of towels or old sheets etc to prevent scratching when you removed it. Took about 10 to 20 mins, depending on how rusted the screws/bolts were that you reach through the wheel arch liners.
yes can do and have but thought i might tackle them with fine grade glass paper first and removing the bumper might aid fitting the after market trans cooler and i may respray the black grills at the bottom if i take it off. do it all in one go.Can you not polish them in place?
yes can do and have but thought i might tackle them with fine grade glass paper first and removing the bumper might aid fitting the after market trans cooler and i may respray the black grills at the bottom if i take it off. do it all in one go.
Did the same with CLK, open bonnet and use masking tape on the bumper.Just mask up round them and go steady with the wet and dry. Bumper off on an 04 plate car could get messy


ok thanks, i would have to wait 2 weeks to get anything from ebay, so use the local hardware store to get fasteners, and they have everything imaginable, well almost.When I removed the bumper, it was those bolts/screws with Torx head that were behind the wheel arch liner that gave me most issues.
I'd definitely give them a spray with some decent penetrating oil 15 mins before you try to under them.
I'd also plan on replacing them, as by the time I'd removed mine, the torx head had seen much better days and I wasn't confident that I could get them back in, or if I did, that they would ever come out again.
Having had a root through Partsouq, I think those torx screws are part number N 000000 000530.
4.8mm x 22mm self tapping torx head.
If you look for your specific model, you will be able to see exactly, usually under "attachement parts" near the bottom of the list, then "front bumper".

You can also buy them from the likes of eBay, at least in the UK

Flanged Self-Tapping Screws TORX Pan Head Black Galvanised 3.9 - 4.8 mm | eBay
Material: non-rusting steel, surface galvanised. surface: galvanised. Screw: TORX hexalobular flanged self-tapping screw. Flanged Self-Tapping Screws. Socket: Torx. AUPROTEC Tapping Screws. socket: Torx hexalobular.www.ebay.co.uk
Those blooming things always seem to weld themselves into the spire nutsWhen I removed the bumper, it was those bolts/screws with Torx head that were behind the wheel arch liner that gave me most issues.
I'd definitely give them a spray with some decent penetrating oil 15 mins before you try to under them.
I'd also plan on replacing them, as by the time I'd removed mine, the torx head had seen much better days and I wasn't confident that I could get them back in, or if I did, that they would ever come out again.
Having had a root through Partsouq, I think those torx screws are part number N 000000 000530.
4.8mm x 22mm self tapping torx head.
If you look for your specific model, you will be able to see exactly, usually under "attachement parts" near the bottom of the list, then "front bumper".

You can also buy them from the likes of eBay, at least in the UK

Flanged Self-Tapping Screws TORX Pan Head Black Galvanised 3.9 - 4.8 mm | eBay
Material: non-rusting steel, surface galvanised. surface: galvanised. Screw: TORX hexalobular flanged self-tapping screw. Flanged Self-Tapping Screws. Socket: Torx. AUPROTEC Tapping Screws. socket: Torx hexalobular.www.ebay.co.uk
Yeah, I saw New Zealand and figured supply might not be identical, so I thought adding the dimensions of the fasterner could be useful.ok thanks, i would have to wait 2 weeks to get anything from ebay, so use the local hardware store to get fasteners, and they have everything imaginable, well almost.
I'm going to sound a bit like the Paint Police, but be careful using 2 Pack paint - a respirator really should be worn.Yeah, I saw New Zealand and figured supply might not be identical, so I thought adding the dimensions of the fasterner could be useful.
Depending on how close your nearest Mercedes dealer is, you could give them a call and ask. In the UK on older Mercs, often bits like this can be surprisingly cheap.
Give us an update once you've completed. We like to hear how the job went.
One other tip. When I did my w203 headlights, I used wet and dry paper (wet), working from about 800 grit up to 1200 grit, sanding away all the yellowing.
Obviously once I'd finished the headlights were totally cloudy.
I then sprayed with a 2K clear coat lacquer from a can, I think three coats.
The lacquer immediately fills all the micro scratches from the sanding with the 1st coat, self levels and leaves a totally clear finish. The transformation was amazing.
Plus 2K clear coat has really good UV resistance, so provides as good (probably better) UV protection compared with any 'headlight restoration' kit available.
If you don't use a UV protective coating, they will degrade quickly again.
I bought this one
Apologies for the Amazon UK link, but just showing what I used as an example.
There is a push button on the bottom of the can so that the hardener mixes with the clear coat, and you have around 24 hours use time I think (it was a warm day, and I needed about 3 hours).
I sprayed outside to avoid the fumes, but did get a little bug on one lens of the first spray. I hooked him off with a screw, and then the 2nd and 3rd coat thankfully covered the paint defect so it was almost invisible on very close inspection. Phew!
Yes, agreed. Thankfully the headlights are so small, I took a big breath, sprayed a headlight, walked a good 10m away and then started breathing. Wait a minute and then repeat on the second light. Probably okay.I'm going to sound a bit like the Paint Police, but be careful using 2 Pack paint - a respirator really should be worn.
lol bugs galore round here, might do it in the shed and get high, no i have a mask for 2k from when i sprayed the Alfa.Yeah, I saw New Zealand and figured supply might not be identical, so I thought adding the dimensions of the fasterner could be useful.
Depending on how close your nearest Mercedes dealer is, you could give them a call and ask. In the UK on older Mercs, often bits like this can be surprisingly cheap.
Give us an update once you've completed. We like to hear how the job went.
One other tip. When I did my w203 headlights, I used wet and dry paper (wet), working from about 800 grit up to 1200 grit, sanding away all the yellowing.
Obviously once I'd finished the headlights were totally cloudy.
I then sprayed with a 2K clear coat lacquer from a can, I think three coats.
The lacquer immediately fills all the micro scratches from the sanding with the 1st coat, self levels and leaves a totally clear finish. The transformation was amazing.
Plus 2K clear coat has really good UV resistance, so provides as good (probably better) UV protection compared with any 'headlight restoration' kit available.
If you don't use a UV protective coating, they will degrade quickly again.
I bought this one
Apologies for the Amazon UK link, but just showing what I used as an example.
There is a push button on the bottom of the can so that the hardener mixes with the clear coat, and you have around 24 hours use time I think (it was a warm day, and I needed about 3 hours).
I sprayed outside to avoid the fumes, but did get a little bug on one lens of the first spray. I hooked him off with a screw, and then the 2nd and 3rd coat thankfully covered the paint defect so it was almost invisible on very close inspection. Phew!
Your correct mention of health risks would have carried more weight if you weren’t wearing reindeer horns buddyI'm going to sound a bit like the Paint Police, but be careful using 2 Pack paint - a respirator really should be worn.
Just be thankful it's not my Raunchy Santa outfitYour correct mention of health risks would have carried more weight if you weren’t wearing reindeer horns buddy
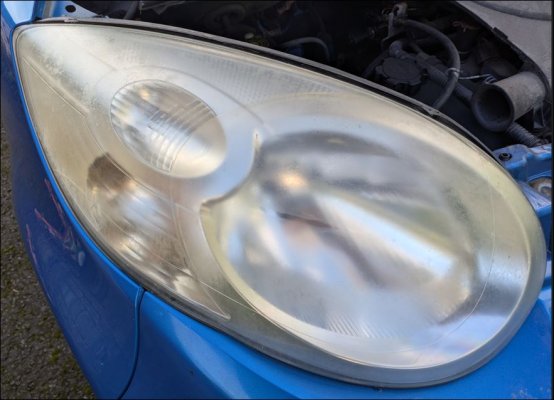
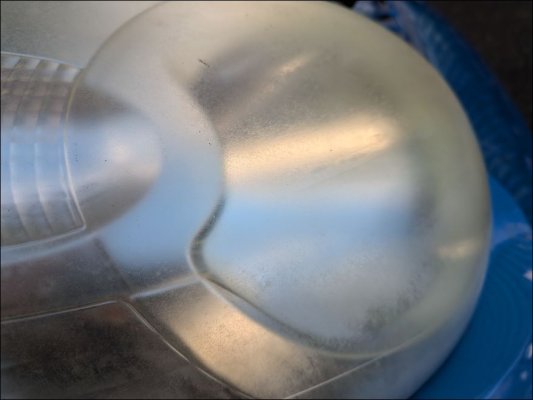
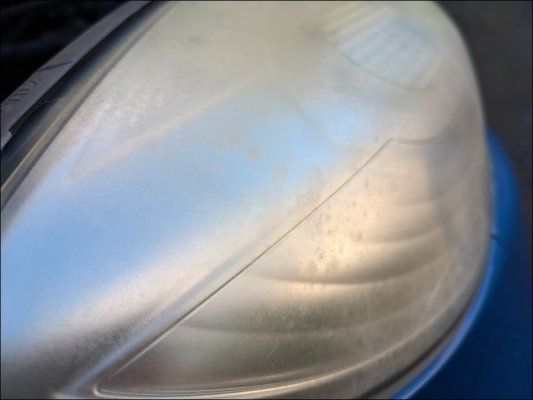
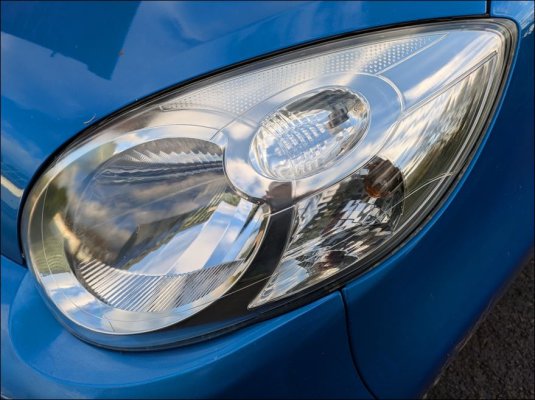
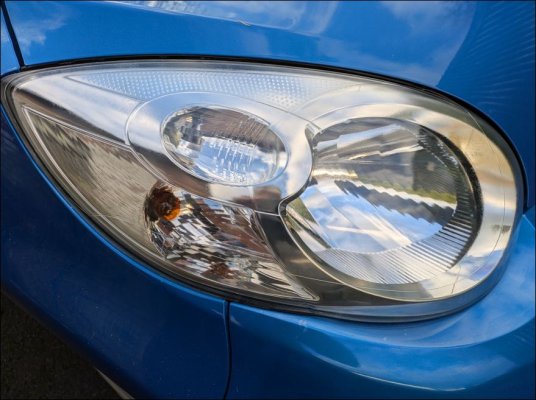
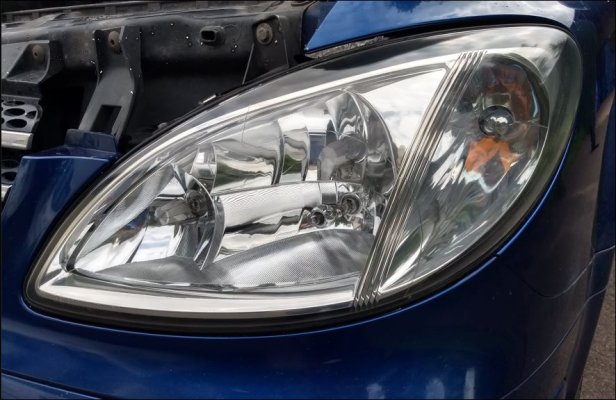
what a difference ay? thats what i want but i think mine have a pattern (like glass ones do) and the top (indicator) part is 'frosted'.Having originally tried a 'kit' that involved wet sanding with various grades followed by polishing I now have a process for lights that only uses two stages (plus sealing).
I bought a cutting compound and foam disk (intended for paint correction) from a detailing place, plus a polishing disk and polish. Using these in a cordless drill (they Velcro onto a foam backing disk) is pretty quick & easy and gives excellent results (better than the wet sanding method). I put masking tape round the edge of the clusters and protect the engine bay (bonnet up) from splatter with sheets of newspaper.
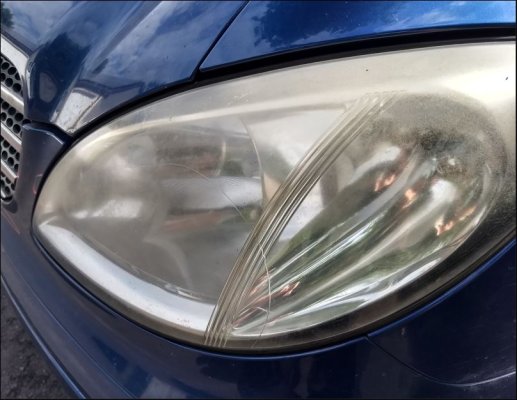
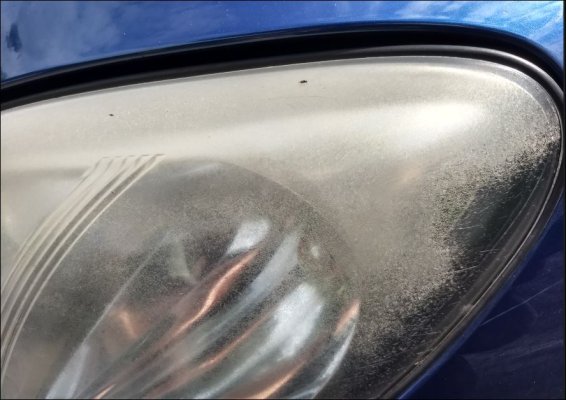
This is my son's Citroen, which is about as bad as I've ever seen (it had been an advisory on the previous MOT and would likely have been a fail this time). Before (after washing & drying):
View attachment 165418
View attachment 165419
View attachment 165420
After:
View attachment 165421
View attachment 165422
Obviously 'curvy' units like this are harder to do than ones with flat surfaces. My Vito wasn't quite as bad to start with but still not good!
View attachment 165423
View attachment 165424
After:
View attachment 165425
We use essential cookies to make this site work, and optional cookies to enhance your experience.
