• The Forums are now open to new registrations, adverts are also being de-tuned.

W204 rear camber arm

Fergalw204

Member
Joined
Jan 28, 2018
Messages
57
Location
Stockton on tees
Car
C220 sport facelift
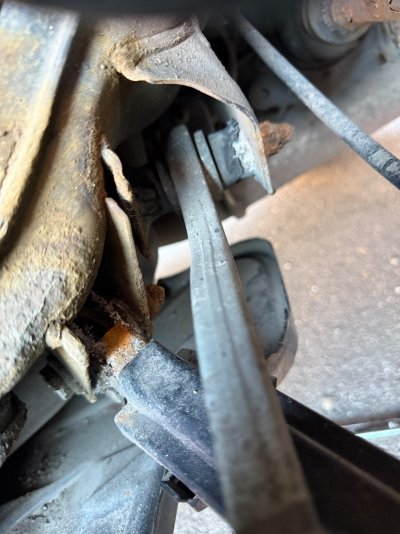
I have recently changed my front left rear control arm and took the car to visit a Hunter alignment tech who came back to me with a few issues to rectify before he carries out the alignment.

The inner tie rods and track rod ends need replacing along with the rear camber arms.
I am going to be carrying out the work myself but haven't managed to get under the car to inspect the rear setup for myself yet due to work and current poor weather conditions.

Has anyone had any experience changing the rear camber arms on a W204, is it straight forward or does it involve dropping the sub frame etc?

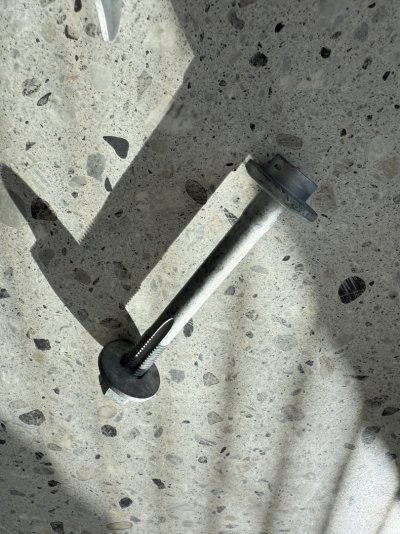
I have ordered the Lemforder camber arms and new bolts from Autodoc and just awaiting them to be delivered, I am guessing that the old bolts will be completely seized and if I can get in I will probably just grind them off rather then struggle with the old ones.
 
Not sure how different they are from a 203 C class, mine were rusted fast. Not a major job if you have the right tools AND the eccentric bolts have been put in 'the right way' .

Bit like this. the bolt end on the eccentric is a Torx and access can be a bit tight. On assembly I smeared the whole caboodle with anti seize , so if rear wheel alignment needs doing in the future it should move.

PS Do not assemble it with the nut on the end as shown in my photos (this was not my final assembly) get the bolt in from the other end. Its the right way.

arm.jpg rear eccentric.JPG eccentric view.JPG
 
Not sure how different they are from a 203 C class, mine were rusted fast. Not a major job if you have the right tools AND the eccentric bolts have been put in 'the right way' .

Bit like this. the bolt end on the eccentric is a Torx and access can be a bit tight. On assembly I smeared the whole caboodle with anti seize , so if rear wheel alignment needs doing in the future it should move.

PS Do not assemble it with the nut on the end as shown in my photos (this was not my final assembly) get the bolt in from the other end. Its the right way.

View attachment 168863 View attachment 168864 View attachment 168865
I’ve just completed the front inner tie rods and track rod ends so thought I’d take a look at the rear camber arm, my bolts are likely going to need cutting off because they are week seized.

My only problem is it doesn’t look like I have enough room to remove the bolt and be able to get the new one in with the very limited space that there is.
Why have Mercedes elected for the orientation of the bolt the way they have when it could have easily entered from the other side.

I have had the leave it for the time being as I don’t want to cut the bolt and not be able to get the car back on the road the same day.
Can you cut the bolt and then put a new one in from the other side ?
 
Can you cut the bolt and then put a new one in from the other side ?
That was my thinking but I’m not sure that even if I cut the nut off that they’ll be enough room to retrieve the bolt.
 

Attachments

  • IMG_1182.jpeg
    IMG_1182.jpeg
    294.3 KB · Views: 6
  • IMG_1180.jpeg
    IMG_1180.jpeg
    210.2 KB · Views: 6
Plan tomorrow is to cut off the arm and feed the camber bolt through other way from the way it’s installed now, should make any difference as the camber can still be set.
 

Attachments

  • IMG_1189.jpeg
    IMG_1189.jpeg
    453.5 KB · Views: 3
Just get it back in the easiest way for you , the eccentric cam part of the bolt and washer push up against the 'indents' pressed into the subframe on each side so it matters not which way the bolt goes in.

Just remember to put loads of anti seize on all the hardware before assembly. :thumb:
 
I tackled this yesterday and it turned out to be a lot more straight forward then I thought it would.

I cut the old ones off, cleaned up the area and installed the new arms and bolts along with a healthy amount of anti seize for future ease.
Took just over an hour and half to complete both sides just need to book in with the Hunter alignment next week.
 
When you take it for rear alignment take the suitable Torx tools along with you, Just in case.

Ask me how I know :rolleyes:
 

Users who are viewing this thread

Back
Top Bottom