Gadgetmaster
Member
- Joined
- Jun 2, 2017
- Messages
- 48
- Location
- Plymouth
- Car
- E220 W211, CLK 240 W209, MG Midget, Skoda Yeti (when my wife lets me borrow it)
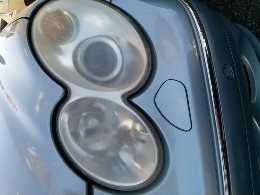
Parking the new CLK anywhere near my E-Class made me realise that the headlights on the new toy were in desperate need of some TLC. Thought I would do a review for you all, with some indications of what I needed to add to the kit, and how it has stood up to my ham-fisted efforts
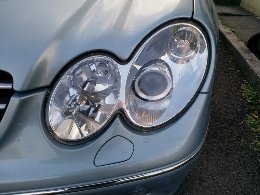
In brief, I was rather impressed with the kit as a whole, and it has certainly made a vast difference. There is certainly enough product included to do more than one vehicle, with the exception of the P3000 "trizact" disc, which disintegrated halfway through the first headlamp. I purchased a supply of replacements, and my second disk just about finished off the car, but was starting to delaminate from its backing at the end. I certainly wouldn't have risked it on another pass.
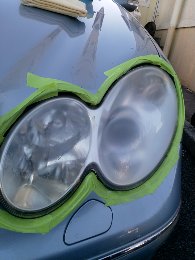
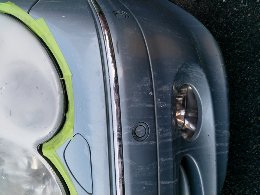
I also bought a roll of 25mm 3M masking tape, in addition to that supplied in the kit. Probably not entirely necessary, but I would rather be safe than sorry. in addition, I bought some headlamp sealant, which is an unforgivable omission from the 3M kit.
Note to 3M...the compound supplied is more than enough for one vehicle, but why oh why put it in a sachet. This makes it easy for the compound to flow out and go everywhere, and difficult to seal up again for later use. A small tube would be much appreciated instead of the sachet.
Pictures are from my near side light, which I did with a cordless drill, set to speed setting 20 out of 60. I did the offside at setting 40, and although the finish is good, I prefer the nearside slightly.
One tip that I would give is to use plenty, and I mean plenty, of water. My very first past, I just followed instructions, having washed the lamp before starting, but with no additional water. Thereafter, I soaked the sponge backing pad before each pass, and also wiped over the head lamp with a damp sponge.
On the off side lamp, I did allow the drill to jump once, which put some rather nasty scratches in the lens. These were, however, easily buffed out with a few passes of the P3000.
Ultimately, I only used three of the P500 discs, and two of the P800 discs. I would actually be happy to use all of these again at a push.
Anyway, enough of my gibbering, and onto the pictures.

