Kdshooter
New Member
I've been looking around for the past 2 weeks to get my centre console upgraded and I did collected some info from here and from other websites to get the upgrade done.
change the centre console from piano black to ash wood effect with clock.
The original didn’t come with the clock so I had to custom run new wires to get it working.

Very straight forward no coding needed.
Comes with 3 wires negative positive and Line
The clock connection has 3 numbers 1-2-3
connected to the fuse box (+)
connected to the ground (-) (earth)
connected to pin 26 in SAM unite located above the foot area above the hood opening lever.
The wires I used to connect on the clock pins was from arduino jumper wires male to female:

Next step is to remove the centre console, there are 2 screws need to be removed you can find a lot of videos on YouTube on how to remove it.
Now after removing the console will look like this:

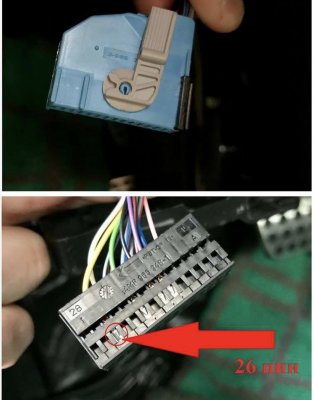
We need to locate the SAM unit as we said it is over the foot area above the hood lever:

You need to remove the blue connection it should be labelled with COC.

After removing the connection and take it off the casing you will see the wires connected to it.
You will need to connect the wire to pin 26. Please note it will be used if you have self-parking feature just attach the wire to it in my case I soldered the wire to it.
To take the pin off you will need a needle to push the connector out. The wire should go
straight to pin 3 on the clock.

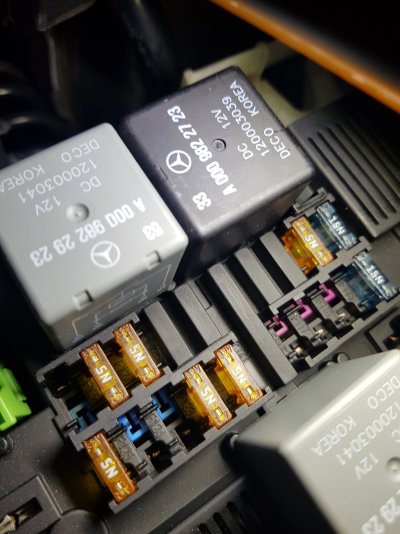
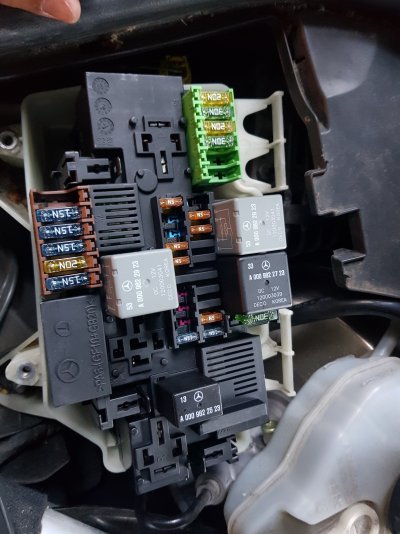
Now the fuse:
I made new connection on the fuse box for the positive connection straight to the clock:

Removing the box is very easy no tools needed just push the lid holding it from the top and lift it up it will come off.

I ordered this pin connector from ebay:
Part number A0115458426

The earth I connected it to a small bolt located under the foot area but you can connect it to any metal section in the car.
The clock must have power even if the car is switched off.
This is the final look:
Before:

After:

Please note:
Some picture I used in this explanation was taken from the internet as I didn’t had time to take pictures of the process.
Also make sure you tape the wires with wire loom tape to prevent any electronic shorts:

I hope this explanation is easy and clear for those who want to change their centre console.