HOW TO:
Remove & refit a (most likely rusty!) W202 Wing - Pre/Post facelift/C36/C43/C55 AMG
Time taken:
Under 30 mins
Tools required:-
10mm* & 13mm Socket, Philips screwdriver (*10mm extremely narrow!), Large sheet or towel to lay the wing on once free of the car
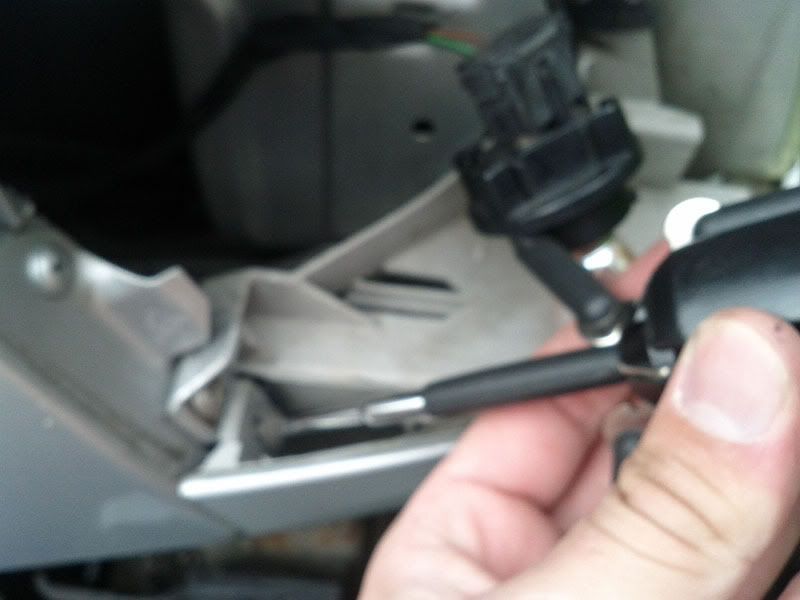
1. Remove the side indicator
With the bonnet open remove both of the front corner indicator lamps.
a) Pinch the two plastic tabs in, and then push the lamp forward until it pops out.
b) Once the lamp is clear of the car, twist the black bulb holder anti-clockwise and pull to release the bulb from the lamp.
2. After both side indicators are free of the car, remove the side repeater lamps by pushing them towards the front of the car firmly and pull outwards.
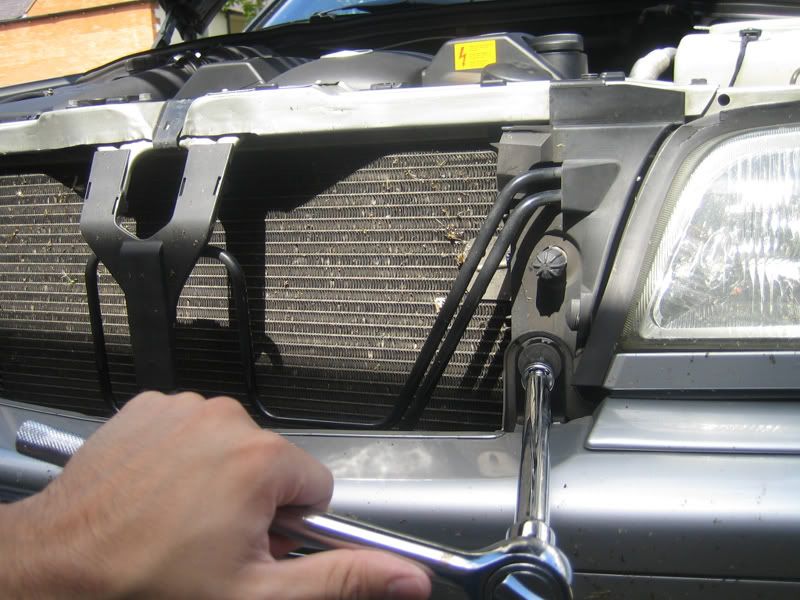
3. Remove the front bumper by undoing the 4x 13mm nuts. Full details of how to do this can be found in my other thread:
HOWTO: Remove a W202 front bumper
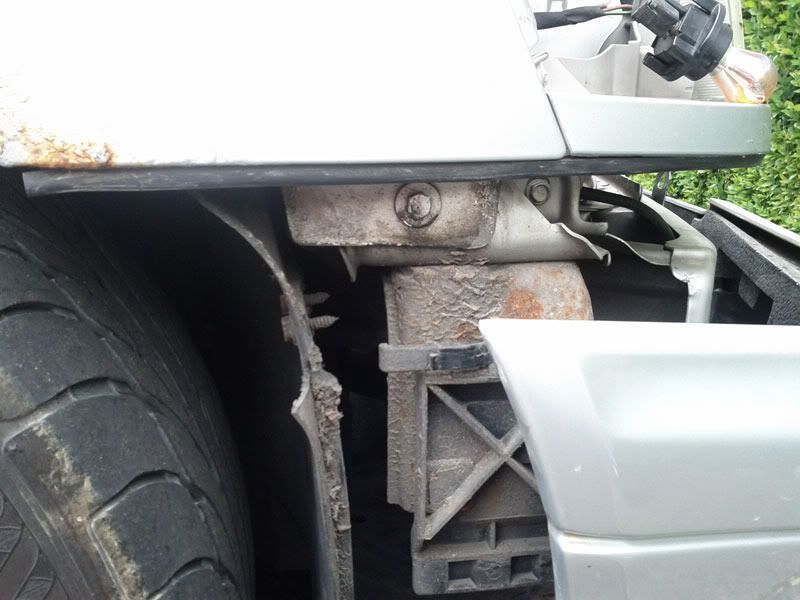
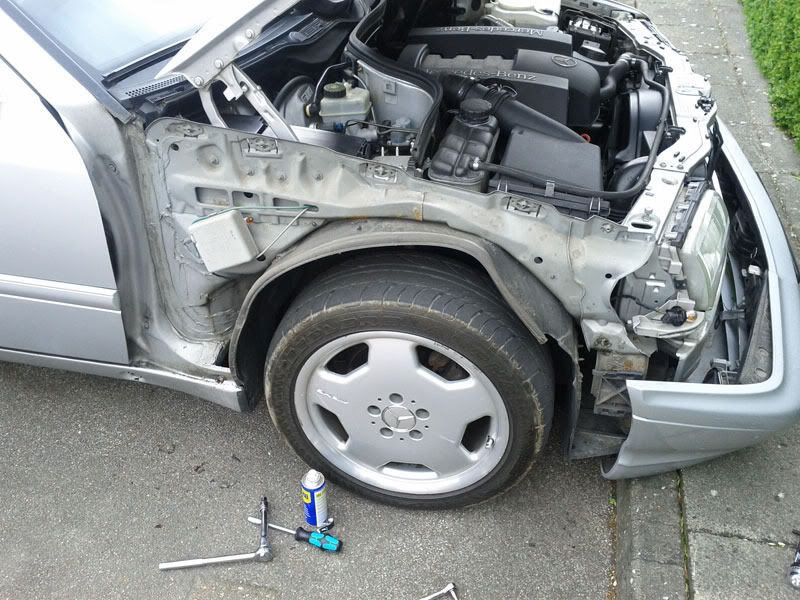
4. With the front bumper removed (or hanging off as per the photo) its time to remove the 10x 10mm nuts - see Red and Orange dots indicated in the photo
I strongly recommend that you use some WD-40 on each bolt, and leave for at least 4mins before you attempt to undo them, otherwise you run the risk of shearing off the nuts!
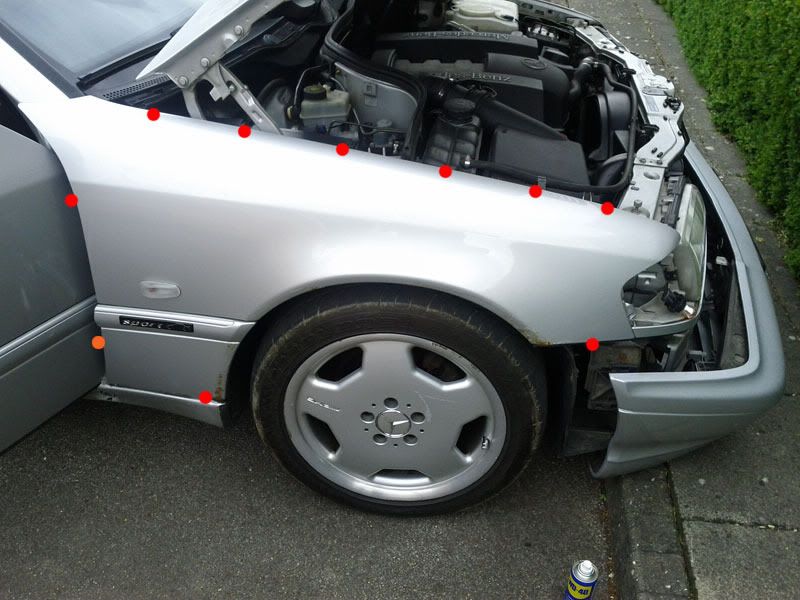
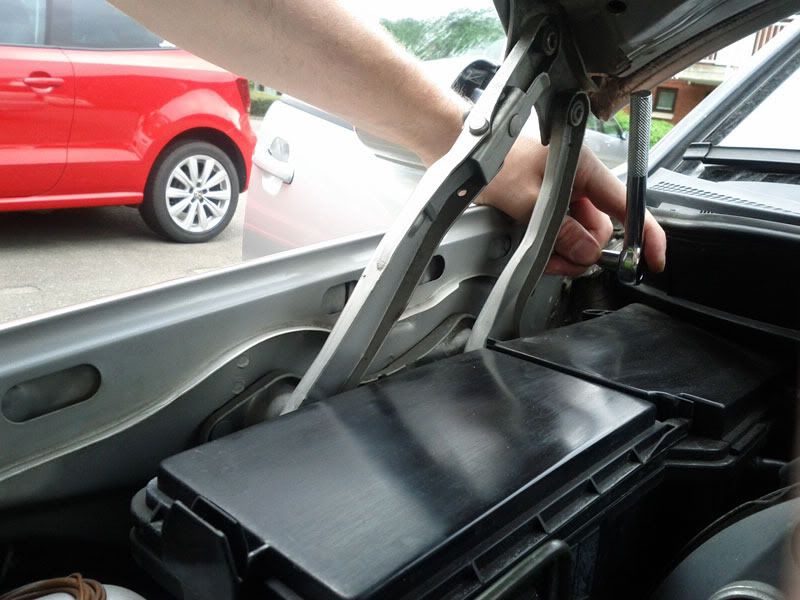
The most problematic bolt of the lot is the lower one next to the door, see the Orange dot in the photo. The access gap is extremely narrow and most socket sets will not be able to reach the bolt without damage to the door!
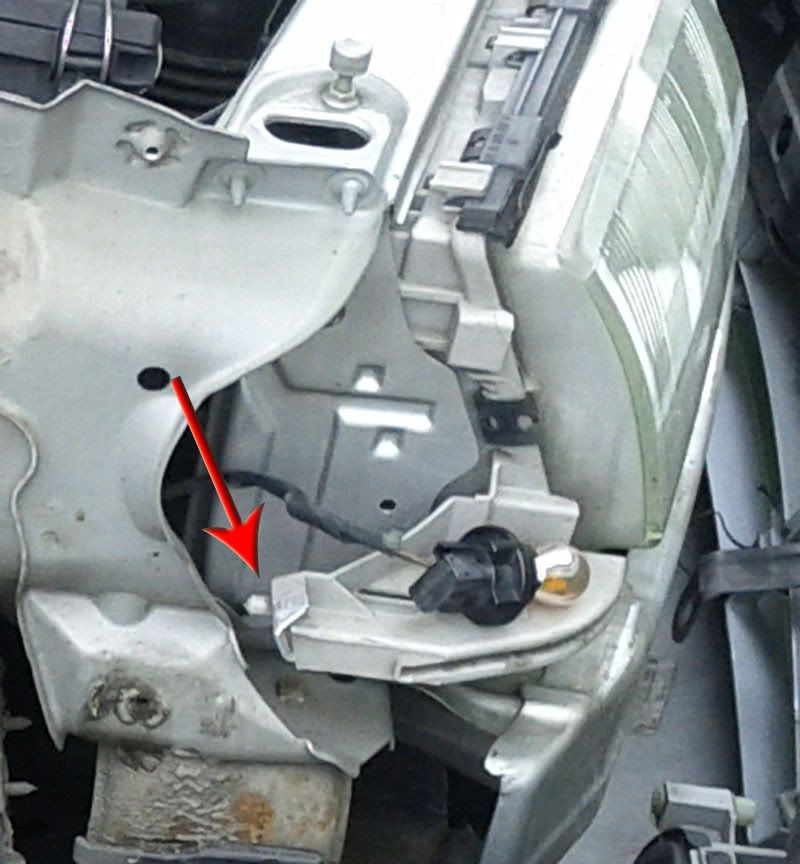
5. After you have removed all of the bolts there are still a handful of Cross-Head screws still remaining which also need to be removed.
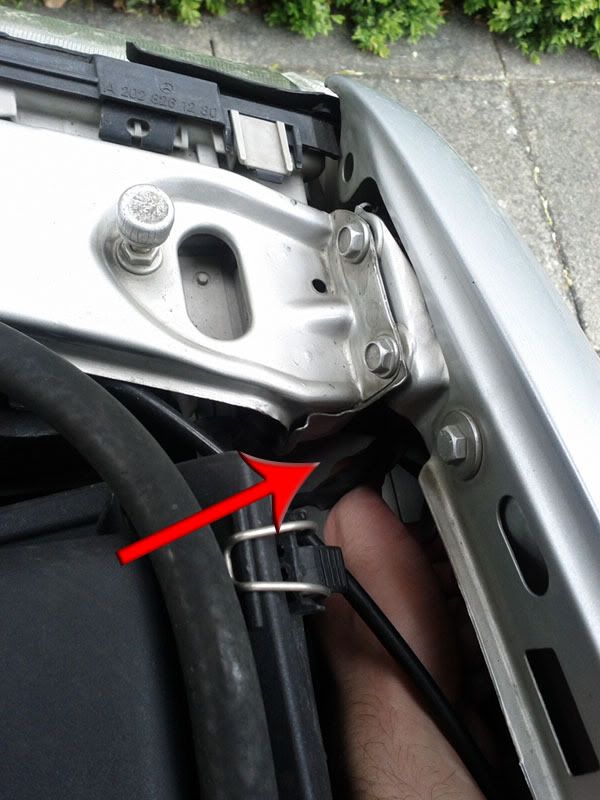
a) Start with the plastic trim panel below the headlights, this trim is held on by 1 screw at each end. For the inside end, simply lift the rubber seal to expose the screw as seen below:
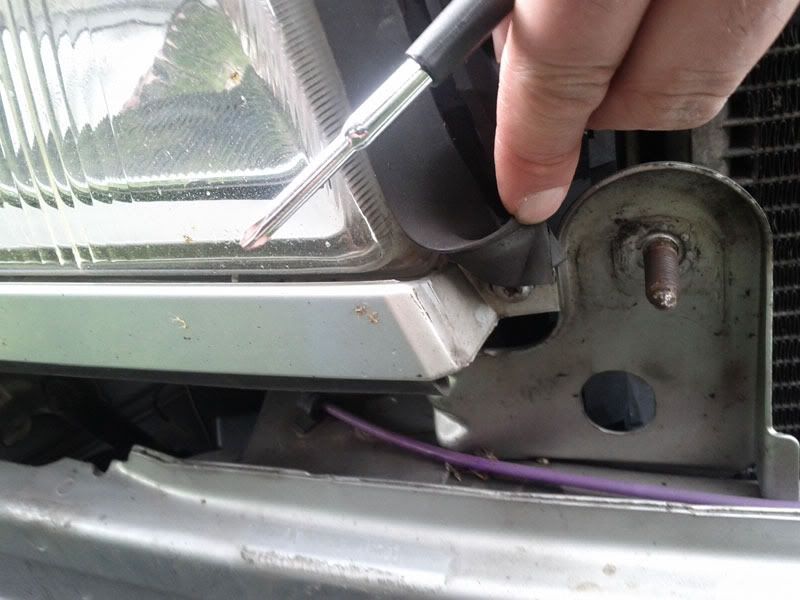
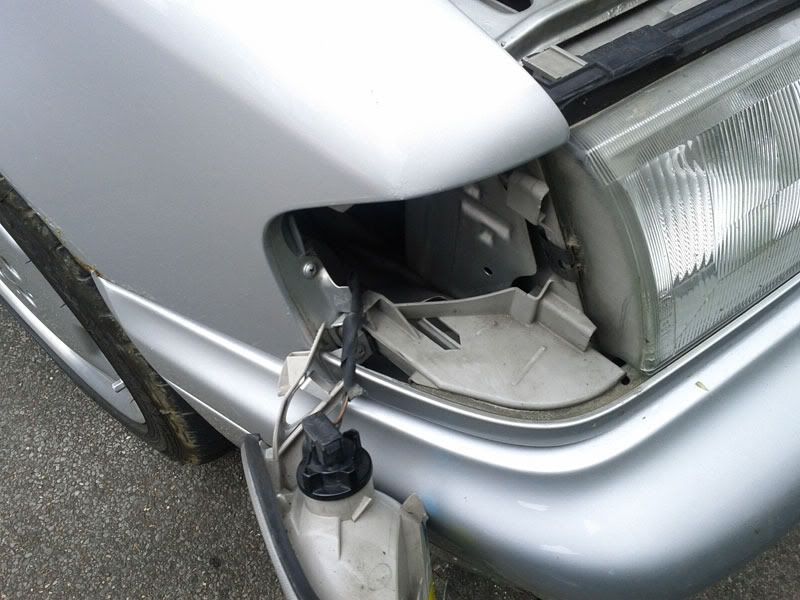
b) Now move onto the extra Cross-Head screw located within the front/side indicator hole, again use plenty of WD-40 before hand as this is likely to have rust on the screw.
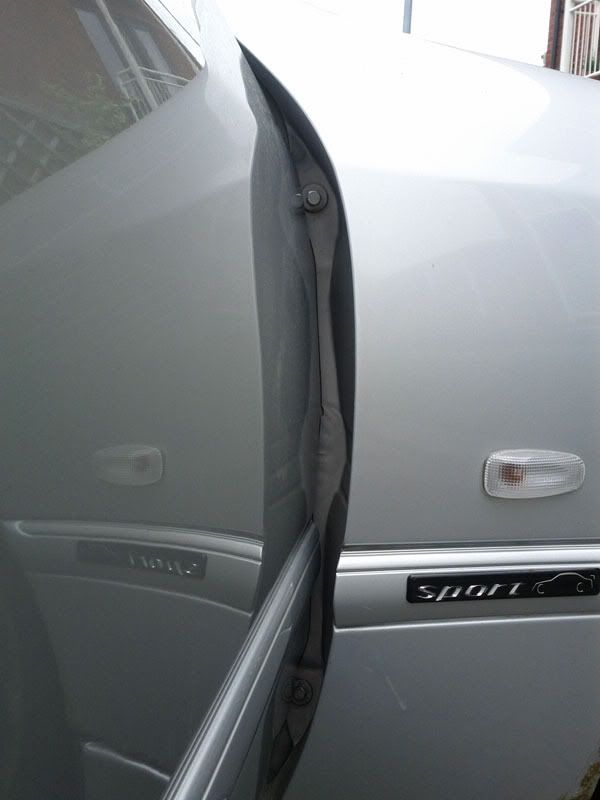
6. Now the wing is almost free, the only thing holding it in place is a small round section of grey headlight trim, which is interlocked with the black curve of plastic trim still attached to the indicator hole of the wing:
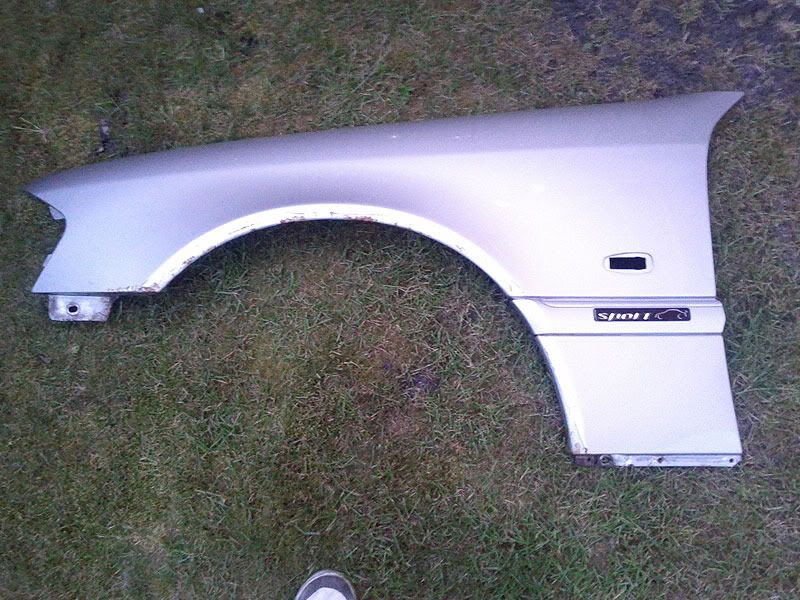
Carefully take the weight of the wing with two hands, from the door area of the wing, pull away from the car towards the front while keeping an eye on the interlocked trim under the headlight. After some adjusting the wing should be come free of the car.
Remember to handle the wing with care, placing it on an old towel/sheet etc to avoid any damage/scratches.
Fitting the wing back on is bascially the reverse, although locking the plastic trim back under the headlight trim is a total knightmare!
Remove & refit a (most likely rusty!) W202 Wing - Pre/Post facelift/C36/C43/C55 AMG
Time taken:
Under 30 mins
Tools required:-
10mm* & 13mm Socket, Philips screwdriver (*10mm extremely narrow!), Large sheet or towel to lay the wing on once free of the car
1. Remove the side indicator
With the bonnet open remove both of the front corner indicator lamps.
a) Pinch the two plastic tabs in, and then push the lamp forward until it pops out.
b) Once the lamp is clear of the car, twist the black bulb holder anti-clockwise and pull to release the bulb from the lamp.
2. After both side indicators are free of the car, remove the side repeater lamps by pushing them towards the front of the car firmly and pull outwards.
3. Remove the front bumper by undoing the 4x 13mm nuts. Full details of how to do this can be found in my other thread:
HOWTO: Remove a W202 front bumper
4. With the front bumper removed (or hanging off as per the photo) its time to remove the 10x 10mm nuts - see Red and Orange dots indicated in the photo
I strongly recommend that you use some WD-40 on each bolt, and leave for at least 4mins before you attempt to undo them, otherwise you run the risk of shearing off the nuts!
The most problematic bolt of the lot is the lower one next to the door, see the Orange dot in the photo. The access gap is extremely narrow and most socket sets will not be able to reach the bolt without damage to the door!
5. After you have removed all of the bolts there are still a handful of Cross-Head screws still remaining which also need to be removed.
a) Start with the plastic trim panel below the headlights, this trim is held on by 1 screw at each end. For the inside end, simply lift the rubber seal to expose the screw as seen below:
b) Now move onto the extra Cross-Head screw located within the front/side indicator hole, again use plenty of WD-40 before hand as this is likely to have rust on the screw.
6. Now the wing is almost free, the only thing holding it in place is a small round section of grey headlight trim, which is interlocked with the black curve of plastic trim still attached to the indicator hole of the wing:
Carefully take the weight of the wing with two hands, from the door area of the wing, pull away from the car towards the front while keeping an eye on the interlocked trim under the headlight. After some adjusting the wing should be come free of the car.
Remember to handle the wing with care, placing it on an old towel/sheet etc to avoid any damage/scratches.
Fitting the wing back on is bascially the reverse, although locking the plastic trim back under the headlight trim is a total knightmare!
Last edited:
")