• The Forums are now open to new registrations, adverts are also being de-tuned.

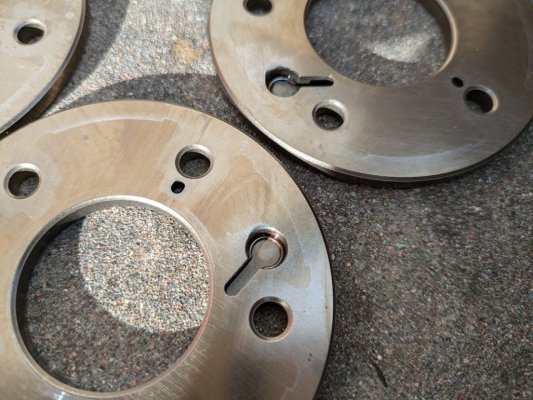
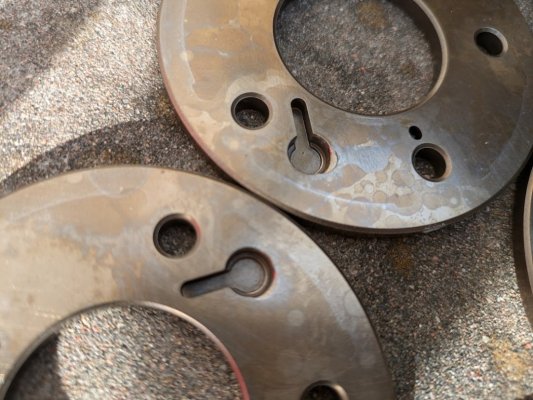
M156 Cam Adjuster plates

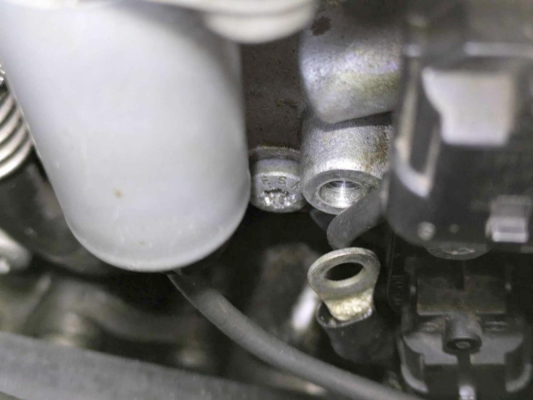
Thanks for the video. We did all that - lock tools on the front and rear of the camshafts, phaser bolts were all torqued to 45Nm plus 90 degrees. As you can see in my photo, the cam and phaser have moved but the adjuster body has not, so to me it looks like the cam has "adjusted". Nothing moved unexpectedly whilst torquing the bolts down, it was only after the rear lock bar was removed that the exhaust cam moved.

I've watched many of these videos and am certain we did nothing wrong nor missed any steps. I'm going to try rotating the engine by hand; if I can get the crank through two full rotations without issue then there's no danger to internal components so the car should be safe to start at least. That just leaves the small matter of that snapped bolt...
 
The tool should be seated when timing is set at 40 degrees, if it's not seating the timing is likely to be out. You could slowly complete 2 rotations by hand and reintroduce the tool at 40 degree. If it doesn't seat, I would loosen the bolt and re adjusted and tighten. Keeping a close eye 🤞
 
The engine was at 40 degrees and the lock tools were all in place and all four were removed, rebuilt, reassembled and torqued in place correctly, we were absolutely 101% certain of that. No chances were taken :). I think that for some reason that adjuster just rotated as it's meant to - I don't think we specifically rotated any of them to the locked position during assembly but maybe there's enough pressure in one cylinder to push back on camshaft to rotate it a little.

I think if I rotate the engine by hand again the others will possibly all pop into place as well. I've emailed 63Motorsports and murder.63 on Instagram to get their views too.
 
Got a response from 63Motorsport:

The phasers have moved from not being in locked position or home position as you had reinstalled, “I don't think we put any of the four adjusters back into the locked position on reinstallation”. It timed because there is pressure from the valve/springs pushing on the camshaft lobes and the exhaust cams rotated clockwise.

Please follow the manual online, page 8, bullet 7:

https://static1.squarespace.com/sta...3/1723152968537/M156+COMPREHENSIVE+Q32024.pdf

I didn't think it mattered if the adjusters were in the locked position for reinstallation, did you do it that way, badgx?

ETA - just got another response on the above point - "Adjusters all need to be in home position as this is part of timing the M156 properly at 40° ATDC. If not the most critical component of the process."

So looks like we will have to pull the adjusters, reset the cams back to correct position and reinstall the adjusters once all are locked.
 
That's correct. Shouldn't take too long to get the tools back on. Lock both banks if you have second set of tool and take you time working methodically👍
 
Maybe this time crank it up to 50NM and then a full 90 degree turn. I know my wrench is a bit old and has an error margin, this gets more inaccurate as the tool is often used. I should replace my old torque wrenches, they have become inaccurate due high usage 👍
 
There's no issue with the torque though, the problem was because the cam adjuster wasn't in the lock position on installation, so the back pressure from the valve springs caused it to rotate and lock in an incorrect position relative to 40 degrees on the crank. I'm just glad it did jump because otherwise we'd have been none the wiser and found ourselves with front row seats for Dances With Valves...

Going to check the others by attempting to turn the cams by the hex sections behind the adjusters. Any that are also not locked will turn a few degrees then click into place. They'll then have to come off and be retimed and reinstalled too. Worst case scenario will be a few wasted phaser bolts and some time.

Then the small matter of that snapped bolt on the offside head...

You'll get there mate and then you'll be an expert 😉
 
Realigned the cam that jumped earlier so that's the adjuster now definitely locked and the cam back in the correct position. I'll need a new bolt so have ordered that and I'm going to remove all four adjusters and triple check they're all in the locked position then reinstall those with fresh bolts and washers as well. Kicking myself I didn't lock all the adjusters in the first place but I could have sworn I read somewhere that it wasn't necessary to do that. Live and learn I guess.
 
Really interesting video posted by SPR Autos which includes replacing the cam adjuster plates. ( From 25min onwards)
I won't comment on the actual engine problem only to say what a great educational video for M156 owners.
To view this content we will need your consent to set third party cookies.
For more detailed information, see our cookies page.
 
To view this content we will need your consent to set third party cookies.
For more detailed information, see our cookies page.


He knows the m156 inside out. As he owns a w212 E63 M156. Good choice of motor 😁👍
 
To view this content we will need your consent to set third party cookies.
For more detailed information, see our cookies page.


He knows the m156 inside out. As he owns a w212 E63 M156. Good choice of motor 😁👍

That's an old video.
It's not Part 2 of the video I posted.
Yes the guy knows his stuff and is a very thorough mechanic.
 
My saga with this continues. Because I can't say for sure that we put all four adjusters in the locked position before reinstallation, I have to remove them to check then reinstall with the cams and crank all in the correct position. Driver's side are both done but the bottom bolt (hardest one to reach naturally) on the front adjuster cover has become chewed so going to have to resort to intelligence or violence to get it out and replace it with new.

1726741776090.png

It's only torqued to 10Nm so am hopeful I can get a long punch or cold chisel on it and tap it round, would only need a half turn really and should then come out by hand...
 
Finally got mine finished and back together the other night. By the time I was done it was nearly midnight so I didn't do a first start until after work the following day. So far so good, no rattles on startup, some ticking from the engine but it was sat cold and idle for the best part of a month so I'll get it moving at the weekend and see if that clears up. Before that though, there are some nuts, bolts and socket bits that the undertray is "looking after" for me so I'll drop that tomorrow and retrieve them.

The other thing is, my original back plates on the cam adjusters really didn't look that bad. It would rattle on start maybe one time in every four or five which I thought was probably a lot, but compared to a lot of the Youtubers these plates barely look worn at all. If I'd known that was the case I might not have bothered. Anyway, it's done now and the car seems to start properly and run without issue (so far) so that only leaves the small matter of that snapped bolt to deal with...

1728081968902.jpeg1728081984409.jpeg
 
Happily my local MB specialist managed to get the snapped bolt out whilst the car was in for servicing so this is all done with now. Nice having the peace of mind about the cam adjusters and not hearing them rattling on startup any more!
 

Users who are viewing this thread

Back
Top Bottom