R230 Boot Seal Leaks

Page may contain affiliate links. Please see terms for details.
Not going by my car late 2009 SL350. Nothing seems to be altered. Same leaks in the same areas

My car is a 2007 and I’ve definitely seen references to many of the later R230, and the R231, having the same inherent issues. The specialist that looks after the car confirms the same from their experience.

Shocking really but once you know the issue IS fixable it doesn‘t need to dominate your decision making process. Probably good practice to budget time or money to get the seal done on any SL unless concrete evidence it’s been done and remains effective.
 
How's the dealership repair working out? Any leaks? Am considering an R230 and wonder if I just factor in £500 for a seal repair. Or are others finding you really need the additional adhesive applied via the DIY method? I.e. the DIY method is definitely cheaper, but is it also better?

Two years on and no problems, but the car is always garaged and not intentionally used in the wet, so I wouldn't expect any really. I doubt they would have done as thorough job as a diy one, but It's stood up to a few eastern European hand washes!
 
Two years on and no problems, but the car is always garaged and not intentionally used in the wet, so I wouldn't expect any really. I doubt they would have done as thorough job as a diy one, but It's stood up to a few eastern European hand washes!
Gotcha, thanks. If I were to get one it would be parked outside so I'm definitely in a different situation.
 
My DIY seal fix has so far lasted 4 years, not bad for such a cheap fix.

I think the possible leak issue is nothing compared to other potential problems so if anyone is worrying about it then I suggest they dont buy an SL. :)
 
Gotcha, thanks. If I were to get one it would be parked outside so I'm definitely in a different situation.

I think the main issue would be how rusty it has become under the seal, and how much treatment a dealership would give it. My car has always been garaged, and I think that ageing adhesion was the cause - I wasn't advised that there was any rust when they replaced the seal. I was in France when I discovered the leak after really heavy, constant rain and strategically lined the boot with towels etc, wringing them out regularly, to prevent the electrics in the boot getting wet until I got home.

As a precautionary measure, I would keep a supply of towels/whatever in the boot of a newly acquired car, or better still, try and challenge test any potential purchase with a hose. Also, try not to open a wet bootlid - the water runs in!
 
Ok, replaced my wifes leaking boot seal on her 2006 R230 sl350 using the information at the beginning of this thread but with an extra strip of thin butyl rope at the top of the seal for belt and braces. After a 20 min hose session not a drop in the boot. Very easy job. The new seal comes with one strip of adhesive tape already I then added the 3m tape above that and then above that the butyl rope.
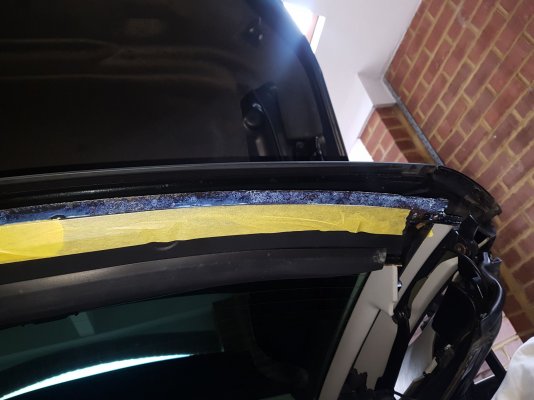
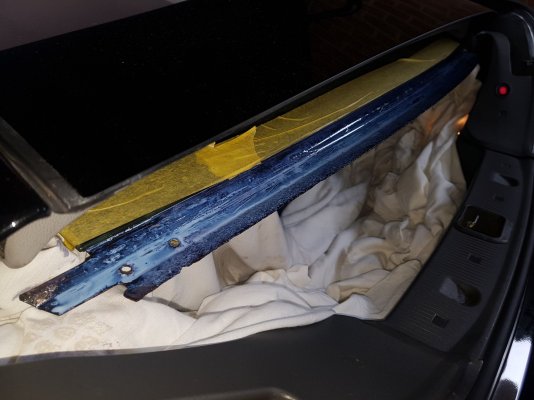
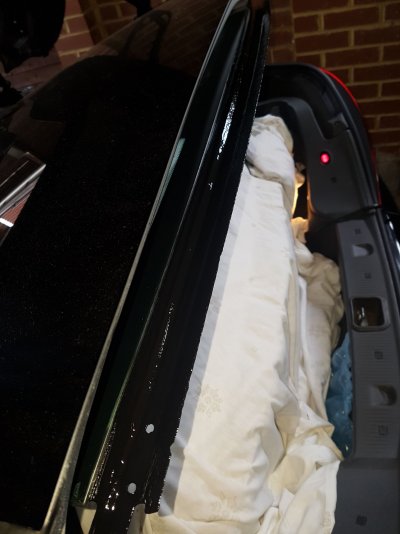
The most important thing seems to be to make sure the metal below the window is smooth, rust treated if necessary (most wil be rusty by now if left outside) and painted. Then cleaned very carefully before fitment of new seal. I used an alcohol based cleaner.
Took about two hours over three days to allow for drying times of rust treatment and paint. But very satisfying to see no drops of water at all, rather than the wet towlels she has had for a couple of years.
Could not have done it, or at least would not have done it, without this brilliant thread so many thanks to the OP and other contributors.
Glad this worked out well for you.

Probably a good time to mention that mine has stayed bone dry, although admittedly has rarely been left out in the rain. It has however had plenty of action with the pressure washer which is a stern a test as anything. Very pleased :)
 
Just about to do this to my R230 today.
 
All done so let’s see how it goes over the next few days, a few points:

1: when you do the 4 nuts back up just do finger tight as the tighter you make them the more the seal pulls off.

2: use the thinners/gun cleaner to help remove the old tape.

3: have a box of gloves with you as you’ll use loads lol

4: the 3m tape is very good, the 3m adhesive is great but do wait till both surfaces are tacky before putting them together.

5: make sure you clean the Chanel that pushes up against the bottom edge of the window, use a plastic trim tool wrapped with a micro fibre cloth soaked in the thinners.

just need to wait 24 hrs and then test
 
Hi all, I am 2 weeks into my ownership of a 2003 SL55AMG and after a foolish decision to have a Eastern European hand car wash near Bristol Airport I found there was damp carpet in my boot and the soft close has stopped working on my boot lid straight afterwards . also there was a damp carpet behind the passenger seat (I think I can see the seal in question ) , I suspect I have the same issues discussed in this fantastic thread, many thanks to the original poster, I now feel like I might have a shot at a dry boot! The car is garaged so I can tackle it at least in the dry. Very useful to read the evolving fix for this, I like to do as much simple work on my cars as I can before going to a dealer/specialist. Your posts have given me a guide to follow and I cannot thank you all enough! Once the leaking boot is sorted, I will look at the boot closure issues... 👌
 
  • Like
Reactions: MD5
Hi John, lets hope you get the leaks all sorted, remember to check all the drains and blow them through

When the car is out in the sun, lets see some pictures

kc
 
Hi John, lets hope you get the leaks all sorted, remember to check all the drains and blow them through

When the car is out in the sun, lets see some pictures

kc
Thanks KC good point about the water drains.. I did poke a 9inch long cable tie down the holes... but an Air line blow through would be a good shout.. Will test the holes with a small bottle of water to see how fast they run... apart from this issue... the SL is like driving Thor's Hammer!
 
following my quoted in post 48 , worth saying my boot is still bone dry and is left outside all yrear ....so its seen a bit of rain!!
 
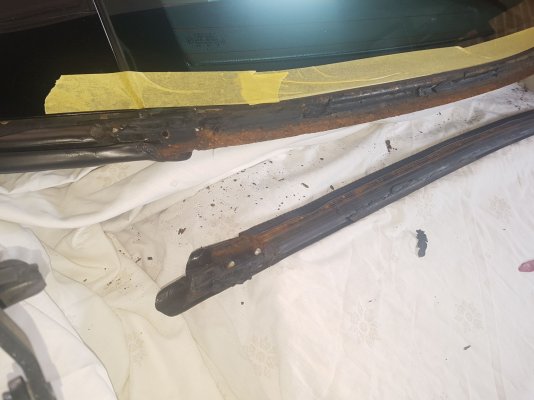
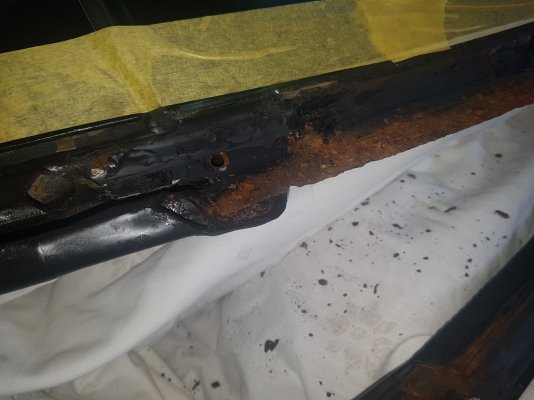
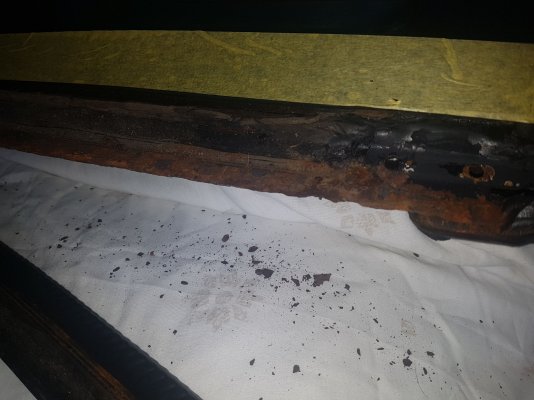
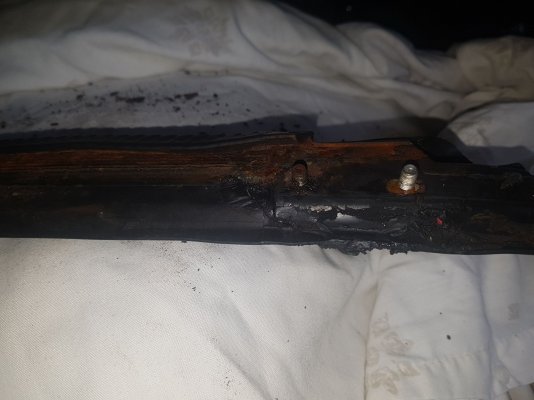
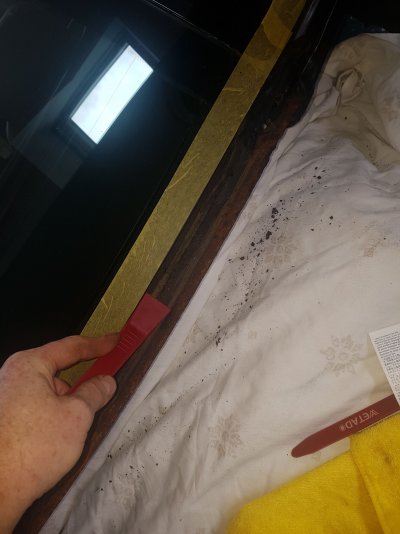
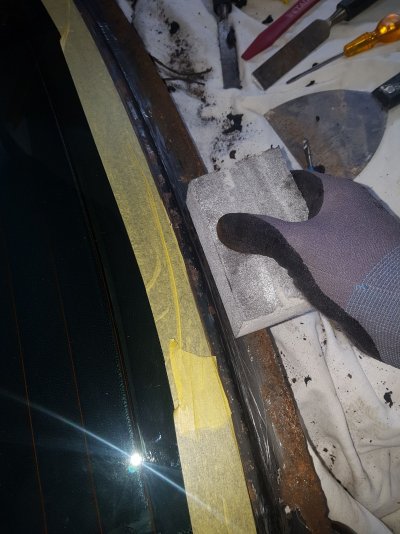
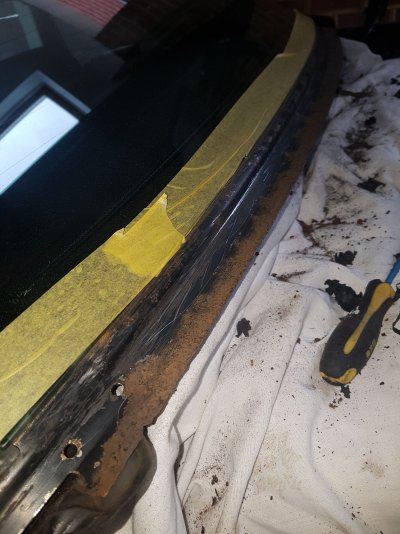
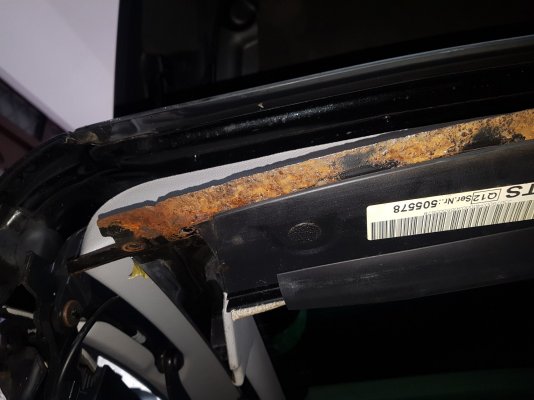
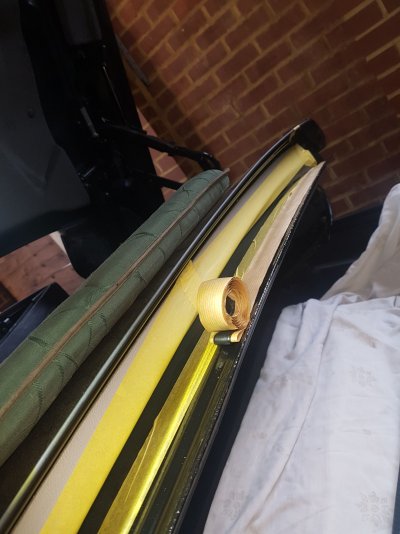
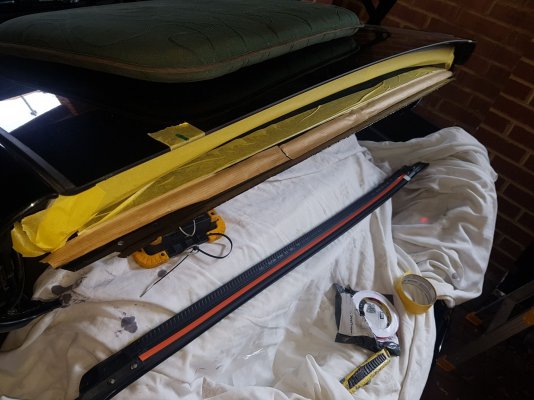
Just started my boot seal repair yesterday.. after eventually removing the old seal which had signs of previous attempts at sealing it...I was surprised at the amount of surface rust and edge deteriation on the metal bracket that the seal attaches to.. I think I caught it just in time. I have rubbed it down and used a rust converter called Kurust by Hammerite which I have used before to good effect on other vehicles. allowing it to cure.. then a coat of Hammerite paint today.. then Sunday I will fit the brand new MB boot seal , with 3M VHB 8mm tape and butyl rope with some sealant on the bolt through brackets as others have done.

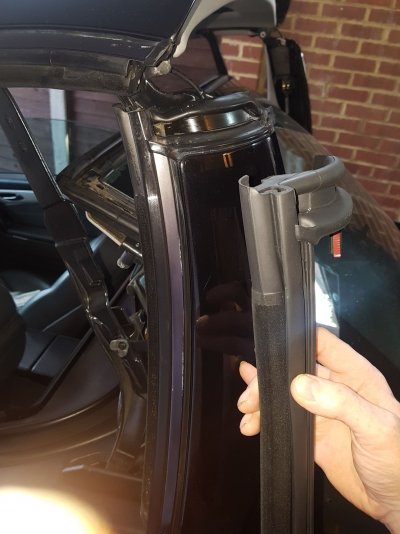
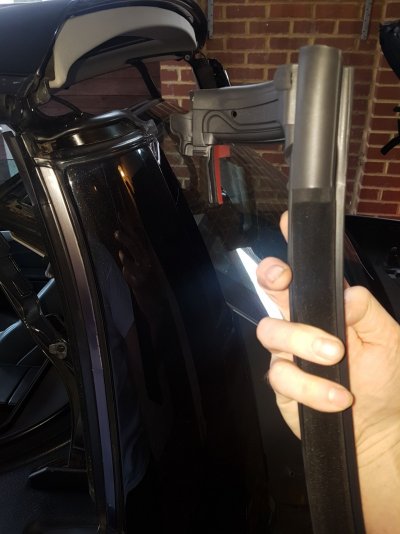
I also have a side rear three quater seal which was leaking too..the water appears to be coming from this seal at the top where the roof meets the rear window top edge and comes straight through into the cabin.. I have cleaned the seal with Gummi . Having compared the new seal I think i can see why (unusual dip in the top of the seal when compared to the new one (or other side).. I am unsure how to change this one (pictured) i can see a little screw in the top and it appears to sit behind the plastic panel trim to the side of the rear window.. it has a small amount of red backed double sided tape attached (I have plenty of 3M VHB tape) it also has the black chrome trim inserted in it. If anyone has changed this seal can they point me in the right direction please re the removal and fitting of that seal..20210903_104115.jpg20210903_104125.jpg20210903_104143.jpg20210903_104159.jpg20210903_104707.jpg20210903_111550.jpg20210903_112157.jpg20210903_112934.jpg20210903_114754.jpg20210903_115741.jpg20210904_123539.jpg20210903_161816.jpg20210903_161923.jpg
 
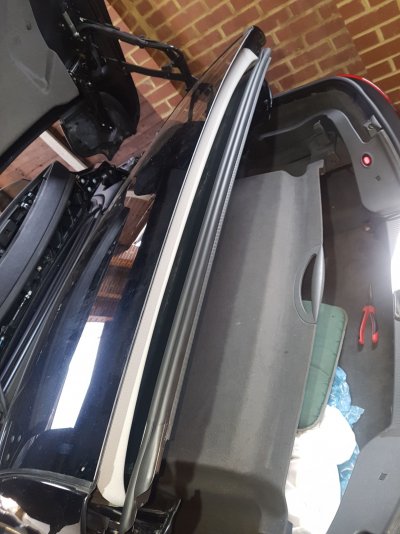
Boot seal attached today using previously mention butyl rope (10mm) applied along the bracket, where the seal would meet the rear window leaving the waterproof paper on it until the seal was in place.. then gently peeling it off so the seal can stick to the butyl (The double sided tape that the seal comes with is fitted in the same way there is a tab you can reach to peel the backing off after the seal is in place)... testing with water tomorrow.. but it looks good. Butyl rope is super sticky and stays flexible is waterproof . I 20210905_121450.jpg20210905_121940.jpg20210905_124033.jpghave used it before on inner door plastic lining.. so fingers crossed..... Thanks again to the OP for all the excellent ideas and solutions!
 
Looks like the seal has been leaking for quite a while to cause all that corrosion. When I did mine back in 2017 I only had a bit of surface rust, I must have caught it early. I like the butyl tape idea, if it works :eek:
 
Yes the seal looks to have had a few quick fixes by previous owners with sealant applied under the seal.. water would have got trapped where the seal folds over and grips the metal bracket at the bottom... and staying wet for months would only need a pin hole in the paint to start the corrosion..even the bolts were rusting.. which is why i used Hammerite paint after the rust treatment as the hammerite paint has rust inhibiters/converters in it and can actually be painted direct to a rusty surface as well as preventing it coming back.
I went for a new seal (& nuts) just to be on the safe side.. I would imagine the metal bracket is bonded to the rear window glass so not an easy job to replace... Fingers are crossed. for a water test tomorrow!
 
I still had water ingress after my test.. I gave it a good soaking from the hose.. I did notice the gap between the boot lip and the window flood with water as it made its way off to the side channel... and heard gurgling as it drained down the drain hole.. did I use too much water in my test? did it back up and pour backwards under the overlap of the corner seal? I left cloths to catch the water.. so no damage done.. I might stick a gopro on 'remote view' with a light in the boot at try and see where its getting in... the butyl rope looks intact along the seal edge.. maybe the seal bolt down points at each need something extra?... bugger.
 

Users who are viewing this thread

Back
Top Bottom