This mod, or rather some of its ingredients, has been discussed and mentioned in a few places around this (and other) forum, as I was looking for answers and advice regarding wire routing, LED layout, RF noise, etc, etc.
I decided to put it all in one place, as it might be useful to someone looking for information on a similar upgrade, particularly as it, due to the type of LEDs used, can be applied to other models.
As I took my time doing this mod, and didn't want driving around with holes in my bumper, I bought a set of new fogs and surrounds to work on, whilst keeping the existing ones on the car, up until the moment, when I was ready to swap them for the modified ones.
new fog lights and surrounds:

I went for a small, round LEDs:

These are very bright, and simple enough to mount on the fog surrounds, without affecting the actual fog lights, including keeping the "follow me home" function intact, which is what I wanted.
The layout, and number of LEDs per side took some consideration, and a few photoshopped mock-ups, bringing me in the end to a simple straight line of six.
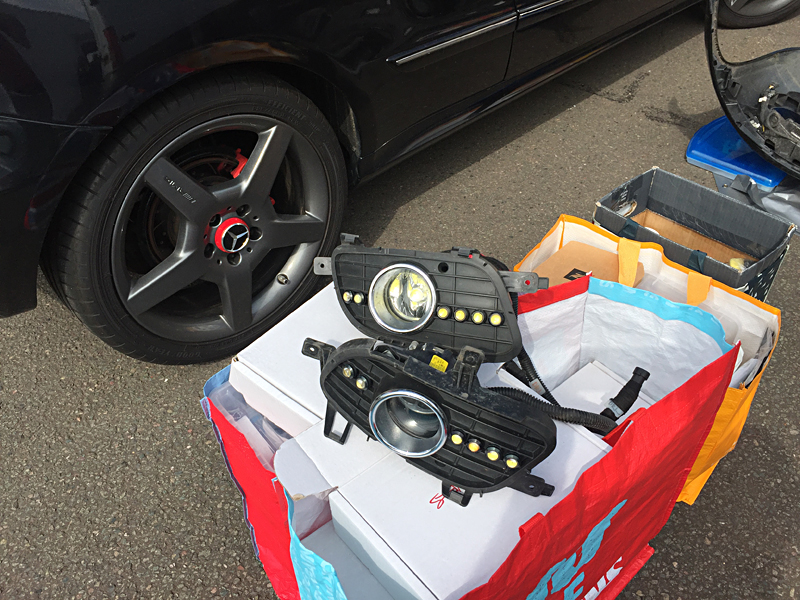
Once the LEDs were mounted:

I fitted the wiring harnesses with waterproof 2-pin plugs:

To comply with the current regulations, a daytime running lights must dim, once your dipped beam is on, so I needed a DRL controller for this.
I also wanted to have a manual override switch, to turn them off completely, and after some research picked an ignition sensing controller, as opposed to voltage sensing ones, mostly available on eBay, etc, as these could be problematic - they react to voltage drop and could dim your DRLs when it is not intended, and also might drain your battery if they malfunction.
The ignition sensing controller is not connected directly to battery and uses dipped beam positive as a trigger, without having to guesstimate the voltage drop to react upon.
Due to each individual LED being a powerful 9W, I needed two controllers for reliable operation:

Also, as LED dimming produces a lot of RF noise, these must be housed in a grounded metal box, away from instrument cluster and other sensitive electronic stuff in the cab.
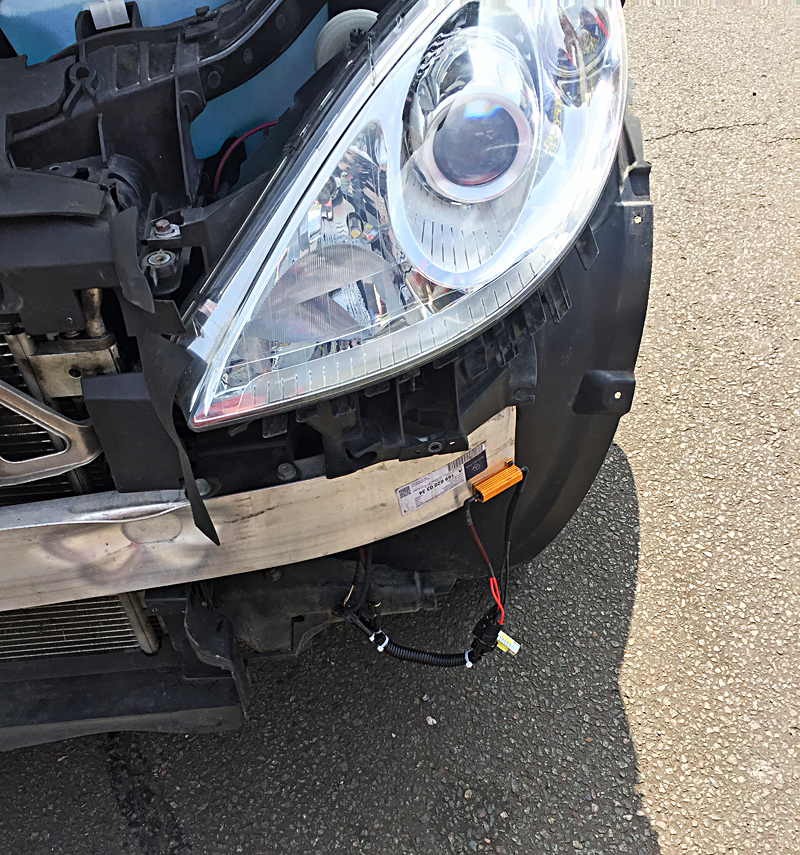
I bought an aluminium box and waterproof strain relief plugs to fit the controllers in the engine bay:


Last test before assembling controllers into the box:
full power:

dimmed:

And now with the box fully assembled:


Fitted the box in the engine bay, slightly different place than initially planned, to allow more space for the cables:


OS lights connected:

NS lights:

the cable is braided and routed around the engine bay:

Swapping the fog light surrounds required raising the car, and removing wheel arch linings (even though the WIS says just loosening is enough), so I went to Nick at Parkham Garage, who did an excellent job, as always:
old:

new:

Now I needed to fit 3 wires through, from the cab into the engine bay. With Nick's help, the glove box was removed, and next to the SAM unit was a nice grommet for the bonnet release cable, which I already looked at from the engine bay side:

In went a 1.5mm pull wire, then all three wires, which then were wrapped in Tesa tape and that section also went through fine, with some silicone spray help:


Now all I had to do, is to fix the braided sheath, fit a 3-pin waterproof plug, and seal the rubber grommet on the engine bay side with high-temp black silicone:

The rest of the wiring, inside the cab, was very easy: Tesa tape and hooking up to the switched positive wire of the power socket in the centre console:


A waterproof fuse holder, with a 15A mini blade fuse, was added too.
For the manual override switch, I decided to use a latched push button, rather than a rocker switch - in normal position (DRLs dimmed on main light) it's flush with its bezel, so very easy to determine, without taking your eyes off the road, and looks neater, than a non-OE rocker switch (and yes, it's hidden under the sliding cover anyway). Oh, and the power socket tray was cleaned after this picture was taken, honest!:

So, the end result:
full DRL power:

dimmed, with dipped beam on:

The actual lights are bright white, without purple of yellow tint, regardless of the angle - the slight difference in colour above is due to digital imaging peculiarities.
at night time:


A200 with daytime running lights
That's about it, happy with the result, equally from a technical, road safety and visual appearance points of view.
Hopefully it'll be of use to someone else.
I decided to put it all in one place, as it might be useful to someone looking for information on a similar upgrade, particularly as it, due to the type of LEDs used, can be applied to other models.
As I took my time doing this mod, and didn't want driving around with holes in my bumper, I bought a set of new fogs and surrounds to work on, whilst keeping the existing ones on the car, up until the moment, when I was ready to swap them for the modified ones.
new fog lights and surrounds:
I went for a small, round LEDs:
These are very bright, and simple enough to mount on the fog surrounds, without affecting the actual fog lights, including keeping the "follow me home" function intact, which is what I wanted.
The layout, and number of LEDs per side took some consideration, and a few photoshopped mock-ups, bringing me in the end to a simple straight line of six.
Once the LEDs were mounted:
I fitted the wiring harnesses with waterproof 2-pin plugs:
To comply with the current regulations, a daytime running lights must dim, once your dipped beam is on, so I needed a DRL controller for this.
I also wanted to have a manual override switch, to turn them off completely, and after some research picked an ignition sensing controller, as opposed to voltage sensing ones, mostly available on eBay, etc, as these could be problematic - they react to voltage drop and could dim your DRLs when it is not intended, and also might drain your battery if they malfunction.
The ignition sensing controller is not connected directly to battery and uses dipped beam positive as a trigger, without having to guesstimate the voltage drop to react upon.
Due to each individual LED being a powerful 9W, I needed two controllers for reliable operation:
Also, as LED dimming produces a lot of RF noise, these must be housed in a grounded metal box, away from instrument cluster and other sensitive electronic stuff in the cab.
I bought an aluminium box and waterproof strain relief plugs to fit the controllers in the engine bay:
Last test before assembling controllers into the box:
full power:
dimmed:
And now with the box fully assembled:
Fitted the box in the engine bay, slightly different place than initially planned, to allow more space for the cables:
OS lights connected:
NS lights:
the cable is braided and routed around the engine bay:
Swapping the fog light surrounds required raising the car, and removing wheel arch linings (even though the WIS says just loosening is enough), so I went to Nick at Parkham Garage, who did an excellent job, as always:
old:
new:
Now I needed to fit 3 wires through, from the cab into the engine bay. With Nick's help, the glove box was removed, and next to the SAM unit was a nice grommet for the bonnet release cable, which I already looked at from the engine bay side:
In went a 1.5mm pull wire, then all three wires, which then were wrapped in Tesa tape and that section also went through fine, with some silicone spray help:
Now all I had to do, is to fix the braided sheath, fit a 3-pin waterproof plug, and seal the rubber grommet on the engine bay side with high-temp black silicone:
The rest of the wiring, inside the cab, was very easy: Tesa tape and hooking up to the switched positive wire of the power socket in the centre console:
A waterproof fuse holder, with a 15A mini blade fuse, was added too.
For the manual override switch, I decided to use a latched push button, rather than a rocker switch - in normal position (DRLs dimmed on main light) it's flush with its bezel, so very easy to determine, without taking your eyes off the road, and looks neater, than a non-OE rocker switch (and yes, it's hidden under the sliding cover anyway). Oh, and the power socket tray was cleaned after this picture was taken, honest!:
So, the end result:
full DRL power:
dimmed, with dipped beam on:
The actual lights are bright white, without purple of yellow tint, regardless of the angle - the slight difference in colour above is due to digital imaging peculiarities.
at night time:
A200 with daytime running lights
That's about it, happy with the result, equally from a technical, road safety and visual appearance points of view.
Hopefully it'll be of use to someone else.
")