• The Forums are now open to new registrations, adverts are also being de-tuned.

CL500 W215 ‘Paid In Full’ Style

**Update**

Sorry guys, I haven’t posted here since August.

To be honest, I haven’t driven the car since September and kept it parked on the drive. I noticed the transmission starting to be slow to engage in P R N D. Changed the oil but no change so it looks like the valve body needs to be changed. This morning I found a bargain of a deal, 722.6 valve body with solenoids for £100.00 - the guy was selling it as he bought the wrong one for his car. Should be coming this week and along with this, I bought a new control panel, gasket, filter, plug and oil. In the next 2 weeks I’ll look to get this all fitted.

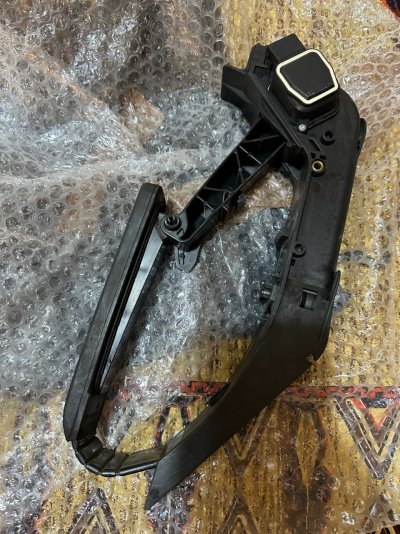
I was looking to buy a new Accelerator pedal as mine kills all response after going into kick down however, I managed to find the actual sensor for the pedal separately. This should come this week as well and should sort that problem out straight away.

And the next things coming into play in the next 3-5 weeks will be:

- Respray the roof and doors.

- Powder Coat the wheels (again)

- Powder coat the brake callipers

- Paint the brake dust shields

- Reupholster the drivers seat

- Maybe custom rear light

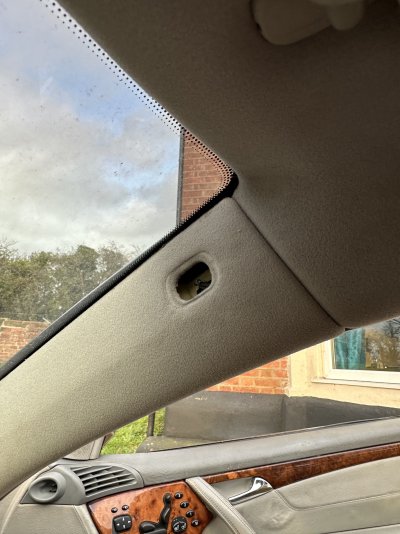
- New interior C Pillars

- Full Paint correction and ceramic coating


Now for the more exciting stuff…
 
Last weekend, I finally changed the Sunroof and finally have a fully working sunroof.

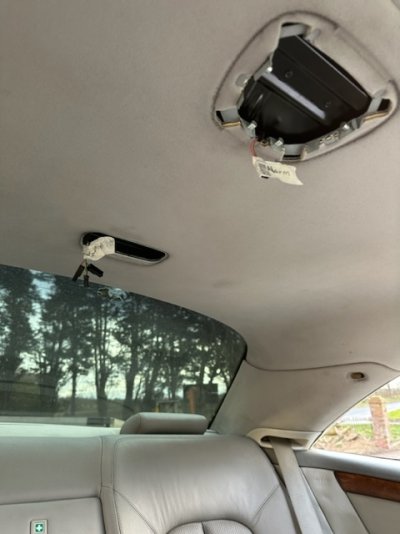
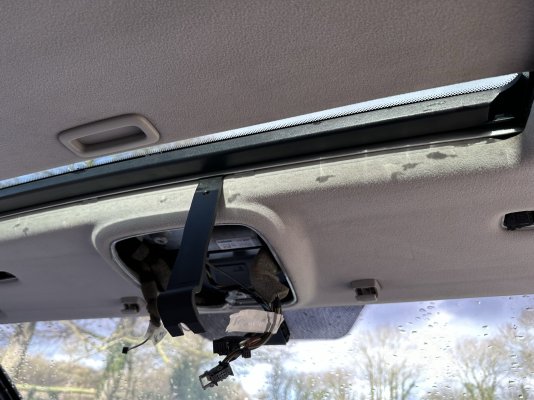
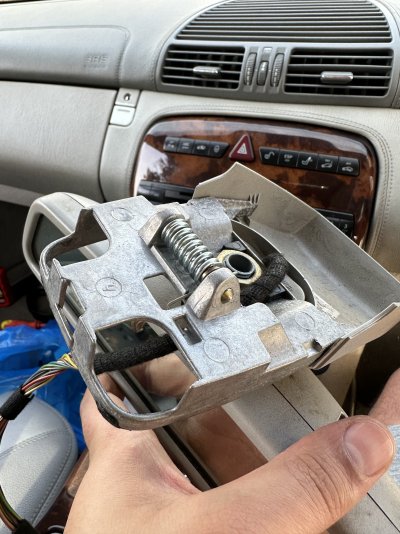
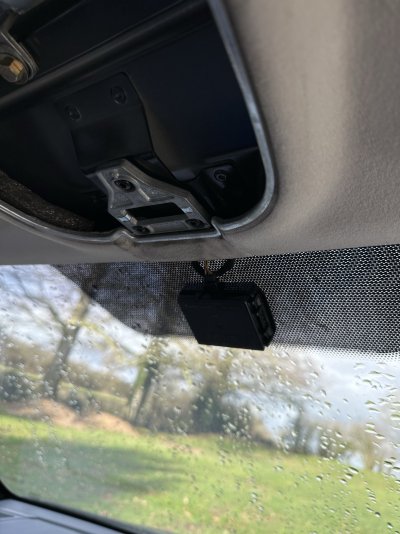
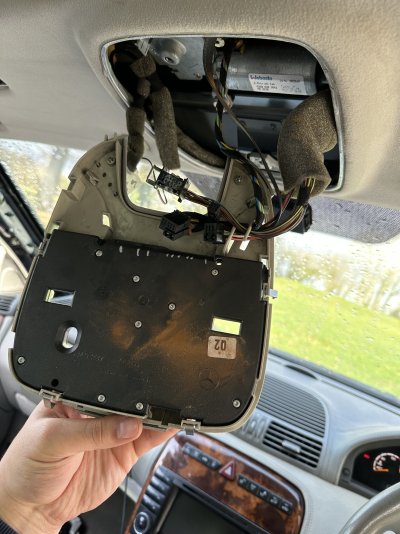
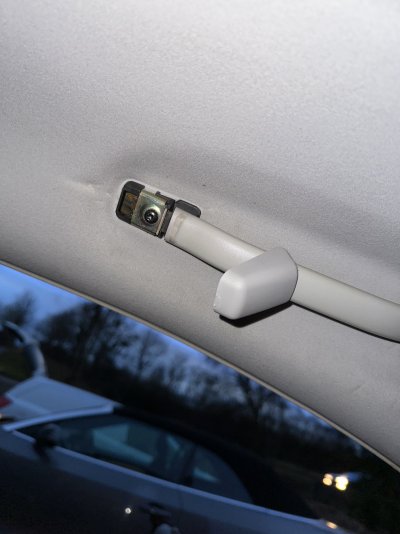
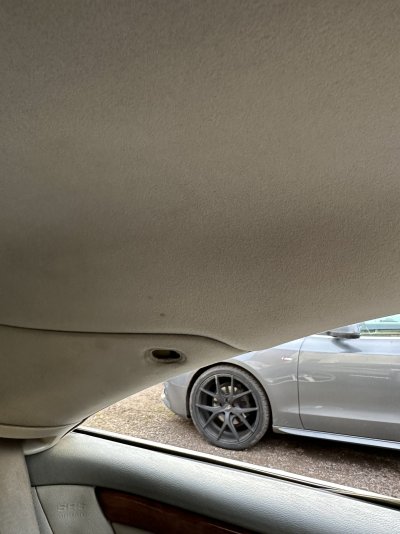
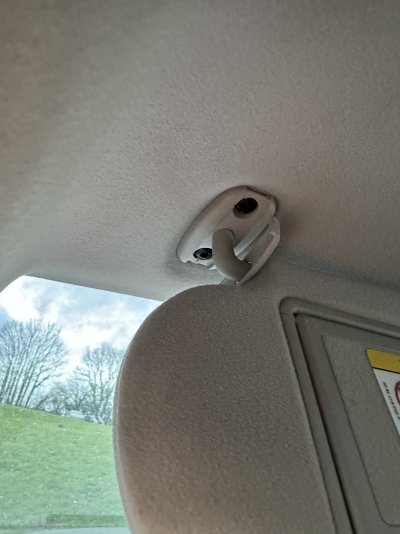
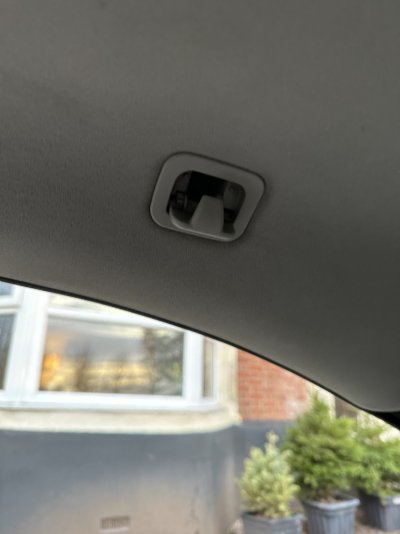
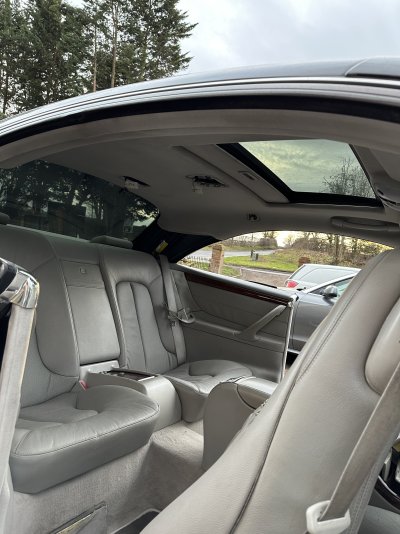
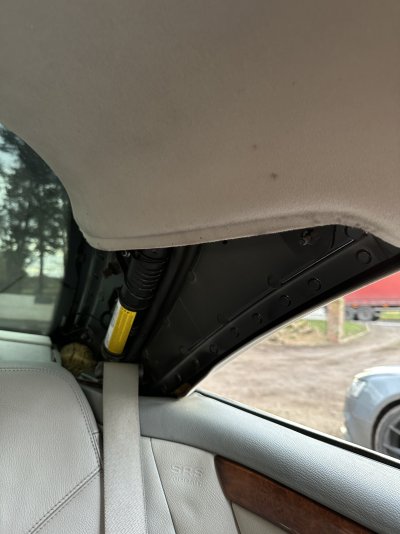
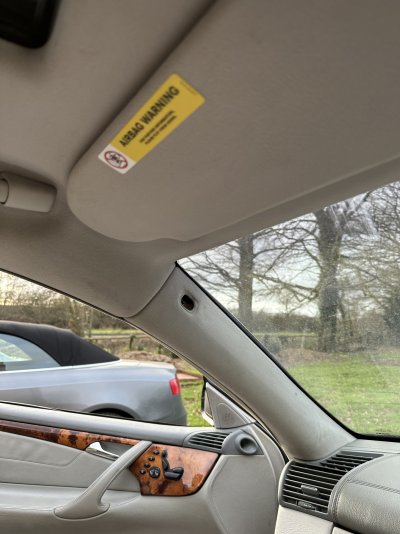
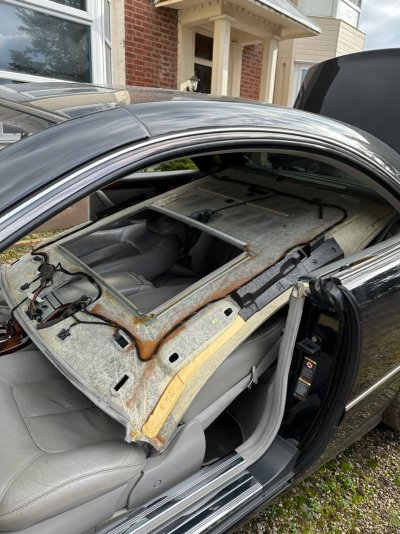
What I realised is, there are no write ups, disassembly guides or pictures on how to remove a CL W215 headliner.

I’ll make a quick list of where the headliner is bolted into so, for anyone else who is wishing to do this can have an idea of what to do:

- Both sun-visors (2 bolts each)

- Grab Handles (2 screws each)

- Rear Coat Hangers (1 each)

- Bolt under the main dome light

- Bolts behind each “SRS AIRBAG” plastic covers.

- Metal strip on the front section of the sunroof (use a plastic panel tool to push upwards to unclog from the headliner.

- Rear view mirror is held in with a spring joint (pull gently down after plastic is removed around it)

- Unplug rear dome and alarm housings

- unfold from the strip around the edge of the headliner either side by the side windows (use a plastic pry tool)

- after all the above is done, push the headliner forward and it will fall freely.

EE6BB05C-5989-4B5E-ACE6-532CEA61D679.jpeg
 

Attachments

  • 89E601F7-B125-474C-8A7E-9FB8FA61A26C.jpeg
    89E601F7-B125-474C-8A7E-9FB8FA61A26C.jpeg
    833.9 KB · Views: 2
  • A34D575B-5A05-4A69-BA8D-638E5E5F4B14.jpeg
    A34D575B-5A05-4A69-BA8D-638E5E5F4B14.jpeg
    1.6 MB · Views: 2
  • 65F9726C-F60F-443E-91C2-239CADCCB888.jpeg
    65F9726C-F60F-443E-91C2-239CADCCB888.jpeg
    759.7 KB · Views: 2
  • 5A8CA502-0A73-41A3-9C97-C5418F796EE2.jpeg
    5A8CA502-0A73-41A3-9C97-C5418F796EE2.jpeg
    1.6 MB · Views: 2
  • 7BE34F48-06A4-41FB-AC3A-A34124B11660.jpeg
    7BE34F48-06A4-41FB-AC3A-A34124B11660.jpeg
    1.3 MB · Views: 2
  • C85DA58E-2C04-4A4E-AD86-EADB8BB96067.jpeg
    C85DA58E-2C04-4A4E-AD86-EADB8BB96067.jpeg
    1.4 MB · Views: 2
  • 1F08AE61-C2E9-4EA5-9645-FB55791C8096.jpeg
    1F08AE61-C2E9-4EA5-9645-FB55791C8096.jpeg
    1,005.7 KB · Views: 2
  • 88734E57-1FB7-4D86-9DC5-9DEBEEBC0D73.jpeg
    88734E57-1FB7-4D86-9DC5-9DEBEEBC0D73.jpeg
    1.1 MB · Views: 2
  • 697EF915-7E97-40F6-8BE3-2585882461E6.jpeg
    697EF915-7E97-40F6-8BE3-2585882461E6.jpeg
    1.9 MB · Views: 2
  • 43F3DA35-0691-4D72-AC44-7666B0324912.jpeg
    43F3DA35-0691-4D72-AC44-7666B0324912.jpeg
    1.5 MB · Views: 2
  • 9D8B66BD-409B-4AF1-BACA-FDC6BE944E13.jpeg
    9D8B66BD-409B-4AF1-BACA-FDC6BE944E13.jpeg
    1.3 MB · Views: 2
  • 7D79C2AA-5419-4BE4-A2BB-1F6B286D30AB.jpeg
    7D79C2AA-5419-4BE4-A2BB-1F6B286D30AB.jpeg
    1.6 MB · Views: 2
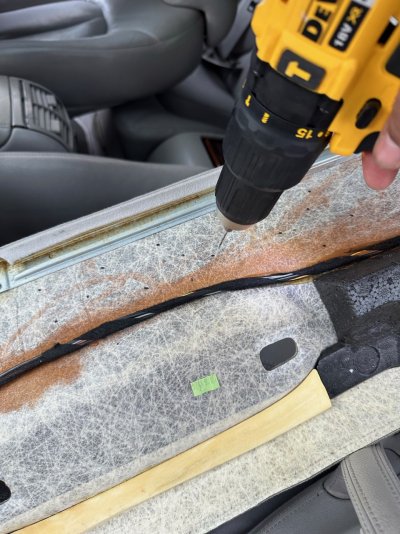
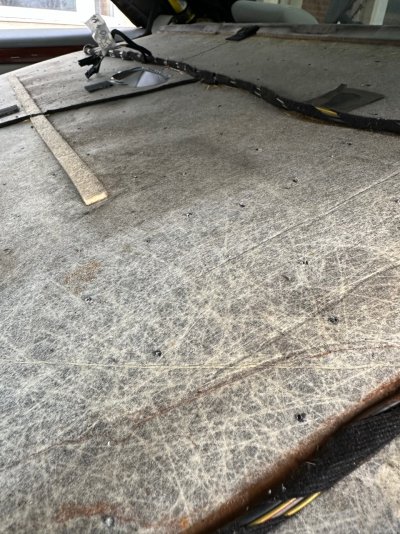
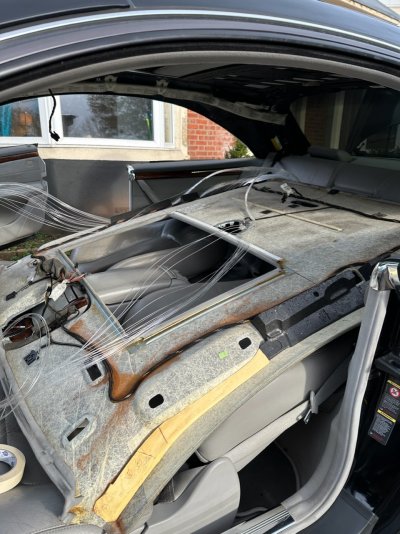
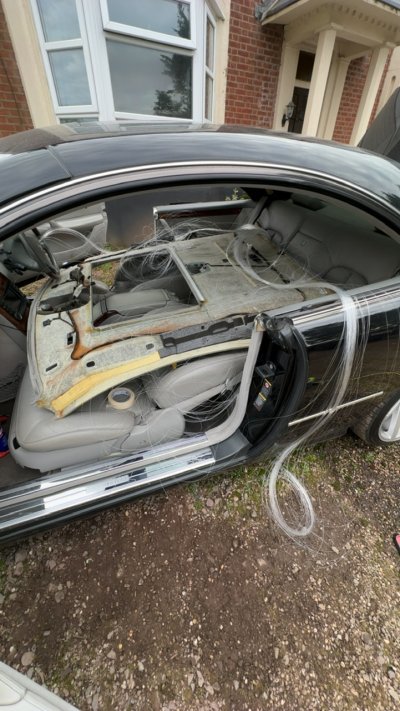
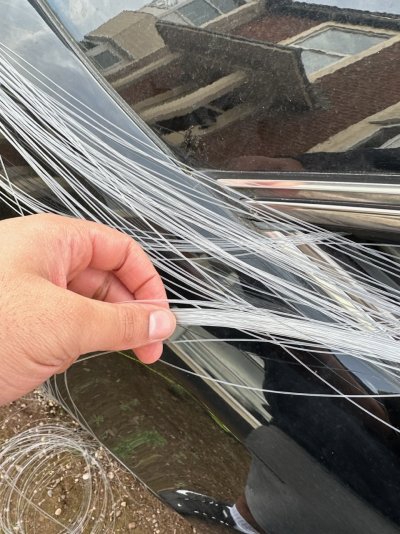
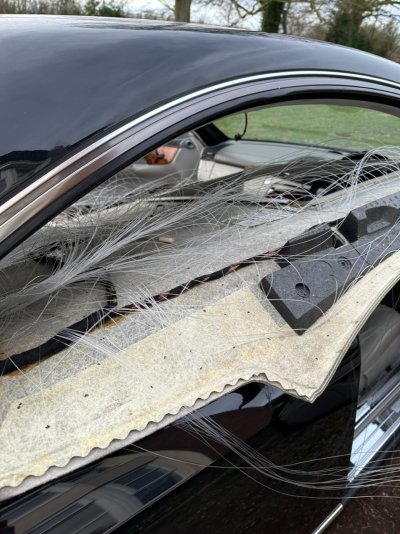
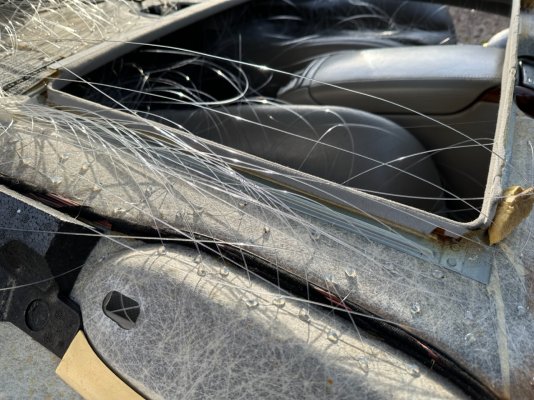
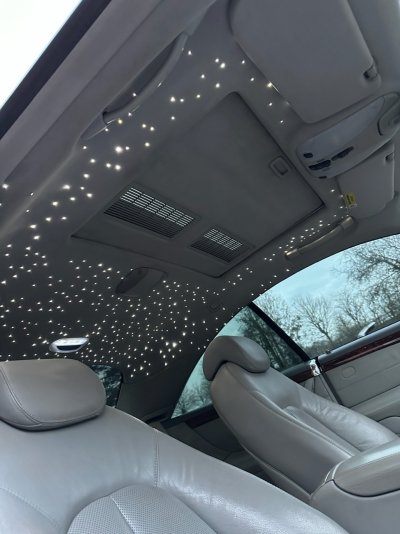
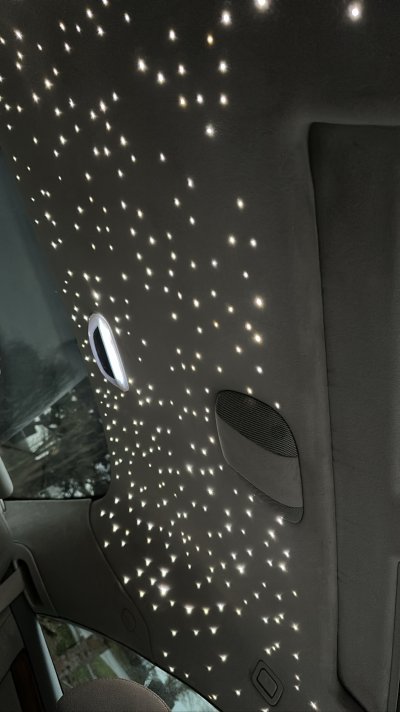
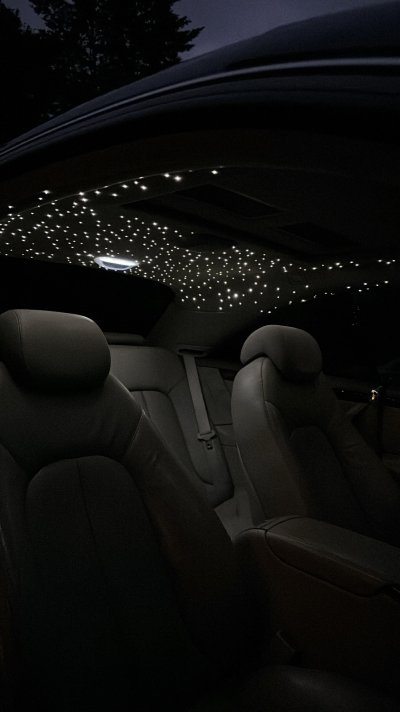
And whilst doing this………….. I wanted to do something new and the first for the W215 (unless proven wrong)… Starlights in the headliner.

This took a stupid amount of time as I couldn’t take the headliner out of the car due to the loom glued on all round. I think it was 18hrs in total drilling in 450 holes that are 0.75mm, 1mm and 1.5mm. Probably the worst experience I have ever put myself through on a car but, I can 100% say, this was the second best thing I’ve done on this car (wheels first).
 

Attachments

  • 4201F1BE-EA27-48C0-BA55-4E1B20952EDD.jpeg
    4201F1BE-EA27-48C0-BA55-4E1B20952EDD.jpeg
    476.8 KB · Views: 7
  • A0E26FE0-4442-4744-B673-A5BE5BD70100.jpeg
    A0E26FE0-4442-4744-B673-A5BE5BD70100.jpeg
    481.9 KB · Views: 6
  • DDE7CD60-D304-46D6-A295-9753B416B818.jpeg
    DDE7CD60-D304-46D6-A295-9753B416B818.jpeg
    587.2 KB · Views: 6
  • BBF3EBCC-5315-4017-897F-7CF7FF7393D4.jpeg
    BBF3EBCC-5315-4017-897F-7CF7FF7393D4.jpeg
    430.9 KB · Views: 6
  • D3ADEECD-B4AE-4036-9745-4DC68569360F.jpeg
    D3ADEECD-B4AE-4036-9745-4DC68569360F.jpeg
    311.1 KB · Views: 7
  • CAB3DDC9-7A68-43AD-8B89-E0AC9F67A9BA.jpeg
    CAB3DDC9-7A68-43AD-8B89-E0AC9F67A9BA.jpeg
    499.5 KB · Views: 8
  • 70F16A7A-2FB2-42C3-B710-20FCF6C46205.jpeg
    70F16A7A-2FB2-42C3-B710-20FCF6C46205.jpeg
    446.4 KB · Views: 8
  • F4CBD6C5-E425-4612-BEB9-6E6E1D8ACC2C.jpeg
    F4CBD6C5-E425-4612-BEB9-6E6E1D8ACC2C.jpeg
    460.9 KB · Views: 7
2D3DDC82-231B-4725-9D67-84A0B4CA5B58.jpeg
 

Attachments

  • 440EAE0B-FFCC-49D9-BA79-927F29D5ACB4.jpeg
    440EAE0B-FFCC-49D9-BA79-927F29D5ACB4.jpeg
    13.9 KB · Views: 9
  • 8D6F7C7A-BCAA-44D5-8C91-BEA8AC375AFC.jpeg
    8D6F7C7A-BCAA-44D5-8C91-BEA8AC375AFC.jpeg
    11.9 KB · Views: 9
  • 771AC1FC-8AAD-47FF-8ED6-D8B9C7CF3BA8.jpeg
    771AC1FC-8AAD-47FF-8ED6-D8B9C7CF3BA8.jpeg
    13.3 KB · Views: 9
I’ll post better pictures once I’ve finished putting all the panels back in and got the fibre LEDs completely flat and flush.
 
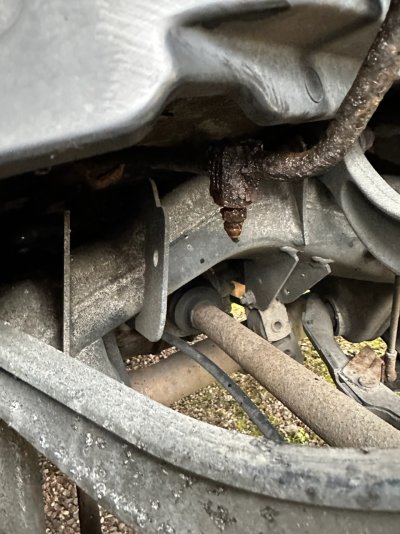
Also, whilst doing all of this, I went to turn on the car and raise the height to save the pain in my back. When I did this, I noticed a puddle forming around the rear left tyre so turned off the engine and went to inspect. As I was looking at where the leak was coming from, I noticed the rear left rod height was dropping by itself.

I looked closer and realised it was coming from the bleeder screw. I left the car as is for a few days as I wasn’t driving it but today, I went to take the wheel off and have a closer look. Sadly it’s just before the bleeder nipple where the leak is occurring - the pipes rusted causing a hole. And more sad news is that the replacement pipe is £240 + VAT and is on back order for months… so, following a previous repair on the opposite side in the exact same position, I’ll be going back to an aircraft workshop to buy some compression fittings to attach a new pipe with a bleeder screw in to keep the functionality. The PSI won’t be a problem as it can withstand 2x the amount the ABC system produces and the other repair has lasted 5 years plus with no leaks or issues.

Stayed tuned for this!A93AE32D-AE75-4C6F-878D-1B017CCADD59.jpeg
 
Yesterday I had a day off work and managed to get a whole bunch done.


ABC is fixed!
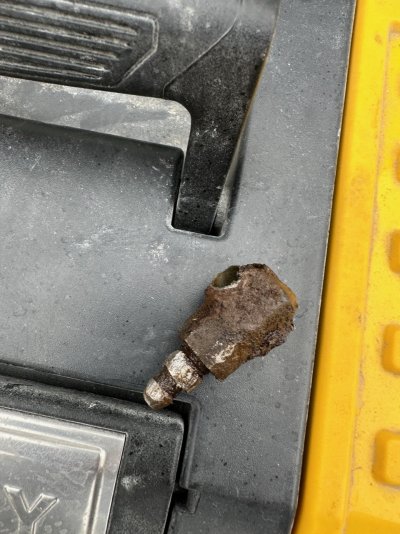
Using two compression fittings and new pipe (which has a bleeder screw), it’s back to working! A simple £35.00 fix including a tin of ABC fluid. I forgot to get pictures of doing the process as it honestly took 30 minutes to do with a friend so, as I went to grab my phone, it was done! I’ll grab some photos of the repair this week but, here’s a photo of the the previous bleeder screw block.

This is probably a repair many of us could look at especially for the pipes which aren’t available from Mercedes anymore. Using new pipe from compression specialists that can withstand the same or more pressure (with the same internal diameter of course) and a couple compression fittings, be back on the road same day for the price of a dominoes.

E0C95993-8197-402A-A691-2394FF44DD9B.jpeg
 
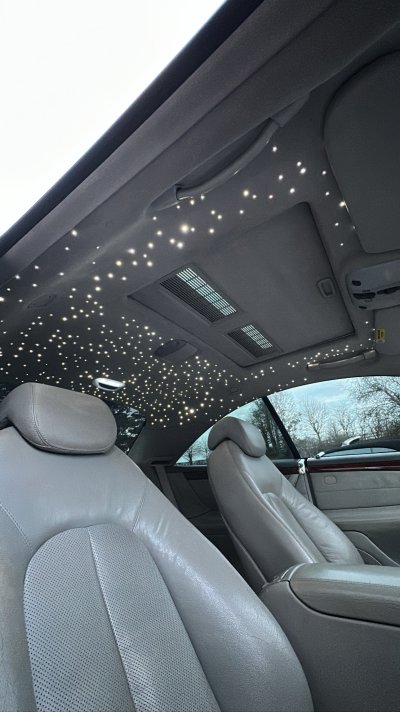
Also, the starlight headliner is complete!

All the panels are back to together however, I am looking for new C pillar panels as the current ones I have could do with a change due to the sun beaming on them the past 20 years.

It’s looks fantastic and can be simply turned on/off with the factory rear dome light - you’ll notice in pictures I was debating on what to do with the current LEDs in the rear dome light as I flipped them over in the housing to reduce the light and then actually decided to take them out all together. The colours, effects, brightness can be controlled by remote or by an app which works great and pairs up as soon as you open the app. The use of it is seamless.

It may be the wrong choice for many enthusiasts but, this can always be reverted by putting in a new headliner and be a 1hr30 job… But, everyone who has seen it has seriously loved it and even had three friends wanting me to do theirs, one wanting it in a brand new RSQ8🤣

5BD47284-00C3-4C22-9E5E-D9F4FF5FD4F7.jpeg5CBCA311-B456-4F3F-9043-E9F6D85E2F88.jpeg069D7DAD-7264-470B-BFE8-841DFB28C225.jpeg7943EDA2-BA71-405D-8220-FD93FEB48F09.jpeg2E313041-ECEC-4256-8A81-93A8EE6E8583.jpeg
 
The Valve Body just arrived.

Will have a new conductor plate in the next few days and when it does come, I’ll give this a deep clean making sure the channels are all clear.
 

Attachments

  • 0C61516E-BF34-4DA9-8E68-935C068341D1.jpeg
    0C61516E-BF34-4DA9-8E68-935C068341D1.jpeg
    442.3 KB · Views: 10
The last sensor I purchased for the “Accelerator pedal” was actually for something else. So, the accelerator issue remained. I spoke to the seller as he advertised it wrong (I also should double checked the pedal myself), but he actually gave me a discount on a pedal he had in stock so result!

Will hopefully get this fitted sometime this week.
3A2A212E-4ECC-4921-BC09-ACE7C19C3539.jpeg
 
Hi There Cxly, firstly i have read the entire thread, and what an excellent job you have done! The car looks amazing ( Not sure about the roof lights though, But hey! I like Marmite and Sprouts! ).
Question? Can i drop of my 2003 SL500 for you to polish!!!
What i have done with mine is have all of the mechanical parts sorted including new struts ( ouch that was properly expensive ) Full service including the gearbox, new track rod ends, brake pipe brake discs blah blah and this year i am concentrating on the exterior. I have purchased a set of factory correct 18" wheels and had them refurbished ( look great ) new rubber all round.
I have booked the car in for some respray work for October .
I am going to give all the leather interior a full restoration and re colour, treat all of the rubber seals with some proper rubber conditioner.
And more importantly i am going on some road trips this year, so something to look forward to!

Very impressed with your car, it looks stunning - Keep up the excellent work and this thread, I feel that i am not alone emptying my bank account every now and them making my car as good as it can be!!
 

Attachments

  • Mercedes SL 500 Wheel refurb resized for MB forum.jpg
    Mercedes SL 500 Wheel refurb resized for MB forum.jpg
    957.7 KB · Views: 1
Oh yes, i forgot some photographs of my car !! I have also added a factory optional wooden steering wheel.... Feels nice in the hand, not for everyone...

That last photo is with the non stock wheels ..... I still have these and i do like them, but i wanted to make the car as stock as possible.... I also have the black steering wheel ( Just in case )
 

Attachments

  • SL 500 With new wheels resized d.jpg
    SL 500 With new wheels resized d.jpg
    1.8 MB · Views: 11
  • SL 500 Steering Wheel.jpg
    SL 500 Steering Wheel.jpg
    1.3 MB · Views: 11
  • SL 500 resized .jpg
    SL 500 resized .jpg
    1.5 MB · Views: 11
Hi There Cxly, firstly i have read the entire thread, and what an excellent job you have done! The car looks amazing ( Not sure about the roof lights though, But hey! I like Marmite and Sprouts! ).
Question? Can i drop of my 2003 SL500 for you to polish!!!
What i have done with mine is have all of the mechanical parts sorted including new struts ( ouch that was properly expensive ) Full service including the gearbox, new track rod ends, brake pipe brake discs blah blah and this year i am concentrating on the exterior. I have purchased a set of factory correct 18" wheels and had them refurbished ( look great ) new rubber all round.
I have booked the car in for some respray work for October .
I am going to give all the leather interior a full restoration and re colour, treat all of the rubber seals with some proper rubber conditioner.
And more importantly i am going on some road trips this year, so something to look forward to!

Very impressed with your car, it looks stunning - Keep up the excellent work and this thread, I feel that i am not alone emptying my bank account every now and them making my car as good as it can be!!

Thank you very much! I appreciate your comments, it definitely makes it all worthwhile!

Sure, can always drop me a message and work something out!

You’re going for the full marathon on the car, honestly, when you look back at it afterwards you’ll be happy you did. The car is looking is immaculate! Keep us updated, I’m really intrigued on the leather restoration process.

Ooo, the road trips sound really interesting! I want to do this myself over summer, go through Germany, Switzerland and France - in these cars, you won’t even feel pain🤣.

Again, thank you for your comments! It’s going to be a car I’ll keep and eventually pass on in the family. I think later this year I should have it to a point where it’s 99% (can never ever be 100% with these cars🤣) and look to just purely enjoy it and start the plans of adding a few more cars to be along side it. Will be looking to sell my two MK1 Golf GTI’s later this year and will be looking at putting those funds towards a SEC 500/560 or a W140 S500 LWB as an old school option and a E55 W211. I think it could make a nice 3 car garage😎
 
Oil, Filter and Gasket arrived today from Mercedes Benz Glasgow. Just waiting for a few more bits and should be ready for the transmission/valve body service.
A5FF6259-3B2B-4B19-BAA3-F14EF6AC4F91.jpeg
 

Attachments

  • 25380170-57D2-4107-828B-08BC09A7CC6E.jpeg
    25380170-57D2-4107-828B-08BC09A7CC6E.jpeg
    1.3 MB · Views: 3
  • 9327C920-8025-4275-9239-98D9B729E23D.jpeg
    9327C920-8025-4275-9239-98D9B729E23D.jpeg
    1.4 MB · Views: 3
Great post ,well done ,your dedication has produced an amazing looking car. .Its fantastic to see our CL's being maintained and cared for, I am on my second one and looking forward to bringing it out the garage this summer for some fun.
 
Great post ,well done ,your dedication has produced an amazing looking car. .Its fantastic to see our CL's being maintained and cared for, I am on my second one and looking forward to bringing it out the garage this summer for some fun.
Thanks buddy, appreciate it!!

I can’t wait either, should be a good summer!
 
You would not beleive how excited I was to see some updates; and what a treat they are!

Your headlining looks incredible!

I was surprised to read you plan on so much bodywork, I thought the car was already "like new" from your previous photos.
 
You would not beleive how excited I was to see some updates; and what a treat they are!

Your headlining looks incredible!

I was surprised to read you plan on so much bodywork, I thought the car was already "like new" from your previous photos.

Ahahah, I’ll keep them coming! And thank you so much!

I think watching The Patina Collective on YouTube has made me a bit more OCD to be honest. I wanted every possible detail like new but now, I want it better than new. I really want to bring this levels above than I originally imagined.
 

Users who are viewing this thread

Back
Top Bottom