• The Forums are now open to new registrations, adverts are also being de-tuned.

My Rust Repair Attempt

jpskiller

Active Member
Joined
Nov 18, 2006
Messages
898
Location
Preston, Up North!
Car
Wifes
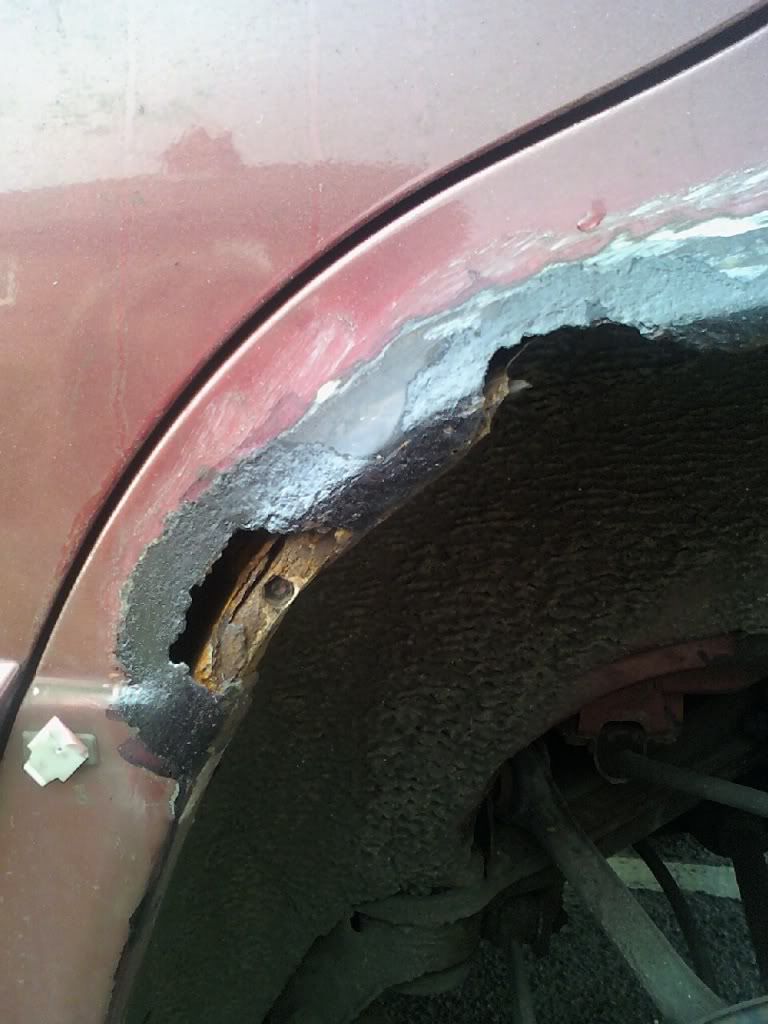
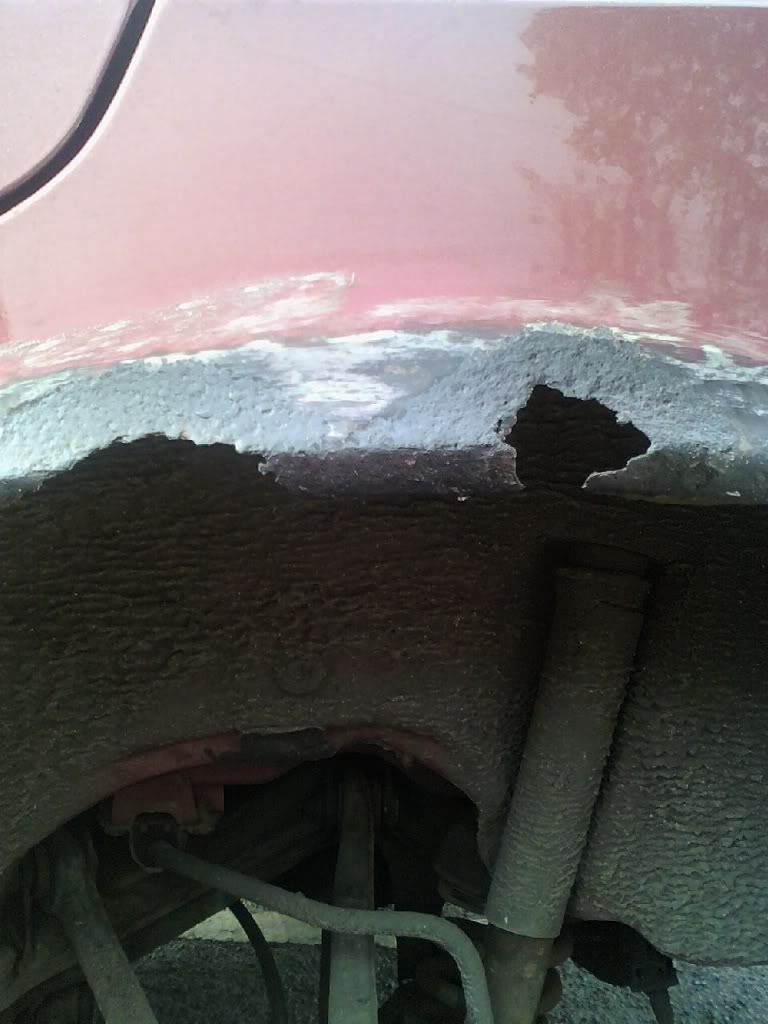
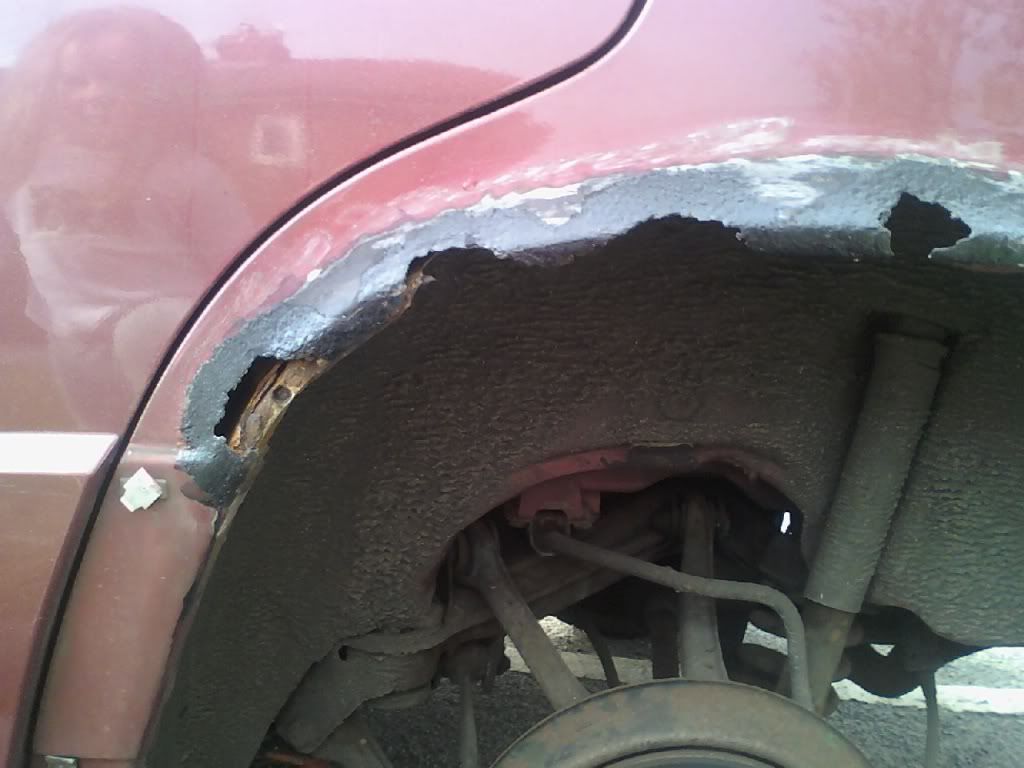
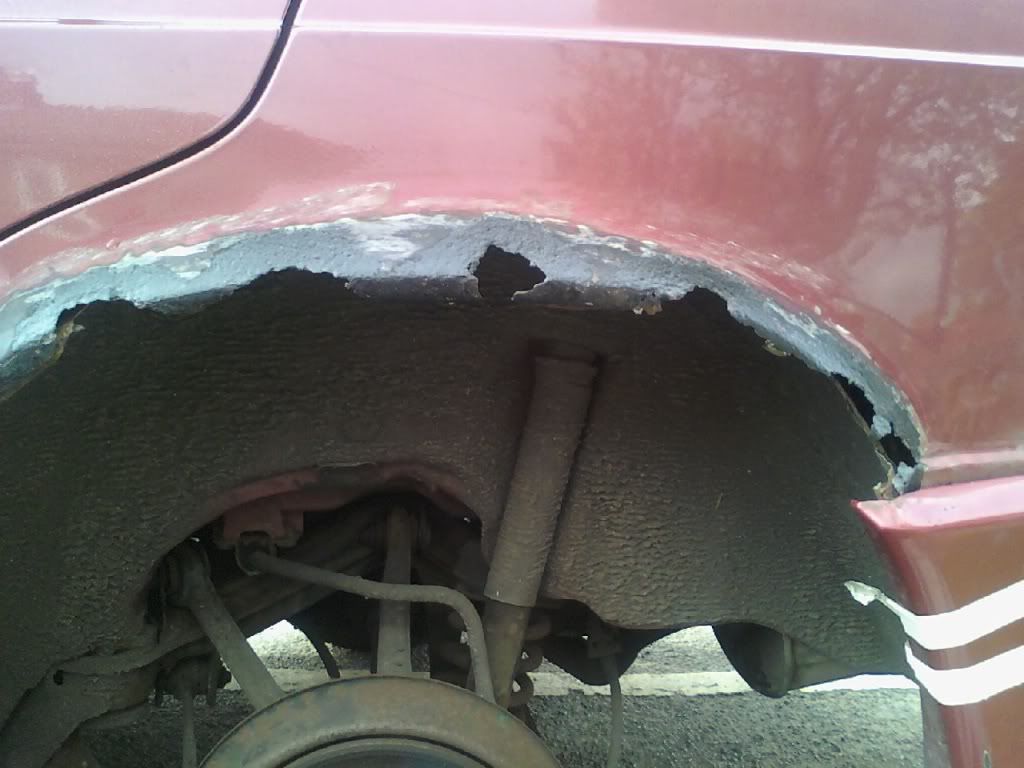
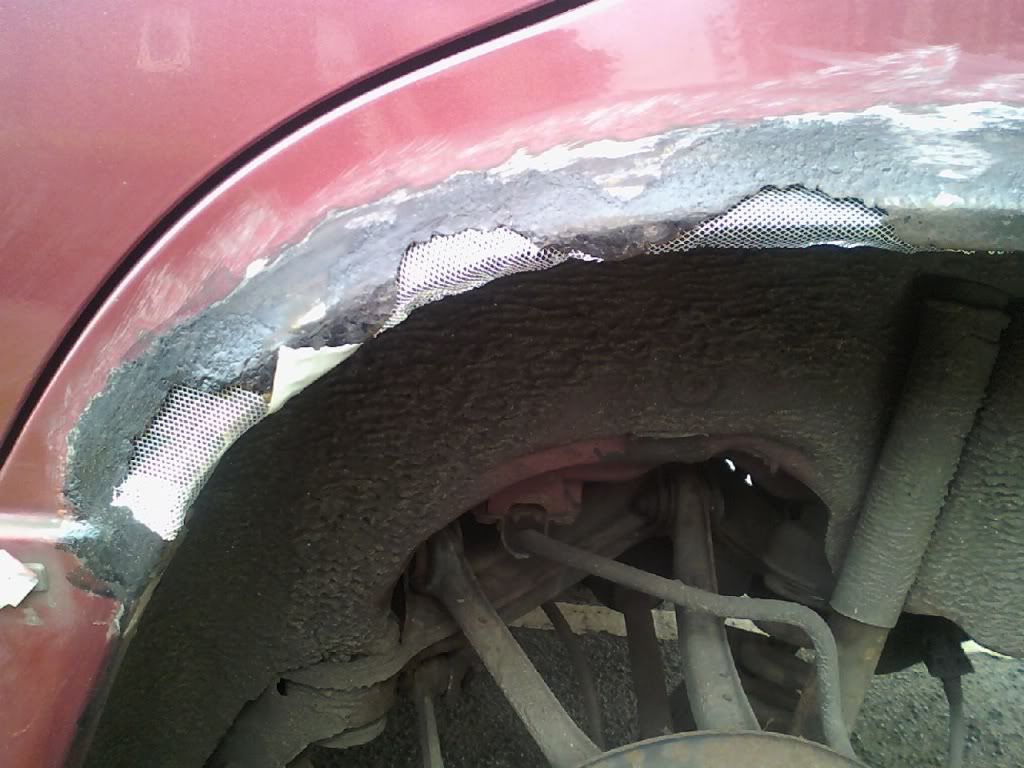
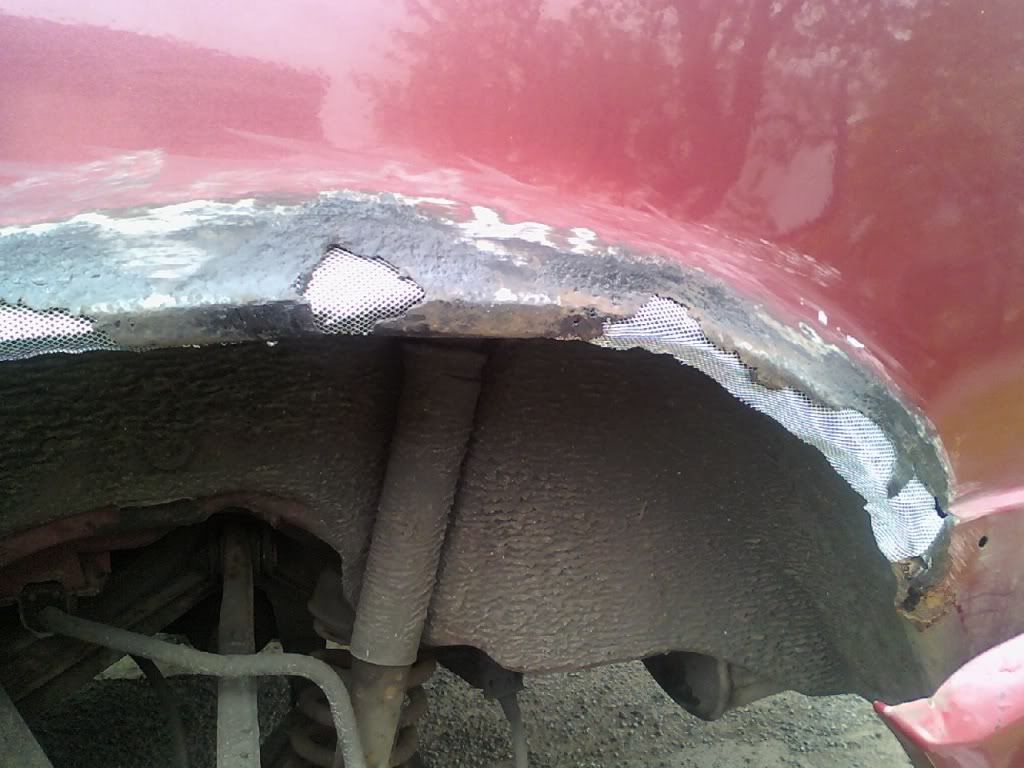
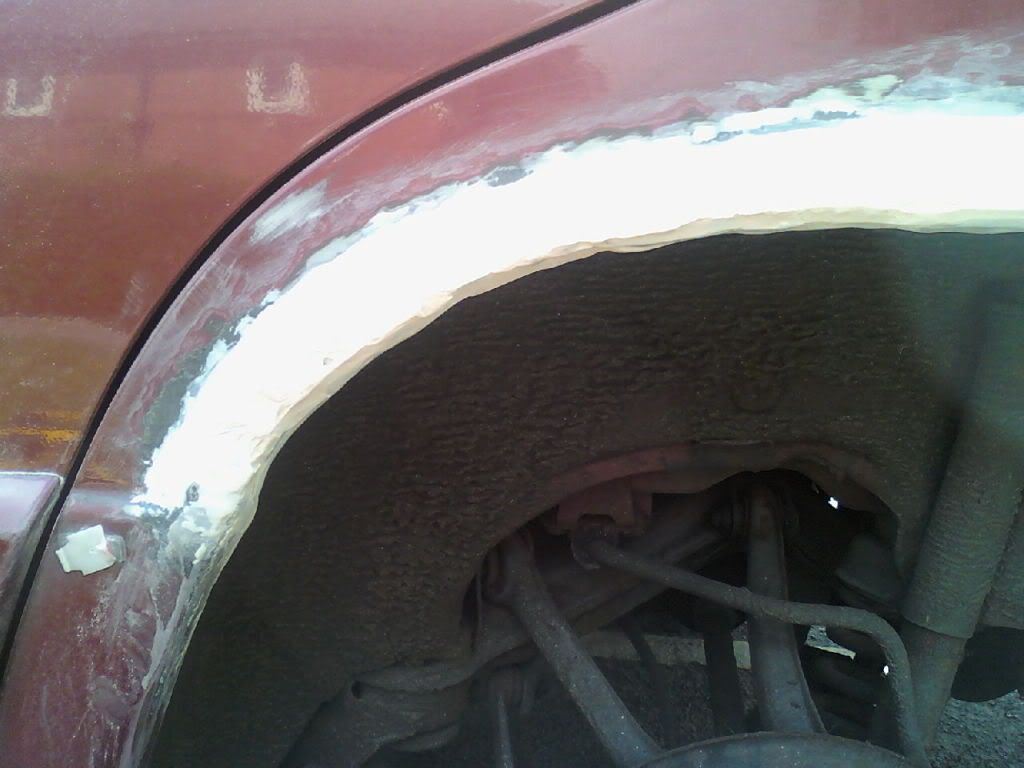
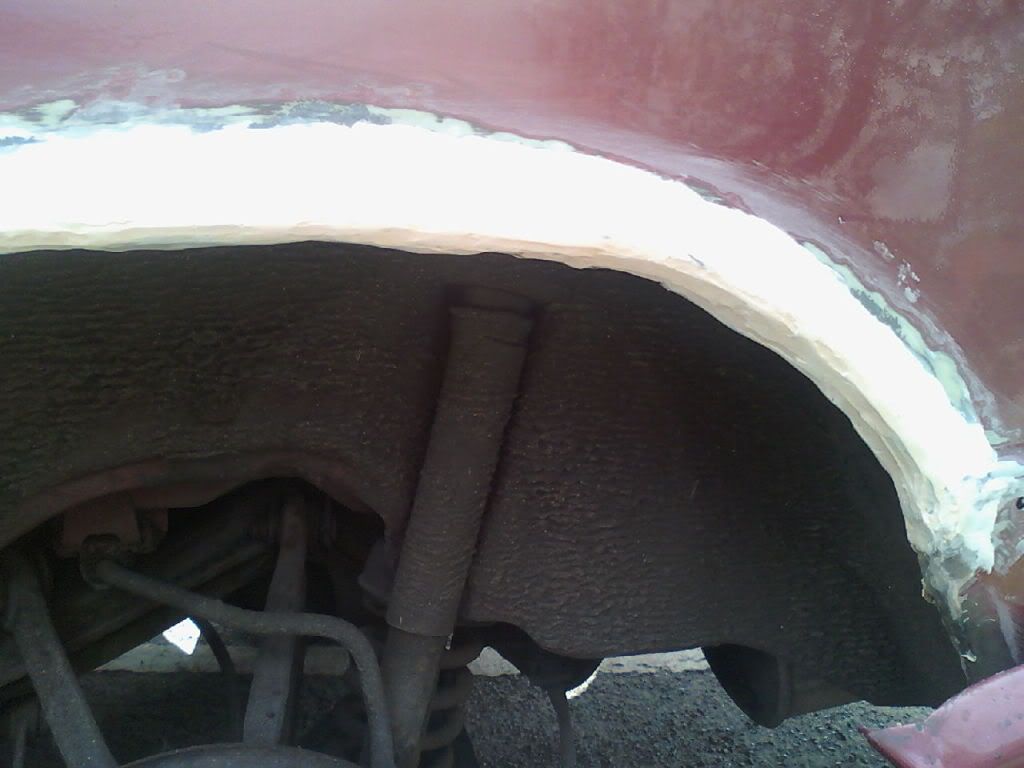
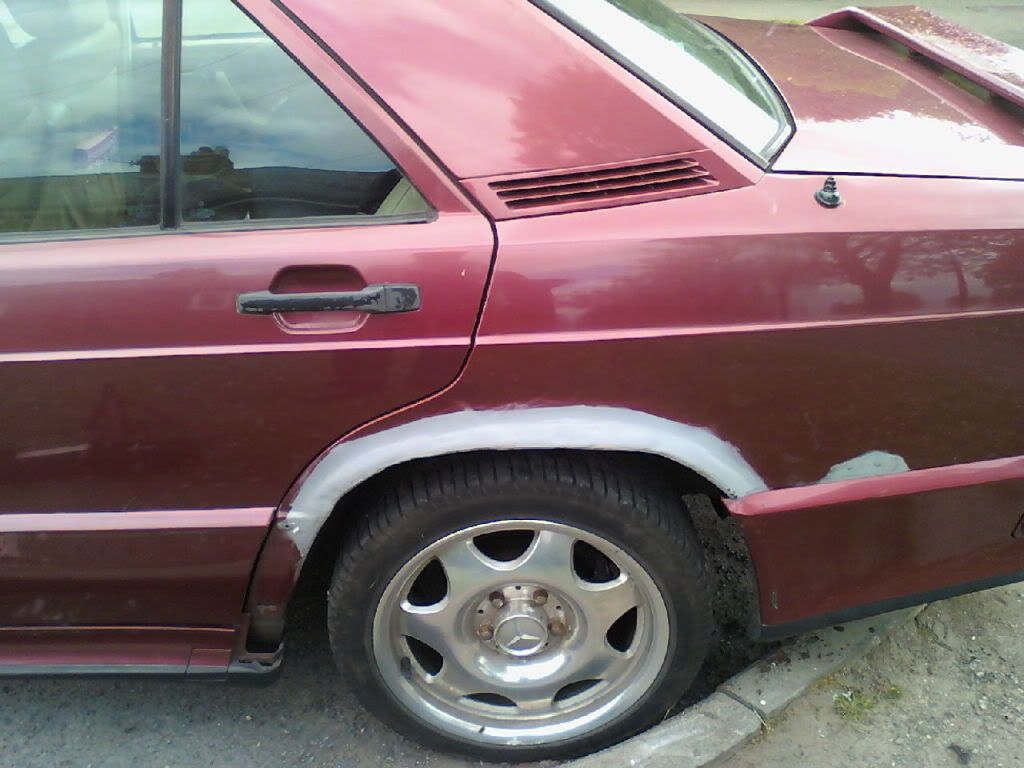
On wifes 190, the rear arch body kit was very loose, and before any kids nicked it it, I popped it off or rather it fell off in my hands, see below pictures of what was left and my attempts to repair.

I realise most people would say scrap the car or replace whole side but money is very tight and if I can keep it going for another year or two then all the better

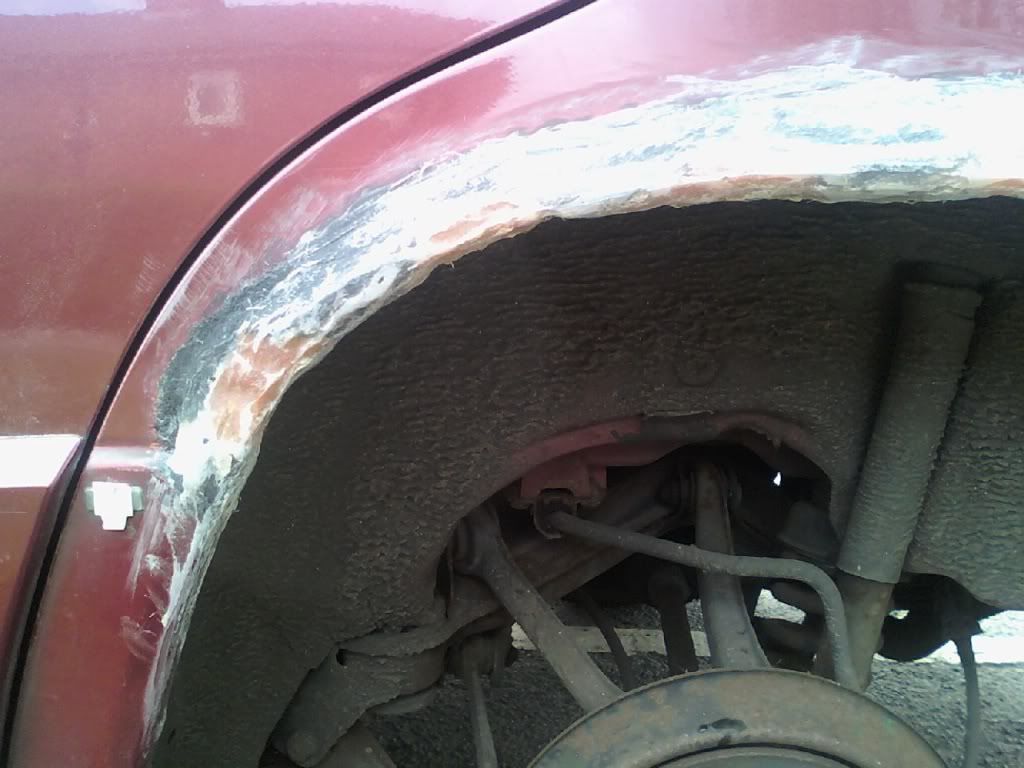
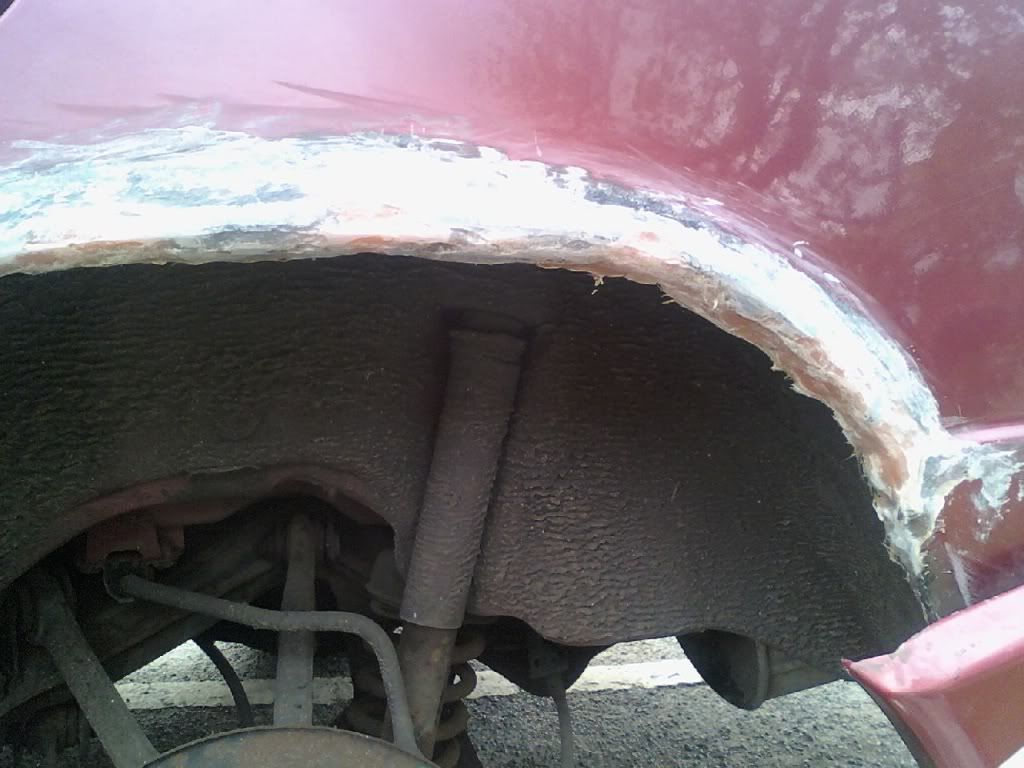
I first removed as much rust then treated with Krust, Followed by fitting mesh to try and get some shape back, and applied firber glass inside and out to rebuild, after that put body filler on and sanded, it dosent need to be perfect because the bodykit will be going back on.

pics to follow:
 
100515_083715.jpg

100515_083724.jpg

100515_083731.jpg

100515_083752.jpg

100515_083745.jpg


Mesh Fixed into place to hold firberglass

100515_090204.jpg

100515_090214.jpg


Fiberglass sanded ready for body filler

100515_100626.jpg

100515_100634.jpg


Body Filler done and sanded

100515_112925.jpg

100515_112934.jpg


More sanding and Anti-Rust Primer

100515_134829.jpg


As said not perfect but after body kit is re-fit and spray, should be ok for a while
Also fully waxoiled inside of wing

P.s this is my first attempt at anything like this, so if I can do it, anyone can!
 
Last edited:
From the first picture to the last - the difference is remarkable. Will be good to see it with trim refitted. Good work.
 
Products Used :
Isopon P40 Firberglass kit x 1
Isopon P38 Bodyfiller x 1
Davids Aluminium Mesh x 1 sheet
Kurust - not gel heard some mixed reviews about that
1 x deruster drill attachment
P180, P300, P800 wet&dry
Anti-Rust Primer

And Lots of elbow grease
 
Last edited:
just a little tip. if you want to shape body filler (to the rough shape) apply it to the body then put a clean plastic bag (freezer type bag) over it. you can then run your fingers over the filler to shape, then when filler has gone off, bag just cleanly peels off !. leaving you to just sand back.
1st attempt very good.
 
Looks like a good job - I did something similar with my first 190 , although it wasn't as far gone . Definitely don't scrap car for such a minor problem but do check for rust lower down at rear jacking points as that is structural and an MOT failure - usually 190's rust there before they go anywhere else .

BTW there isn't supposed to be any 'bodykit' on the arches of a 190 : chrome arch trims are an aftermarket fitment usually put on by owners who want to cover up rust , and they end up CAUSING rust due to trapped moisture .

Good luck with the car , though , they are up and coming classics which deserve to be preserved . Some panel suppliers do rear wheelarch repair sections for the 190 which can be welded in , if you want to do a more permanent repair later on .
 
do check for rust lower down at rear jacking points as that is structural and an MOT failure - usually 190's rust there before they go anywhere else .

BTW there isn't supposed to be any 'bodykit' on the arches of a 190 : chrome arch trims are an aftermarket fitment usually put on by owners who want to cover up rust , and they end up CAUSING rust due to trapped moisture .

thanks, jacking point is ok for rust at the moment (passed mot Jan), this car was modified by mercedes cicley when new and has the full Cosworth Body Kit which includes the arch covers.
 
Seems an unneccesarily elaborate job here...

Newspaper, chicken wire, polyfilla and a good coat of gloss paint used to be quite sufficient...

...for a couple of weeks...
 

Users who are viewing this thread

Back
Top Bottom