• The Forums are now open to new registrations, adverts are also being de-tuned.

OM642 Green O-Ring replacement instructions?

According to WIS, and referring to the picture in post 3 for ease of everybody's reference:
OM642 Green O-Ring replacement instructions?

- Remove the top engine cover.
- Remove the batwing (item 5).
- Remove the auxiliary belt cover (possibly optional, but WIS absolutely says remove it).
- Remove screws and brackets at 45, 50 and 60.
- Remove the black plastic bracket near the end of the metal tube/next to the resonator box (bracket is connecting to a thick rubber intercooler hose).
- Loosen (but maybe remove is more effective) the 2(?) screws holding the black plastic resonator box in place.
- You should now have enough room to wiggle the aluminium pipe free (of course leaving roughly in-situ if only replacing the o-rings.

Nice to know this doesn't require the bumper off.
But, for any of the o-rings on the lower part of the system attached to the intercooler, it does require access from underneath and engine underguards removed (still no bumper off apparently).
 
Can confirm that the above instructions also work on a W219
 
Thanks for that!

My problem remains the same - either you need a long and flexible torx wrench adaptor to get to the two very small screws on the kidney/plastic resonator box (and possibly/probably drop them!), and/or you need to remove the plastic shroud which sits parallel with the fan.

You can get to the top two screws of the plastic shroud, but it's still connected by another much lower down, which I can't get to. Loosening the plastic shroud would really help with access!

Anyone got any suggestions on accessing those two screws?
 
Also noticed that (on my dad's car at least) there's some remnants of sealant on each side of the pipe.

Are you guys (that have done the job) just replacing the o-rings, or are you using some kind of extra sealant too?
 
Just the o-rings and a smear of silicone grease. Don't see why anything else is needed and any sealant is going to make dis-assembly difficult in the future.
 
Ah, I saw some blue stuff so assumed it was sealant.

Anyone able to offer any suggestions on removing those two screws, or the plastic sheet behind the fan? There's barely any room to manoeuvre.
 
The car needs an MOT so I called the indie and asked how much it would cost to do the replacement, and they said it's quick, about 1/2 hour labour, so for £45 inc. VAT I'll just take it there! Especially as it's not really my car.

Still interested in learning more for when I replace the seals on my own car, though.
 
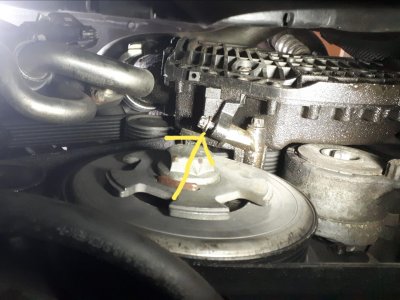
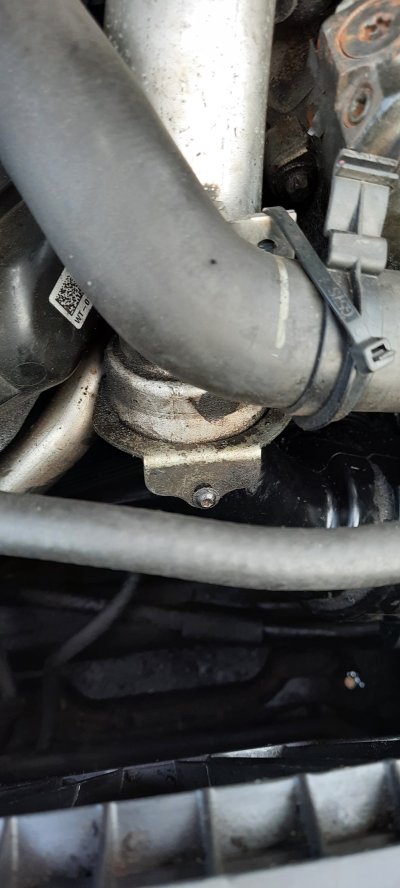
My car is a C350CDI facelift 265bhp. Ive Just changed both O ring seals on the resonator pipe, the green one and the black one, which connects to the resonator box inlet. All I did to remove the resonator pipe is to slacken off the two resonator box bolts but not remove them, one you can see from viewing looking under bonnet, the other you can't see, so I removed the front two under tray covers from from front bumper end. See attached photo for lower resonator box bolt. I used brothers inspection pit , which makes this task easyer.
 

Attachments

  • IMG-20200627-WA0001.jpg
    IMG-20200627-WA0001.jpg
    197.3 KB · Views: 101
Bought all these from MB Grangemouth to change all the turbo-intercooler o-rings.
A0149976445
A0279974745
A0219976545
A0219976645 x2
A0289974548

Really helpful bunch.
Came in at just over £30, and sent to a local Arnold Clark for free delivery. Best price for these parts by a mile.
If you need some Merc bits, I recommend you see what their prices are; I've been pleasantly surprised!
Did you need to mention the forum for a discount or was it just good prices from the start ?
 
The replacement 'black' seal between the outlet end of the metal turbo pipe under the batwing and the inlet for the resonator for the 265bhp OM642 engine (E350) is I believe A0279974745. (this is the other end of the pipe to where the green seal goes).

See here for a parts catalogue:
CHARGE AIR INTERCOOLING MERCEDES E-KLASSE [Car] [CHASSIS] (EUROPA)

All the intercooler pipes, resonator and seals are shown.

I cannot seem to find part A0279974745 anywhere in the UK. Has the part number changed?
 
I just phoned up MB Grangemouth and bought it direct from Merc. I wouldn't expect anyone else to sell it.
They were cheaper than anyone else for all the gaskets and seals that I could find elsewhere anyway.
 
On the older ones there's a horseshoe with one torx that holds the metal pipe to the resonators as well as one halfway middle of pipe. They sometimes can be wiggled but better to remove the resonator bolts and it frees it all up.
Install the green O ring with a tiny bit of lube over the turbo not inside the alloy pipe. We used to use two O rings as these fail so easy.
 
Thanks for the image of that bolt under the resonator box ambjoinery ;-). I've been trying to replace my Thermostat today and it was not knowing where this bolt was and not being prepared to approach from underneath and remove the undertray that made me jack in the task. It was that last bolt that just wouldn't give me enough play to get the pipe off to access the Thermostat bolts. I might give it another go tomorrow afternoon.
 
That's an awesome video. Mr Greedy thanks for the list of parts. Makes life much easier.

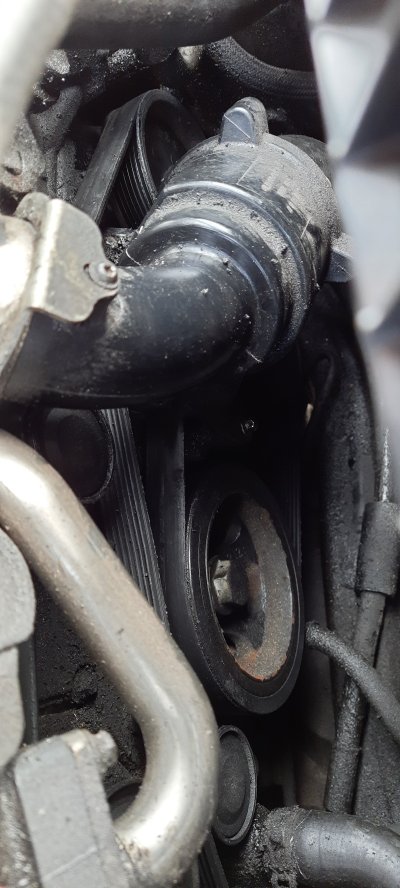
I have a load of oil all over my aux belt and I'm almost certain it's from where the metal pipe joins the black resonator.

Might even attempt my self.


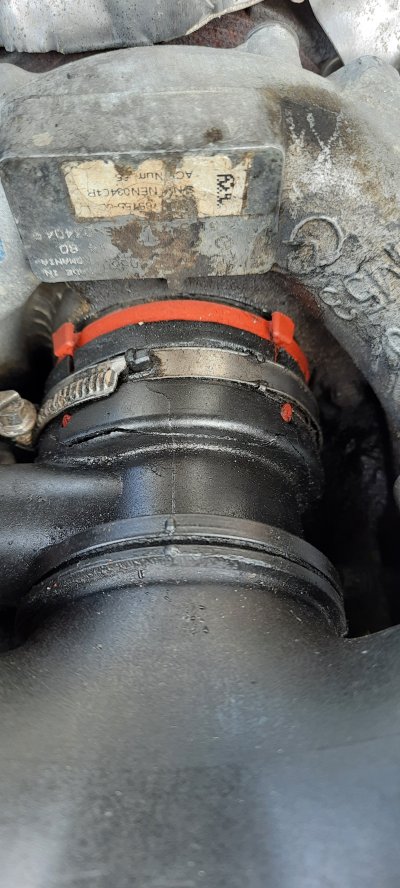
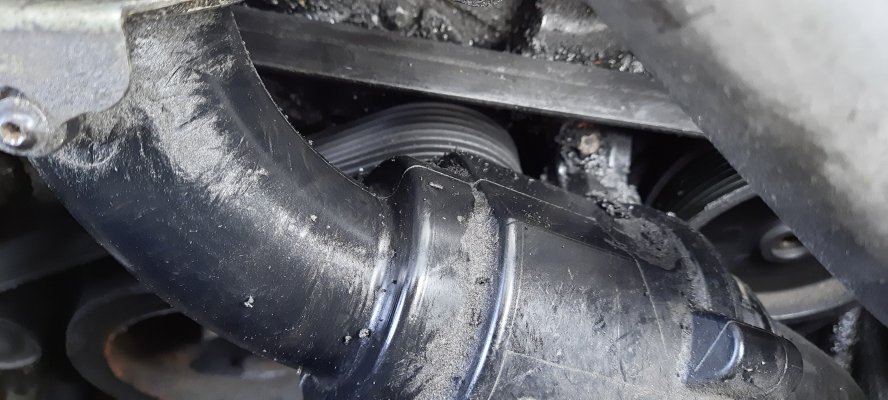
I do have a small crack in the bat wing... How worried should I be? I was thinking of using some plastic weld or araldite.
 

Attachments

  • 20220101_125030.jpg
    20220101_125030.jpg
    1.5 MB · Views: 41
  • 20220101_125053.jpg
    20220101_125053.jpg
    1.6 MB · Views: 39
  • 20220101_125050.jpg
    20220101_125050.jpg
    1.4 MB · Views: 32
  • 20220101_125045.jpg
    20220101_125045.jpg
    1 MB · Views: 38
I had a leak on the intercooler hose that comes out of the resonator and feeds into the intercooler. I changed the seals on both ends. It’s close to the location you mention, so check it out of you can!

That black seal at the end of the silver tube can be tricky as it doesn’t always give you a confidence inspiring pop or feeling that it’s correctly in place. I’d change all the seals you have the ability to change!

That crack in the batwing doesn’t look small to me. I’d Google turbozentrum and buy a silicone hose and dremel off the rest of your hose, or buy a second hand one perhaps? It’s such a silly design…
 
Your main orange turbo seal should really be pushed in more than that btw!
 

Users who are viewing this thread

Back
Top Bottom