• The Forums are now open to new registrations, adverts are also being de-tuned.

Project: Rust (W208 CLK)

tlbham

Active Member
Joined
Jun 13, 2009
Messages
114
Location
Bucks
Car
2001 CLK430
Hi all,

I'm about to begin trying to fix some of the rust on my W208 CLK. I thought it might be useful to other members to learn from my successes/failures over the coming weeks/months.

I'll start by saying I have a tiny bit of experience fixing minor rust on past cars, but I'm very much an amatuer.

I'd welcome any advice others have for me.

Starting point: Early-April 2011...

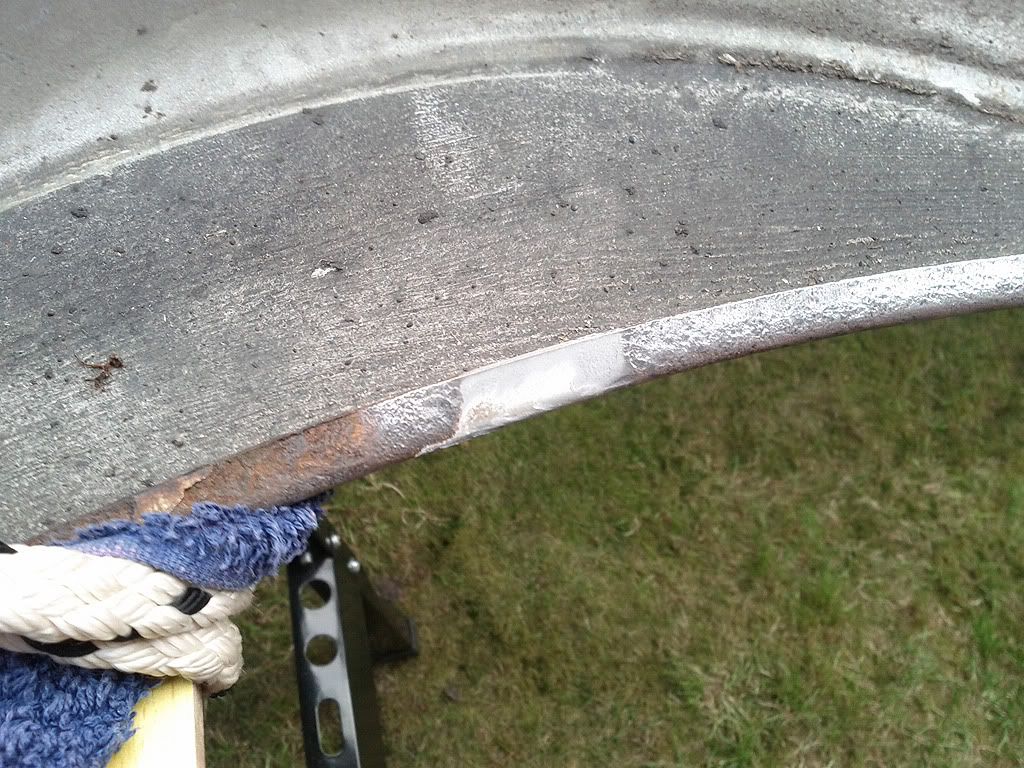
1. Rust on front edge of rear nearside wheelarch.
DSC00012.jpg

DSC00013.jpg
DSC00014.jpg


2. Rust between lights, nearside.
DSC00015.jpg

DSC00017.jpg


3. Bubbling starting on offside wing, adjacent to bumper.
DSC00020.jpg


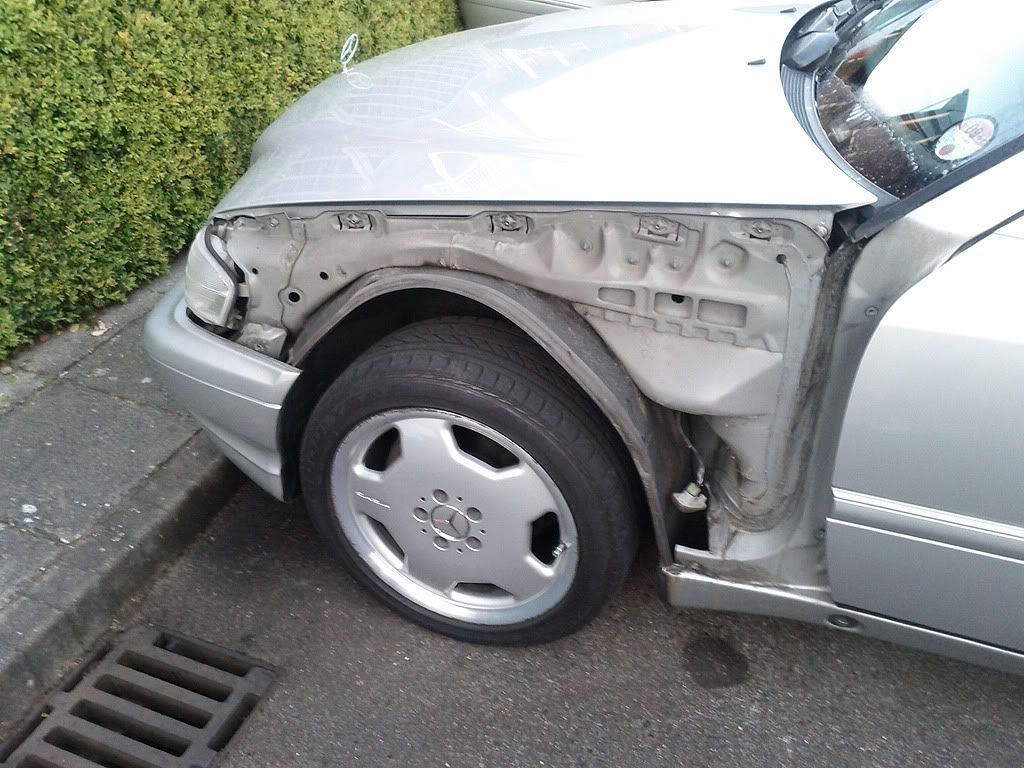
4. Rust behind offside front wheel.
DSC00021.jpg

DSC00022.jpg


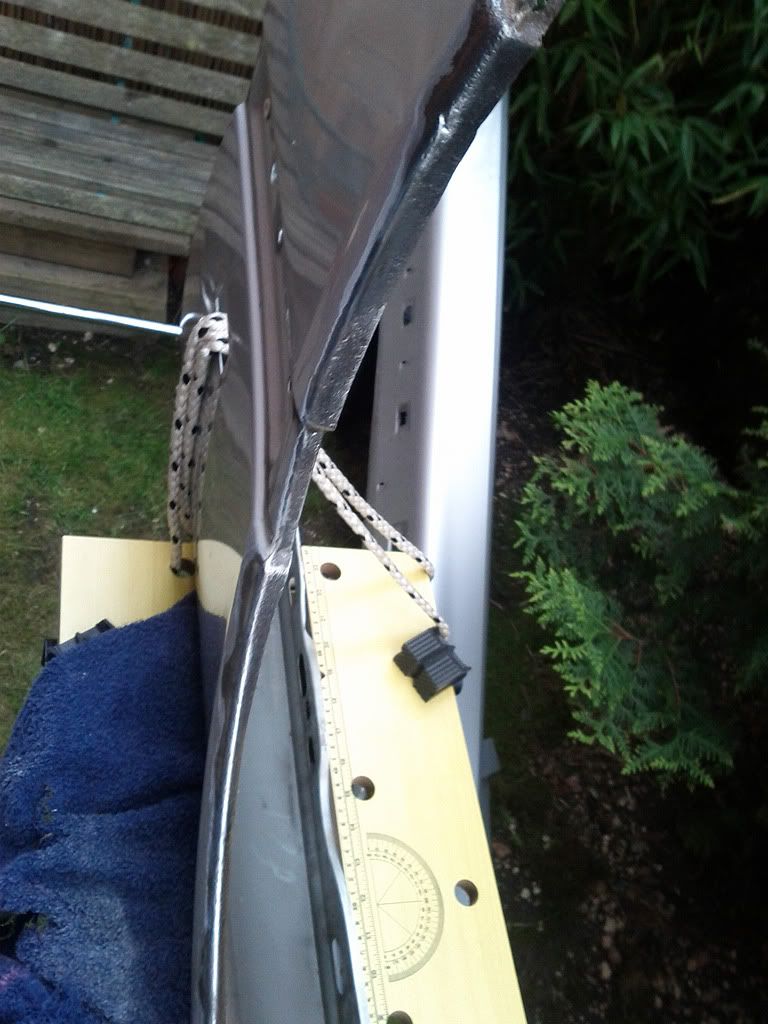
5. Beginnings of rust at front edge of offside rear arch (under trim).
DSC00023.jpg


I'm wondering where to start as I write this - so much rust!!!

I'll most probably begin with the bonnet rust, between the lights. It's easiest to reach (no bending down) and fairly small, with no nooks/crannies. :thumb:

Equipment (will add more paint/primer in future)
DSC00024.jpg


...I will also have access to a garage and spot light, plenty of newspaper and other assorted stuff like cloths. If you don't have a garage, ideal weather is obviously dry (not very sunny though - this is bad for paint when drying) with no wind (otherwise newspaper gets blown into wet paint!). However, I would avoid doing this outside altogether, if you can.
 
Best of luck, hope all goes well.

I've owned many rusting cars in the past, and i've never had any luck with treatment! Countless layers of Krust, primer and topcoat all look good, and feel like they'll work but literally days later the rust begins to poke through! It is the most demoralising feeling..

Obviously a bad workman always blames his tools, and im sure success is based on workmanship!

One product i've had great success with is Hammerite direct-to-rust sprays, and in future i may try using these as the primer coat as they really do appear to stop rust. Fingers crossed.
 
The key is getting these anti-rust coatings actually in contact with the corrosion interface, which not where the brown rust is. This means removing everything that is even vaguely brown and somewhat grinding back into unaffected paint.
Once you have shiny silver steel you'll see little black specs which is the pitting. Whilst the active rust is happening in the bottom of the little craters, preparing the steel to this stage is good enough to get anti-rust coatings to work.
I tend to keep grinding until I think the metal is getting a bit thin, then apply the coating. I then use filler to fill up the scallops taken out by the grinder.

Judging by the pics, you could probably grind out most if not all the pitting, and therefore have an excellent chance of the rust never coming back. It's worth doing it properly once with rust, as when it comes back the next time it is much more deep seated. Unfortunately to do this takes a good day or two due to drying times and a great deal of careful sanding. When you rebuild the surface with fillers you must be careful not to sand through the anti-rust coating. If you do you'll have to top it up. Best of luck!
 
Furthermore, rusty wheel arch lips need thorough investigation. The trim needs to come off along with the wheel and you need to get brutal with the underseal on the inside of the wheel arch lip. The corrosion usually spreads just as far behind the lip as it does on the outside where it is visible. If this isnt dealt with as thoroughly as the area on the outside, rust will be back soon. This risks it getting into the seam there, which makes it very difficult to control. My W202 had begun to do this. Hopefully I'll get 2-3 years from all the work I've done. After that, it'll be time to cut chunks out and weld in repair sections!
 
any news/pics as to how this is going?
 
Remove the wing and use an angle grinder, dont think about using Sandpaper or attempting it on the car as it will be back within a year.

rust1.jpg


The only way you will get rid of it all is with a Grinder - mine was £30 from B&Q:
rust4.jpg


rust5.jpg
 
Karl have you got more pics showing how it progressed, and a bit of detail on your method? Would be helpful.

Cheers
R
 
I will do a "How to" to remove the wing if you like?
I have only done the one wing at the mo, so still have the other to do. The guy in the bodyshop couldnt believe I had done it with a spray can. - the trick is time, I spend the best part of 2 weeks on it.
 
I will do a "How to" to remove the wing if you like?
I have only done the one wing at the mo, so still have the other to do. The guy in the bodyshop couldnt believe I had done it with a spray can. - the trick is time, I spend the best part of 2 weeks on it.

I was more after a how-to on your removing rust/paint technique....if you wouldn't mind mate?

Considering the pro-s think you did a good job. If you could also let me know what paint/primer you used that'd be great.
 
1: Extreme Angle Grinder from B&Q - £30
2: Wirebrush attachment for angle Grinder £7
3: Krust (Liquid)
4: Hammerite anti rust primer
5: Various levels of sandpaper, 180, 400 etc
6: Halfords 744 Brilliant Sliver spray can
7: Clearcoat lacquer spray can
8: T-Cut (only T-Cut it after at least 4 days or so)

Once you have T-Cut it with plenty of elbow grease, it will look like it was done professionally.

The key is to start pressing down on the can before you make contact with the metal, and release it after you have moved away. Take fast swipes across the area and never slow down/stop on an area or you will end up with dark patches on the paintwork.

Thanks Carl - do you mind giving waiting times for drying etc at each stage - be much appreciated.
 

Users who are viewing this thread

Back
Top Bottom