• The Forums are now open to new registrations, adverts are also being de-tuned.

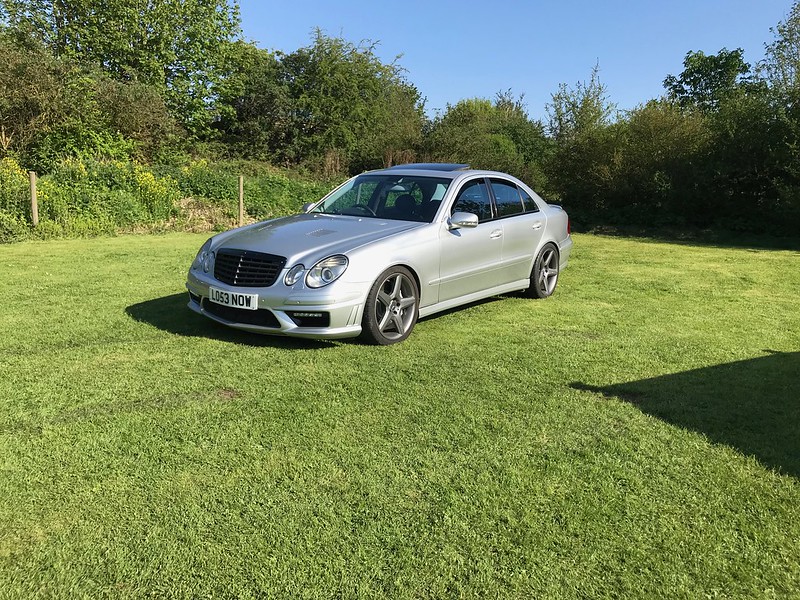
Silver E55.

They are available.

Congrats on beating A's 1/4 mile record. Well done and well deserved. When did it happen? I seem to have missed it.

Thanks Alex. I ran it October last year. Was a little frustrating because I hit the rev limiter on the 2-3 shift.

I'd also gone another day with many kilos taken out, nice cold temps and strong tailwind at Santa Pod (which is quite rare), but it rained out. But hoping to go this Saturday if weather stays nice.

Managed to cut out 112kg of weight when in race trim (mainly in the form of a Kirkey seat, Braille battery and light wheels)
 
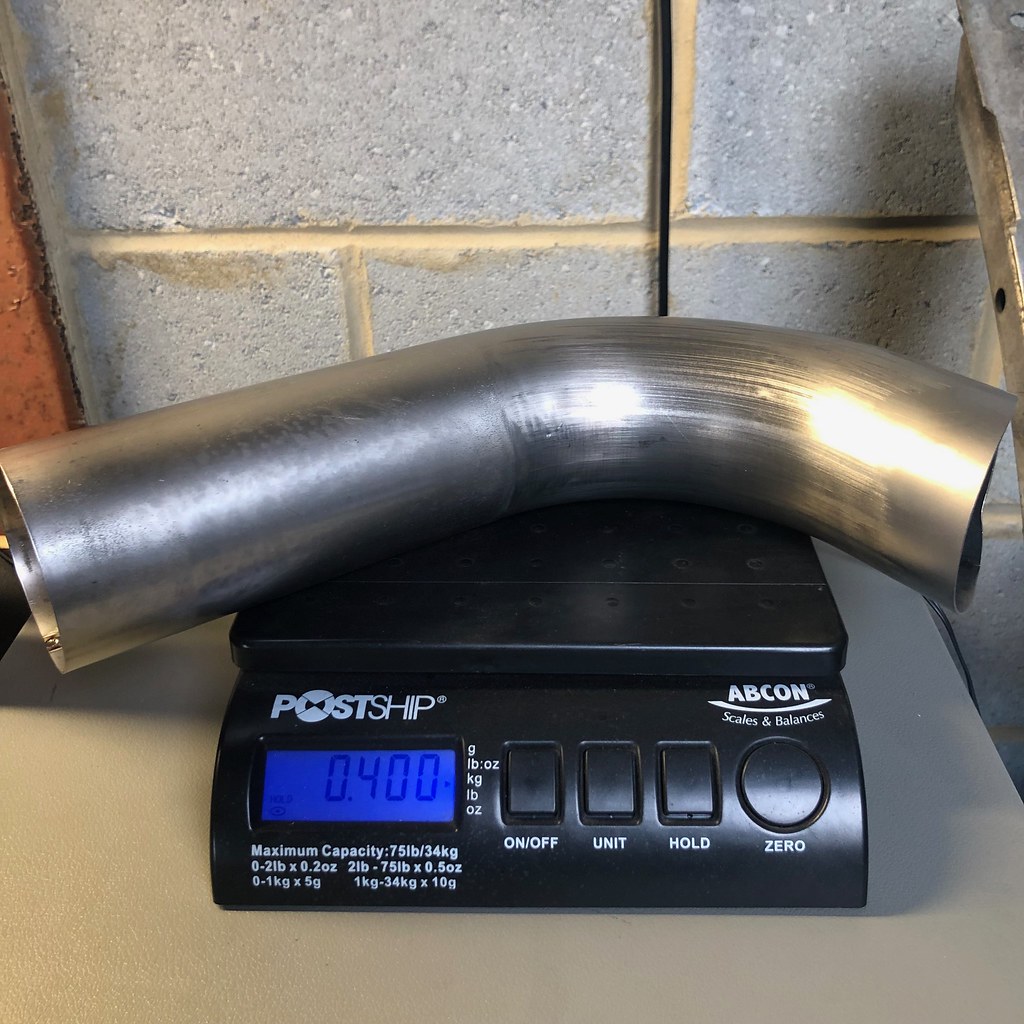
Not going very fast at this point due to being busy with a million of other things but some stuff has been showing up lately, which I can't wait to use in the car, namely this Titanium goodness:

46583907604_487ec23790_b.jpg


This forged 18" set:

46415513635_459a3082f9_b.jpg

Any hope you will make the exhaust for other M113k’s? Which forged rims are these?

Thanks,
Mick
 
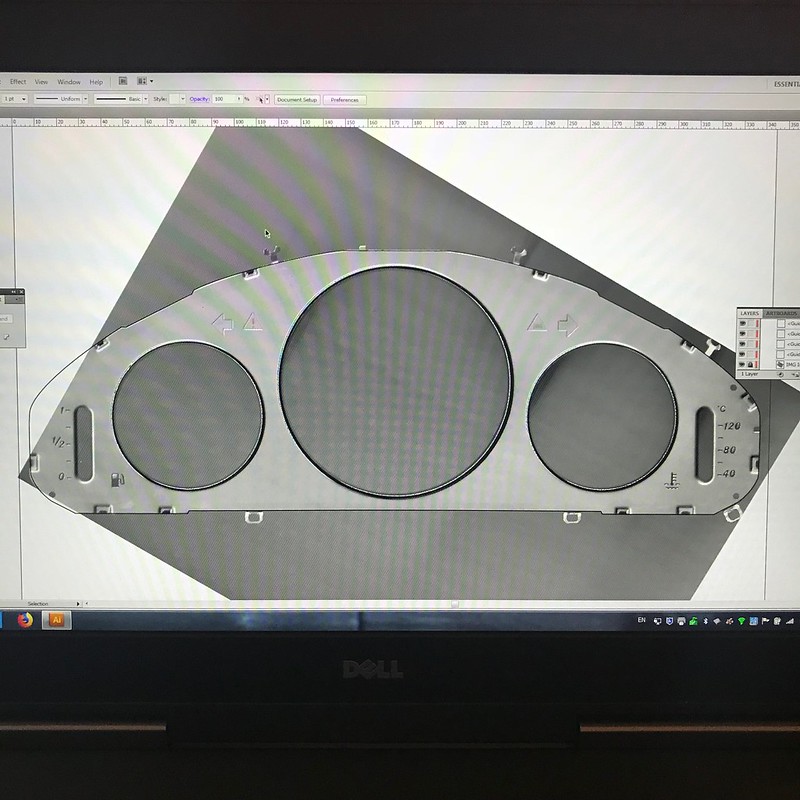
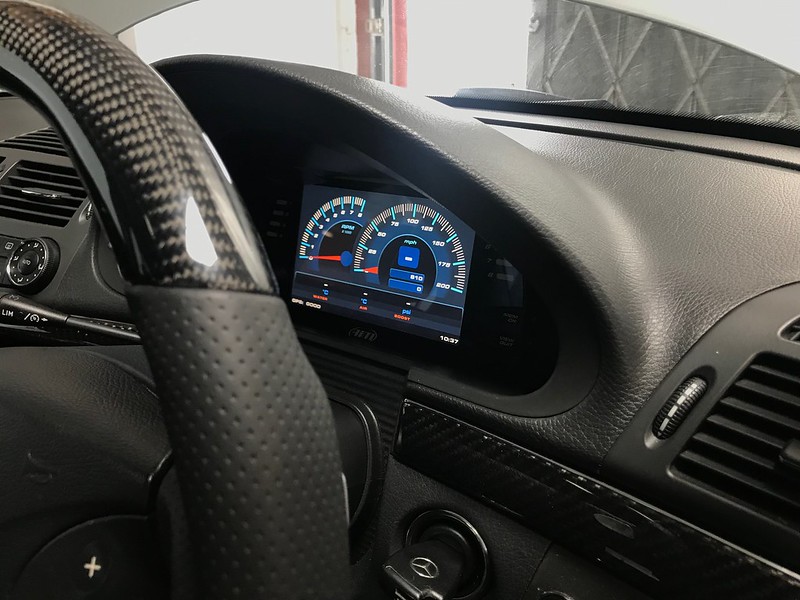
Whilst they were being made I thought it would be nice instead of cluttering up the cabin with extra gauges and dials for this and for that, to actually have everything displayed in one place. Modern race displays have the ability of not only pulling the information from the ECU but also allow some add-ons in form of sensors, indicators, etc. This would be really handy as I could not only see almost everything that happens in the ECU but have the road going features like high/low beam and side indicators, fuel level, set out some some warning (e.g. low fuel) and messages based on conditions of the ECU/sensors. With this in mind I removed the instrument cluster, took it apart and scanned the backplane. The idea was to integrate the new display into the dash pod as opposed to mount it on the steering column in front of the old one.

28140860608_916cdc0c7c_c.jpg


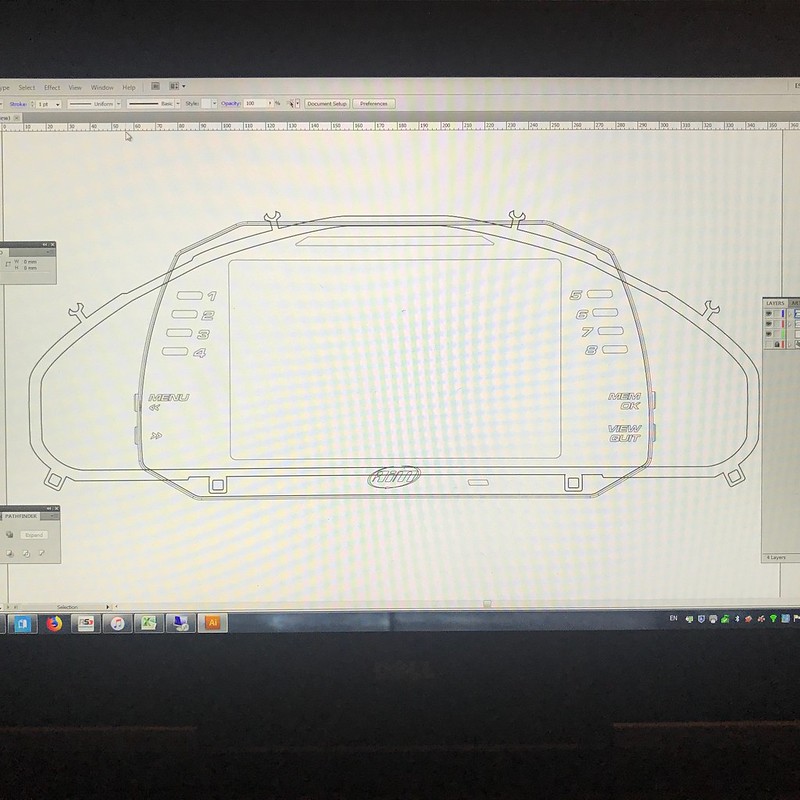
A couple of hours in the Illustrator playing with various dash templates and I had a nearly perfect match:

27144115647_a47e67ebb6_c.jpg


The new dash has lots of features which I don't immediately need but among the useful ones are:

- GPS module (e.g. for circuit driving as well as for measuring the speed - aka VBox)
- 8 screens of data (although I probably need only a couple - one for road use, another for showing the actual sensor data)
- Gear calculation & display based on speed and RPM (with the manual gearbox there was no way of knowing which gear you're in. Until now)
- Ability to add various CAN expansion modules (I use one for converting indicator/lights/fuel level sensors to CAN and displaying them on the dash)

28140860978_cd4298cf35_c.jpg


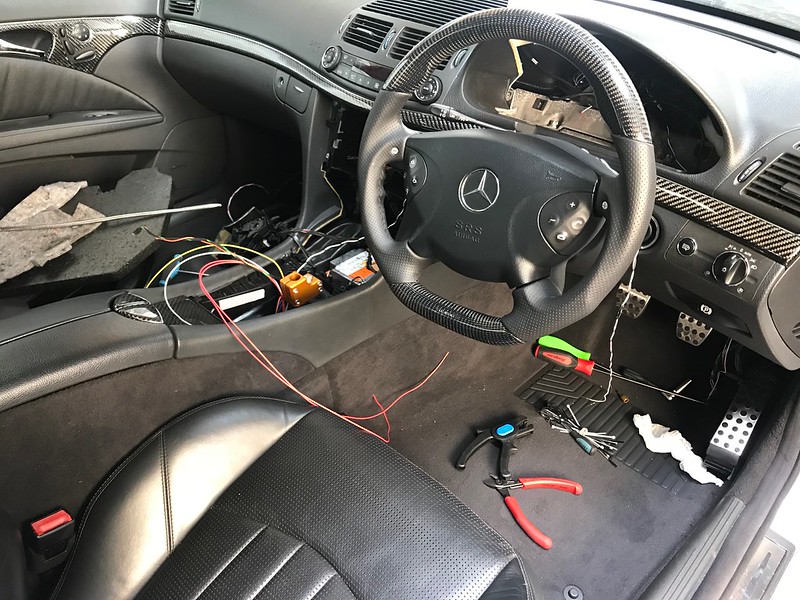
After making all the necessary brackets and wiring the dash:

41113762375_0099398b64_c.jpg


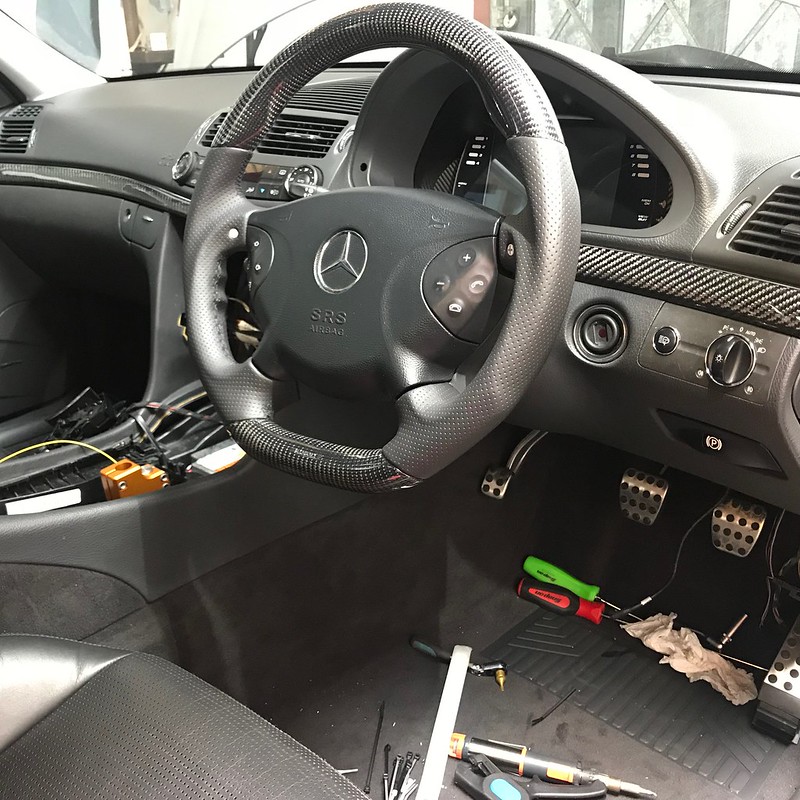
A quick test to confirm that it works in its new place:

41113762415_d253e073b6_c.jpg


I then took a drive down to the BOTG but arrived a fair bit later than planned due to 2853 traffic accidents that day, all on my way there:

42013843131_bd87c69539_c.jpg
. Would love this gauge cluster in my CL
 
Posted this in another thread by mistake...apologies to those forced to read it twice! :rolleyes:

Just spent an hour I didn't have following this thread and like so many others on here, feel the need to pass a comment or two.

Alex, your sheer tenacity at the way in which you have overcome to achieve your end game is astounding and admirable, to say the least.

Your taste in project appeals to me on so many levels...Q car stealth (noise notwithstanding ), engine looks fantastic (lurking as it does in gloss red and black without a plastic cover in sight) and wonderful attention to detail to realise it.

I once read a book about a driven chap like you, and I used to wonder where he found the hours in a day. His name was something-or-other Brunel. Great thread, well documented, and thanks for sharing! S**t, is that the time...!
 
Any hope you will make the exhaust for other M113k’s? Which forged rims are these?

Thanks,
Mick

Maybe. Depends on many things at the moment (time being the biggest factor). Wheels are BC Forged RZ09.
 
Posted this in another thread by mistake...apologies to those forced to read it twice! :rolleyes:

Just spent an hour I didn't have following this thread and like so many others on here, feel the need to pass a comment or two.

Alex, your sheer tenacity at the way in which you have overcome to achieve your end game is astounding and admirable, to say the least.

Your taste in project appeals to me on so many levels...Q car stealth (noise notwithstanding ), engine looks fantastic (lurking as it does in gloss red and black without a plastic cover in sight) and wonderful attention to detail to realise it.

I once read a book about a driven chap like you, and I used to wonder where he found the hours in a day. His name was something-or-other Brunel. Great thread, well documented, and thanks for sharing! S**t, is that the time...!

Thank you for taking the time to read. I don't have any special talents so will never come close to Mr Brunel.

Re these red cam covers. I tend to stay away from anything bright or bold in this car so red woudn't my first choice for anything but since covers came powder coated with the engine courtesy of Weistec Engineering, I kept them.

Thanks again.
 
Lol, I suppose my point was it is surprising what can be achieved by a mere mortal when you are dedicated of purpose.

And if that's the case with colours as they came, your engine looks fairly dedicated to purpose in its natural state, too (to me, anyway)! Keep us posted with your progress, Alex.
 
The progress has been a little slow due to a let down by one of the suppliers going under with my money and order. Ordered some titanium back boxes and lambda controllers from BTN Performance (part of BTN Turbo Charger Services) on the 3-4 weeks leadtime. Being let down multiple times before, been following up two weeks in onward when learned that the company is no more and all assets are being sold to a third party who hopes to restart the business and fulfil the outstanding orders. Heard all that before so got on the phone there and then (BTN's last work day apparently), got my money back (thanks for that) and went on re-ordering the parts. With over 4 weeks wasted, it's another few until the parts arrive, now from the US direct.

AEM Electronics came in first. Took over where BTN left, made an exception given the circumstance and allowed to purchase direct, and at a lower price. Which is a bonus. The back and middle boxes have been ordered from Burns Stainless instead of going titanium like planned before. Burns makes light weight re-packable exhaust boxes so the weight differential to Ti will be kept to the minimum.

Managed to squeeze a couple of jobs whilst waiting for the parts and that's full refurb on front and rear axle. Both subframes removed, completely de-rusted, treated with the converter and re-painted. Febi suspension components used to rebuild. All done in-house. Rear bushings upgraded to poly, made and supplied by Creative Steel of OR, USA. Normal weld and fab will resume next week. So hopefully not too long before she's back on the road again.

Some pictures of new headers taking shape in the "Lego" kit form before all the metal cutting and welding as well as of the suspension overhaul.

33886635518_8856e106d6_b.jpg


33886636048_18d96e2295_b.jpg


47711062612_f4fec1f8bc_b.jpg


47711062502_31246208f8_b.jpg


47763531891_5263159064_b.jpg


47711062732_19588b7e44_b.jpg


47711062622_3b928a8ae5_b.jpg


46847184905_009c5b365b_b.jpg


47763532701_5e46a6f700_b.jpg


46974402114_7d71c5ccb9_b.jpg


47763532101_1e2cd5f6d0_b.jpg


46974402434_1129bbf43e_b.jpg


46974402154_66762847d3_b.jpg


40797320253_00d859a8d7_b.jpg


40797320083_ec7318d1eb_b.jpg


46974402594_c720c38d21_b.jpg


32820070107_89af07b804_b.jpg


46974402464_aaae4b62c3_b.jpg


46847141715_f67c879b40_b.jpg
As ever Alex, absolutely amazing work, the under side looks virtually new, I really cannot wait to hear what this exhaust note will sound like given what your making, look forward to seeing the car when it's back together.
 
As ever Alex, absolutely amazing work, the under side looks virtually new, I really cannot wait to hear what this exhaust note will sound like given what your making, look forward to seeing the car when it's back together.
don't we all mate lol.
 
Do you have an idea on what the final capex will be Alex? Did you ever start with a budget in mind?

Would you ever sell it? :D
 
Do you have an idea on what the final capex will be Alex? Did you ever start with a budget in mind?

Would you ever sell it? :D

I’ve no idea on the costs buddy as it’s been nearly four years in the making. I hope it’s cheaper than going to college to learn metal fab and mechanics. If it was ever the goal?

I started in similar circumstances to @E55BOF with a broken engine and little to no understanding on what it will actually take to fix it. Eventually I just wanted to finish the car with no corners cut or expense spared.

A lot of it turned out to be my own time really (something we don’t get back.) Not so much money (which we make many times over.) Got some new skill or two out of it, some return fab business and a massive boost of confidence in actually achieving and completing things. Something I’m eager to use moving forward.

It would be silly not to sell the car if I had the right offer on the table. My idea for that is quite high so it’s unlikely to happen and I’m not at all desperate to give away such an enormous personal effort.

Clear as mud this one ;-)
I think it’s brilliant what you’ve done pal, I really do, and I’d like to throw my hat in to the ring when the time does comes to sell.
 
A few more bits done on the car over the past few weeks. New firing order specific headers are taking shape:

47978079448_183e7cf86a_b.jpg


Got to the point where I needed tighter radius tubing which is not available in mandrel bent form. Ordered some pressed doughnuts which had to come from Australia of all places. 4 days from placing an order until landing in the UK (and that's with regular post), another 2.5 weeks until I could come and collect them from a local depot. Who would have thought. But since I'm used to waiting for parts for this project forever, it's okay I guess:

47978109798_1ab5273971_b.jpg


One of the things that I realised early on was general difficulty with removing/refitting the parts in the engine bay. Everything is tighter than ever and as such even harder to access. So a decision was made to convert some of the items to AN fittings in order to make the task of pulling the engine (for example) less painful that it is. Helps with serviceability as well. First on the list was the gearbox. It's got a fancy aerospace grade dry break fitting:

47978079453_a67d624d41_b.jpg


That called for chopping the original OE line and re-welding the ends on to a stainless tube which then was shaped for the dry break fitting. For those who don't know what a dry break is, it's essentially a coupling that allows to disconnect a hydraulic line without spilling the fluid anywhere. Think of PCL air hose couplings, just for fluids. God knows why they tend to be extremely expensive (the one pictured is over £500 retail) but thanks to some research and good old eBay surplus, are available at near Chinese made dry break prices. So now removal of the gearbox is (relatively) easy - just pulled the coupling apart and it all stays dry and pressurised.

As part of general feedback from driving the car, I had to improve the oil catch can accessibility. It was originally placed in the auxiliary battery pocket behind the bulkhead which proved unwise. So it had to move back to the engine bay and took place of the s/c circuit header tank, which now grew to the size of an ice tank and moved where the aux battery and catch had been residing. Here's a quick fab job on the ice tank - 2mm ali sheet chopped on a guillotine, bent and tacked:

47978081407_8f12cc003b_b.jpg


47978081437_e8846dbd6a_b.jpg


Then some bracketry added to the chassis to support the tank:

47978079443_3c9a50ed71_b.jpg


All etch primed, ready for paint in the next few days. Once it's all fitted, I'll carry on with the headers and exhaust.
 
Very good to see the latest update, but you have digressed Alex..:) last i saw you were working on the exhaust, which given what you had already done there, it was already a work of art.. wish all workmanship was like that, is this diversion solely as awaiting materials from Aus..?? as ever mate, my hat goes off to you, astounding work.

R
 
This car just gets better and better.

I was reminded about this car today while down at BeanieSport dropping my wife's Twingo off. Chris said you pop in there for the odd chinwag.
 
Very good to see the latest update, but you have digressed Alex..:) last i saw you were working on the exhaust, which given what you had already done there, it was already a work of art.. wish all workmanship was like that, is this diversion solely as awaiting materials from Aus..?? as ever mate, my hat goes off to you, astounding work.

R

Thanks Ricky. A bit of both. Whilst I could just sit waiting for the material, I usually end up squeezing in a couple of smaller jobs here and there. And as I tend to overthink things, they wind up being full blown mini-projects in their own right. I started out with wanting to relocate the catch can (it gets a lot of condensation so needs emptying more often) but as the space has already been used up, I had to move things about and so instead of just moving the header tank, I thought I'd make it bigger. After all, it'd only take a couple of days fabbing it up, right? Wrong. New AN fittings, breather valve, this and that and it's another week gone. I'm still waiting for my guy to CNC a bypass type inlet so I'm not going anywhere for the time being. Matt of Terminal Velocity has kindly moved me to July so mid next month is my next checkpoint.
 

Users who are viewing this thread

Back
Top Bottom