• The Forums are now open to new registrations, adverts are also being de-tuned.

w124 estate e320 1994 knocking from rear/ replacing rear sub frame advise sought

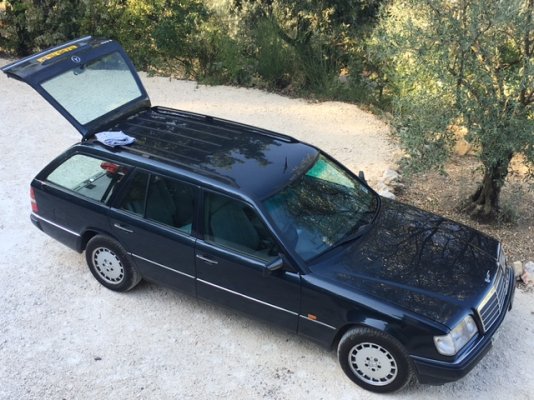
Yes, those parts for the subframe mounts are still (or were) made by MB. They were very expensive though back on 2017 when I bought them. Too expensive and I did haggle them down a bit but they are solid and just do the job. There are separate parts for the actual triangular mount and the lug plate that the subframe screws into. You'll see when you see a picture of them. The numbers are: 124 611 11 47 (Mount £63 each) ) 201 611 00 11 (Mount plate £34.70 each) But also there is a company in Germany 'Trabhan' that make peplacement panels for all the bits that rust out on these cars who are much cheaper. Haven't tried them yet but I will buy from them the panels for behind both headlamps for mine which need replacing. Below is their ebay page for the subframe mounts but on their main page are all the panels a w124 owner could possibly need. Bit more complex possibly buying from Germany now with new trading 'restrictions'. I am planning a trip to Berlin to see some friends in the summer (pandemic allowing) so will get the panels then.
Mercedes E-Class W124 Rear Axle recording + Thread Plate Axle Console | eBay

Pressing that axle/hub into the knuckle is tough. I luckily had a friendly local merc guy who let me use some of his tools. But even with the correct tool I was amazed at how tight it was. As a non engineer I am always impressed with those kind of narrow tolerances. Like I said before, make sure you have the brake shields in place before pressing them in!! Sounds like you did a good job on the rust under there. I did a similar job but much less effective than yours as I was on someone else's ramp so was in a rush. There is no stopping the rust - we can only slow it down!

Tom
 
Hi Tom, thanks for this, that repair patch from Trabhan looks spot on. I was wondering If I should make my own, but that looks like a great solution. I suppose key will be recording some datum points so that repair patch goes back in exact same position, or a using a stripped down subframe as a jig to hold patch whilst tacking welding into place. I think the day will come when a full strip down and rust cut out repair will be required, so might have to use this firm for other repair sections...good to know they are available.
Having seen my efforts my neighbour was quite perplexed, and said "why don't you scrap it and buy a new one", but I kind of like the challenge and have learnt from it too, I also like keeping it going, its turning into a bit of a "Triggers broom", but one thing that remains is that wonderful engine. And when it all works is a pleasure to drive, so ill keep repairing, using and enjoying it.
 
Yes, the 'why do you keep that old car going' is a common conversation. Only until they ride in it tho! I could have scrapped it so many times but I just decided to replace the part or get it welded and it just keeps on going. I recently bought a tiny and beaten up Citroen C1 for my kids to learn to drive in. Its a great little car with an amazing 3 cylinder toyota engine that uses no petrol at all. Easy to drive, fun and lightweight. For a while I wondered if it was the beginning of the end of my affair with my old wagon. Time to let the old dinosaur go? But it has simply served to make me love it more. Climbing back into the 124 after the tin can car highlights the way it was made and how lovely it is to drive. And as you say, that wonderful engine...
 

Attachments

  • IMG_5394.JPG
    IMG_5394.JPG
    176.8 KB · Views: 5
 
Useful info, just gathering parts to drop & overhaul rear subframe on my A124 E320. Interested to see how it rides after back & front suspension & bush replacement. It’s done 97k miles but looks to be on original suspensio.
 
Yorkee, good luck with the project...is there a problem with how your car drives now? Are you going to go down the polybush route?

I like the soft ride, to soak up the bumps, but was wondering is i should go polybush at the front, due to weight of our 3.2L engines/ improve handling at motorway speeds (90% of my use)...?

To keep on topic, couple of tips:

I would advise on not using heat whilst using a press. I bought a press and took it up to 9.5 ton to remove the rear bearing, then applied heat....nothing....but this action resulted in one of the calliper lugs getting bent a little, so my bolts were ever so slightly skew when put but in (visual check)...I checked with the engineer (who eventually removed the bearing), who confirmed that application of pressure and heat would get it back with no issues/ weakness to the metal. Whish was done. The bearing actually let go at about 12 - 13 ton without heat. So my lesson learnt is, if it doesnt move apply more pressure, not heat....

My next issue was the lower hub bush. What I should have done is get the engineering firm to replace this whilst the bearing was being replaced. It is so much easier with the brake shield removed, and probably would have only cost another tenner...

Instead i got the hub back, with brake shield on and old lower bush in. I had to soften the rubber to melting point with plumbers torch, apply 3-4 ton to push the inner socket out. Once this was done I had the issue of the outer sleeve to remove. I had to very carefully use a metal bladed hack saw to cut a slot in the sleeve. You will need to take the hack saw apart, put blade through, then fix the blade to the handle. The depth of the slot I cut was 1.5mm (be carefully not to go too far and damage the bushes seating in the cast). I then used a hammer and screw driver to knock the sleeve through, it took a number of hefty hits to get it to move. Once out out, it was clear that the sleeve was corroded at both ends 2 to 3mm all the way round, hence why it would not wind out using the threaded bar method seen on utube vids. This all took an afternoon, still.... im learning about stubborn bushes every day.

Next challenge, clean and paint hub and shield, install lower new bush when it arrives (threaded bar method hopefully), then put hub axle back on the car....
 
You will need some sort of spacer when installing the lower bushing, you don't want to use the centre to pull it in. And be careful to not damage the rubber gaiter like I did.
It's a sort of ball and socket bushing if I remember rightly.

Ps, I used the old sleeve as a spacer to install the new bushing.
 
I’ll be keeping it factory spec. Decided to do it due to tired rubber on all arms & surface rust on subframe & rollbar. Thought I’d start at the back & work forward. Repaired/restored other vehicles in the past, which involved welding & fabrication as well as mechanics. I have an engineering background & have a real problem putting back dirty/rusty parts back together when repairing. Would of gone bust if I’d been a mechanic!
The A124 is not my daily driver so time is not an issue.
Thanks for the tips & guidance.
 
Ours was refurbished using MB rubber bushes as per original spec. However at the front the anti-rollbar was replaced with the sport line version. This was not intentional but as it has AMG alloys and a sport line gear knob the guys assumed it was sport line spec. I think it does feel a bit tighter on the front but that may just be wishful thinking.
 
Possibly a daft question....once all apart if the bearing checks out leave it?
or do it once and change the lot?
My original plan was blast subframe & control arms and replace all bushes.
Replace the other 8 arms.
Strip the driveshafts, regrease and replace boots.
Blast anti rollbar & replace bushes.
Finally new springs & shocks.
All standard.
 
Hi Yorkee
I suppose whether to change the bearing depends on your project/ how long you wish to keep the car/ what condition you like to run your cars in. By the sounds of it unless you know the bearings were changed recently, it would be worth considering to do this as part of your strip down rebuild as this would be proper job/ belt and braces approach. Having rebuilt mine, I didn't realise how noisy my bearing had become as I had become used to it. But with the new bearing in, and given that its huge improvement from reduced noise, and now so much more enjoyable drive, for the cost and trouble you are going to, swapping out the bearings would be a good investment.
My approach is different, for this task I only changed that which was worn out, this was to get the car back on the road ASAP and keep costs down. So the bearing on the other side I kept as is.
As i have a spare subframe, with good MB shafts hubs etc, I will start collecting the parts ready for a rebuild approach that you are taking, and I can start rebuilding this frame off the car. When the other bearing fails on my car, hopefully I will have the time to do full rebuild of the car, as it will need it by then.
Good luck with the project!
 
Just Closing Out the thread, my bearing journey has come to its conclusion.
Car back together, and 280 miles trip for work as shake down, completed.
With the reduced noise levels in the car the 280 miles just slipped by. Also made me appreciate how good the W124 drive is.
So I felt well chuffed that I tackled a job I wouldn't normally do my self.

Final tip: apparently, it is not best practice to rebuild suspension in full droop. I came across this advice online. (so i used spare jack under wishbone to raise to right height, quite straight forward and no issue)


So here is a run down of tools bought:

8 inch hub puller £25 (didnt work, had to get bearing pressed out)
Impact universal joints (black) good for strip down £9.49
Plumber gas torch £32
Gas 2 bottles £19 (loads left for other jobs)
Torx bit set £9.85
Hexstart bit set £9.99
Mercedes clk Hub lower bush tool (ebay) £29.99 no good for removal due to rust, but great for installation.
Neilsen 13" circlip plyers £24.50 (didnt use in the end)
Press Bearing tool kit £36.69 (ebay) but also used flat plate some 10mm thick which I already had
10 ton press £179.80 (used but not successful, bearing released at 12+ ton)

professional service: engineering works to press out bearing and replace £40. (highly recommend as they could have done the lower bush as well, saving much time)

Materials:
WD40: allow £5
copper grease: allow £3
rear axle lower bush £12.95 (ebay/ MB wanted £45)
Fertan rust converter and screfix no nonsense degrease allow £10,
Satin Black calliper paint, (used for all rust converted areas subframe, arms etc etc..., I can, Allow £12
Rear Exhaust, £65
Exhaust rubbers £10.85
Exhaust paste allow, £8
Wheel bearing kit, febi, KMS on ebay, £38.99
Anti roll bar, drop links, ebay, x2 £13.64
Loctite thread locker medium, (good u tube video) £6.29

So not allowing for tools, cost is circa £220. Certainly worth it for the experience and extra knowledge gained, sense of achievement at completion and end result. With 240K miles on the clock, im at the moon so now on return journey...
Thanks to everyone for comments, help and advice, much appreciated.
 
I am just about to drop my subframe so this could not have come at a more opportune time. One question, what size socket do you need for the drive shaft hub nut? All of my larger sockets are hex whereas these look like a bi-hex sort of thing.
 
Hi Martyn_n, My sockets are Halfords professional/ advanced, From memory it was 32mm. My black impact sockets would not fit so I had to turn to standard chrome set, in which I found the Bi Hex you describe, not something I like to do with impact gun, but had to, and no damage done in the end. I used dewalt 240v impact gun, it came straight off. Long breaker bars with additional tubes for greater leverage wouldnt touch it. look to see if the nut has been hammered in to lock it to the spline, (inner ring) use the handbrake before you take it apart to assist with turning resistance if required....
 
Hi Martyn_n, My sockets are Halfords professional/ advanced, From memory it was 32mm. My black impact sockets would not fit so I had to turn to standard chrome set, in which I found the Bi Hex you describe, not something I like to do with impact gun, but had to, and no damage done in the end. I used dewalt 240v impact gun, it came straight off. Long breaker bars with additional tubes for greater leverage wouldnt touch it. look to see if the nut has been hammered in to lock it to the spline, (inner ring) use the handbrake before you take it apart to assist with turning resistance if required....
Thanks for that, if only I had read it before I removed the handbrake cables and cut the brake hoses ready to drop the frame! I'll get it in a vice once I have it all stripped down.
Thanks again, Martyn.
 
Thanks Robbieesprit for the comprehensive info on your experience. I was looking at pullers etc, will probably remove hubs get bearings removed, refurb then get bearings installed. In the past I’ve used large vices/ 3/4” sockets with threaded bar to remove & install but this seems a bit tougher.
 

Users who are viewing this thread

Back
Top Bottom