W212 Lower Control Arm Replacement DIY questions

Page may contain affiliate links. Please see terms for details.
I've ordered loads of stuff from Autodoc in the past. As long as you can wait for a sale and are sure you are getting the right bits (returns to Europe, urgh, no thanks), they are ultra competitive and because of the volumes they shift, it gives me confidence that they will be genuine OEM (rather than counterfeit).
 
I've ordered loads of stuff from Autodoc in the past. As long as you can wait for a sale and are sure you are getting the right bits (returns to Europe, urgh, no thanks), they are ultra competitive and because of the volumes they shift, it gives me confidence that they will be genuine OEM (rather than counterfeit).
There was an optional £3.50 payment for up to 200 days return at their cost if the parts not been fitted :)
 
I just ordered the two control arms, Lemforder, from autodoc for about £153 on a "35% off offer"... I'm pretty sure the problem is the control arms, anyhow...
 
Just looking into this again and trying to figure out if it's worth me tackling this, or simply taking it to an indie, depending on the cost (plus tracking). I'm guessing it's 2h labour to do both sides, what do you reckon?

Also looking into if it's silly to do only this part and not others 'while you're there'....

Apparently the W204 is indeed similar to W212, so the video in the original post is a good indication of the job. Not as easy without a lift and in in the cold, though. Although it's not the most pressing thing in the world, and I do already have the ball joint separator.

All ears for any more advice!
Before you finish ordering, try and get it up on a lift, and check all of the joints on the suspension, if only to confirm that its the TC arm is the one making the knocking noise. Does the car tend to wander on a straight road? Generally, after replacing suspension parts, you will need the car's weight on the arm for the final tightening, but you can still manage this even if its on axle stands by jacking the front hub , using a bit of wood between the hub and the jack.
 
Thanks - I've actually already got the lower control arms. In all honesty I can't see myself jacking the car up and getting the car on axle stands just to poke and investigate! I'd rather crack on with the control arms, or give it to someone else.

I don't have any wandering, no vibrations or anything like that. Just little bit of clunking and a 'this car doesn't feel new' feeling on something like cobblestone roads, potholes etc. About 12-14 months ago I could feel/hear the clunking then too, and I asked MB Brooklands (who were doing the service) to check the suspension and they gave it the all clear. I was surprised as I thought they'd delight in finding issues with the car, but I wouldn't be surprised if they didn't even check...!

I think the clunking is something that most people in the car with me wouldn't notice, if they weren't OCD and didn't have the pedals and steering wheel for extra feedback.

Yes, the video does show jacking up the suspension in order to tighten, if anything that looks like the trickiest part to do for an amateur DIY-er.
 
For my original post in August, I didn't fully grasp that you were doing this yourself, and my recommendation to get other bits done was primarily aimed towards getting better value from the process if you are paying someone else to do it i.e. you have already paid to get it up on the ramps and wheels off etc, so a 'few more bits' all at once is better value than each bit one an a time. And then, following on from that, because you would have changed a few more bits, then deffo get tracking done.

For just the lower control arm, you might have a go at that yourself if it's straight forward, and then you could get tracking checked at the likes of Kwik fit or wherever to make sure it's not fundamentally wrong.

However, two words of caution.
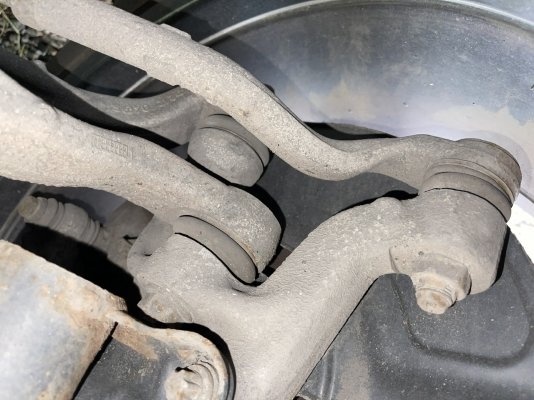
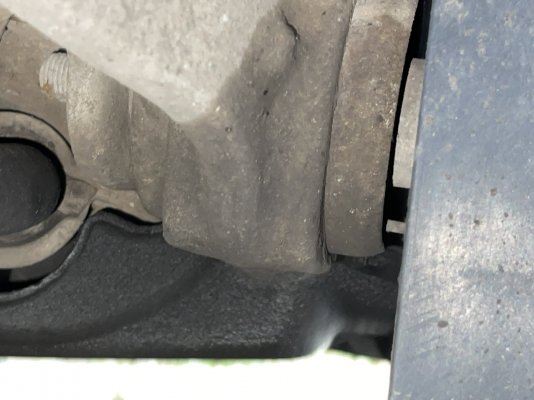
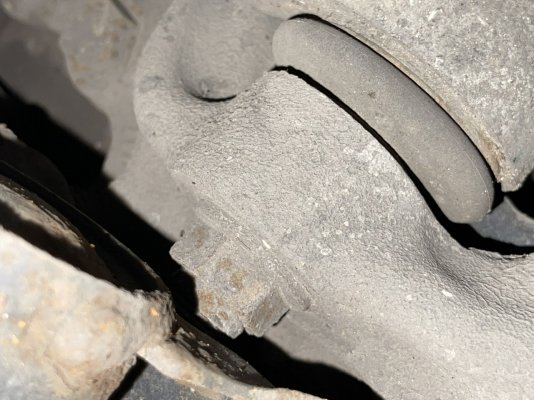
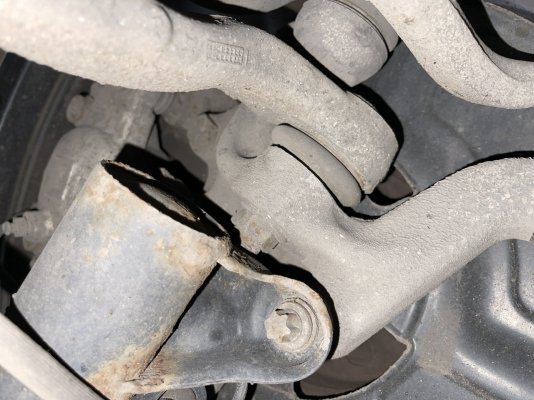
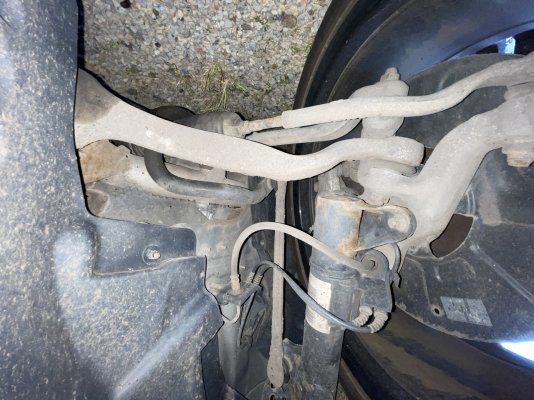
- For the w203 that I had and referred to previously, the balljoint for the front (aluminium) control arm is 'trapped' by other components that also need to be removed, and half the front hub and caliper ends up hanging off to create enough room to get to it. The rear lower control arms comes out on its own. Here's a great FCP Euro vid showing the pain.

- The vid linked for the GLK350 is for the 4matic version (looks the same setup as the 4Matic E class) which we don't have.
I found the vid for the balljoint on the w212 E63, and looking through 7zap seems to show the same suspension setup at the front as our cars, and depending on which arm you are replacing, there is a risk there might be some interference from other components that you need to get out of the way, in a similar fasion to the W203 FCP Euro vid linked above.


So, if you're hoping it's going to be as easy as the GLK350 4Matic vid, I'd suggest getting under the car and having a good look round just to check what's coming off where.
If it is the same as the 204, again it looks relatively straightforward from the w204 youtube vid I found if you're removing the control arm they are (the rear one).

Nothing worse than hoping it's a comfortable hour each side before lunch, and it turns into a pig of a job 2 days each side. Wrong tools, starts raining, snap a bolt, wriggling round on your back etc etc
 
Check the video original post - the W204 is apparently the same as the W212, according to the chap in the video below.

I've seen the W204 video you posted but not for a while, so it's a good watch now!

To view this content we will need your consent to set third party cookies.
For more detailed information, see our cookies page.
 
Check the video original post - the W204 is apparently the same as the W212, according to the chap in the video below.
The vid of the 204 corresponds to the parts drawings for the w204 if you look at 7zap, which is not the same as the parts drawings for the W212.
In that vid he is removing the rear (and lower) control arm only. You get a good shot at 2m20s that the front control arm is 'trapped' under the bottom of the suspension strut.
I therefore assume you are replacing the rear control arm.

The w212 E350CDI (our cars) have the same 7zap part drawing for the E63 (which looks like the setup in the w212 E63 in the vid I linked). They are just rough diagrams, but if you check the E350 part vs the E63 part, they visually look very very similar, but they do not look like the parts in the w204 vid in the post#1.

I had found it but hadn't looked at the FCP Euro suspension diagnostic vid. It looked pretty heavy going so I skipped it.


Hell, who am I kidding. I'm just going to get a beer and have a watch 👍 😅
 
Ted, this is as much for those who haven't studies the FCP Euro vid (which I'm sure you have),

At 0m15s, and again at 1m50s and 3m55 the suspension looks to me like 4Matic. You can clearly see the drive shaft and steering control rod. Of course, this might just be a random suspension shot for effect, because:
It does not related to the non-4Matic setup shown in the clip at 1m35s, where you can see that the front axle lower rear control arm doesn't have an integrated ball joint, so I'm guessing you should consider changing the ball joint as well.
This is a bit of a piss poor oversight at video setup by FCP Euro in my view, because the parts lined up on the bench at 3m20 are clearly for the non-4matic, and you can see that they have loosly assembled the ball join into the front axle lower rear control arm.


Common issues for clunks on the W212 during turning, he mentions ARB drop links at 2m50s.
A2123201189 and A2123201289
and also the McPherson tension strut bushing, by which he means the large, inner bush on the large front control arm (control arms A2123302711 and A2123302811 - just replace the arms rather than faffing with pressing bushes in and out).

He then goes on to recommend replacing all the front suspension components with rubber bushers at about 70-75k miles, and all the rear suspension components with rubber bushes at about 110-120k miles.

40 mins, and I'm not even half way through the FCP Euro vid. Oh dear.
 
Last edited:
Reading your reply properly now - but he does mention at 5mins in that it's 4matic, and there will be small differences on RWD, and that at the knuckle there will be a ball joint which isn't integrated

(I don't have clunking while turning btw)

And yes, I just bought the entire arms and won't be trying to pop out the bushes (they seem to be keen on doing that in American vids). To confirm, yes I have the A2123302711 and A2123302811 control arms (Lemforder).

Replacing all front suspension at 70k on an E-class seems a bit mad to me....
 
Further interesting points.

The McPherson tension strut, or more simplistically the massive front control arm, is the arm nearest the front of the car and has a hydro bushing where it connects to the chassis, so that might have popped.

The rear most control arm on the front axle is smaller, and is all rubber bush.
 
Reading your reply properly now - but he does mention at 5mins in that it's 4matic, and there will be small differences on RWD, and that at the knuckle there will be a ball joint which isn't integrated
Just got through the vid, and I'm letting Kyle Bascombe off the hook. He does indeed blast through the 4Matic caveats at 5 mins. What is apparent from this video is, he knows his stuff!

So, back to my earlier recommendation, do jack the car up, and wave your phone under the front bumper and take a vid of the setup, so you can check if there is going to be an interference issue with that massive front arm. The 204 vid showing the 'easy' control arm replacement was the rear arm. Not that it's the same anyway.
Do you only have the front arms?


If you are changing the rear arm at some point, you should change the ball joint as well I reckon.

I'm looking forward to tackling all this myself.... 😭
 
Last edited:
Like any mechanical jobs you ( or I ) take on, no matter what they are, when the time comes to do the same job a 2nd time, there's things that you will do different, no matter how many U Tube videos you watch before hand. You just have tom be carefull, and when it comes to steering brakes etc. extra care is required. This has been my experience anyway. But in any case, Good Luck with it and keep us informed. :thumb: :)
 
Like any mechanical jobs you ( or I ) take on, no matter what they are, when the time comes to do the same job a 2nd time, there's things that you will do different, no matter how many U Tube videos you watch before hand. You just have tom be carefull, and when it comes to steering brakes etc. extra care is required. This has been my experience anyway. But in any case, Good Luck with it and keep us informed. :thumb: :)
Like replacing a clutch. On your own.

The next time I replace a clutch, the thing I will do differently is, pay someone to do it for you!!
 
Like replacing a clutch. On your own.

The next time I replace a clutch, the thing I will do differently is, pay someone to do it for you!!
MrGreedy,,,I'm not going to tell you how long ago it was since I did my first clutch replacement, but it was on a Morris Minor, in a farmyard, on the flat of my back with the car up on concrete blocks.....and in the Morris Minors, the front section of the floor had to be taken up to give access to the upper gearbox bolts. A Nightmare. But got the job done, new pressure plate and disc, fine !!! :banana:Everything back together again, and went for a test drive,,,and discovered that the thrust release bearing was noisy :eek:o_O:wallbash:( did not drive it before starting the job, because it was not drivable, clutch completely shot) So back up on the concrete blocks, off with the floor ( a bit easier 2nd time round) drop the box, and replace the bearing...everything back to gether again. Thank God. But the farmyard smell followed me around for days afterwards....
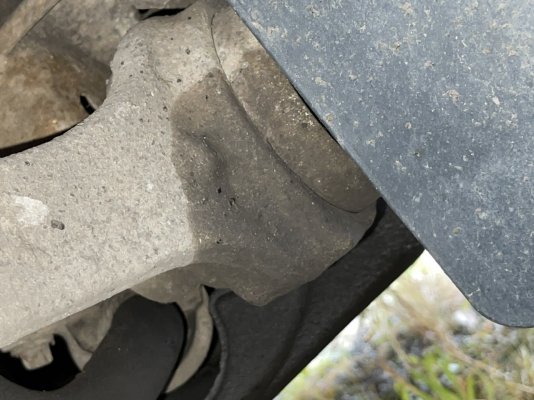
:wallbash:
 
Thread resurrection alert!!

Here are some (bad) pics behind the wheel. Not the best shots but to me it looks like the strut is in the way, but I’m assuming that when the vehicle is raised up and the hub ‘drops’, there’ll be room for a torque wrench/socket there.

So, looks similar to the 204 AUTODOC video I posted. What say you all?

You can see that on the side closest to the engine, there is some weeping on the arm which indicates the hydro seal is gone.

Another thought - the anti roll bar links look easy to change, and are cheap. Does anyone know if it simply two bolts per wheel, and that’s it? I think they’re about £20 per side so pretty cheap.
 

Attachments

  • 5EB8AA15-78DF-4E26-8E59-83176F3F5C4D.jpeg
    5EB8AA15-78DF-4E26-8E59-83176F3F5C4D.jpeg
    356.3 KB · Views: 19
  • DF831A2C-BDD6-457D-93DC-BAB871749E60.jpeg
    DF831A2C-BDD6-457D-93DC-BAB871749E60.jpeg
    406.7 KB · Views: 17
  • A8121276-34CA-40FF-958B-3348CFB75365.jpeg
    A8121276-34CA-40FF-958B-3348CFB75365.jpeg
    258.3 KB · Views: 15
  • 7E73DBAA-530C-4FBE-B2A8-CED6AFD39ACB.jpeg
    7E73DBAA-530C-4FBE-B2A8-CED6AFD39ACB.jpeg
    400.1 KB · Views: 16
  • 58AFCC91-3CBB-4E3A-BA24-EF655596CB4B.jpeg
    58AFCC91-3CBB-4E3A-BA24-EF655596CB4B.jpeg
    406.5 KB · Views: 19
  • 2C9E1178-4B92-4B39-B79A-A84DDC2E759E.jpeg
    2C9E1178-4B92-4B39-B79A-A84DDC2E759E.jpeg
    456.2 KB · Views: 20
Regarding the drop links, in my very limited experience I've never seen any drop links that are anything other than 2 bolts/nuts per side.
But doing drop links as a "simple job" has twice required me to use an angle grinder to cut the rusted nuts and bolts off due to being seized in a serious way.
It's simple replacing them after that, having left a couple of coats of black anti corrosion paint to cure on the inevitable bare metal on the anti roll bar from angle grinding.

Crack on Ed and good luck 👍 :cool:

(I just want you to guinea pig this for me please 😉)
 
The forum software ignores orientation and flipped the photos… what is this 2002 🤣
 

Users who are viewing this thread

Back
Top Bottom