• The Forums are now open to new registrations, adverts are also being de-tuned.

intake manifolds, oil cooler seals

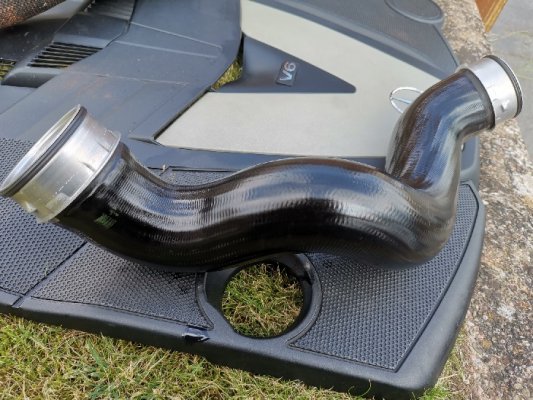
Ok i decided to fish out the two intercooler pipes this afternoon, they were very dirty and there was a little wear mark on the metal work behind the one on the passenger side. The pipe the drivers side had a little oil inside it so i am thinking that the turbo needs replacing soon. I am going to put the car up on stands next weekend and disconnect the intercooler and give it a flush out, clean things up and refit along with the new pipe seals, so i cleaned the pipes up and refitted them, no marks, splits in either pipe.

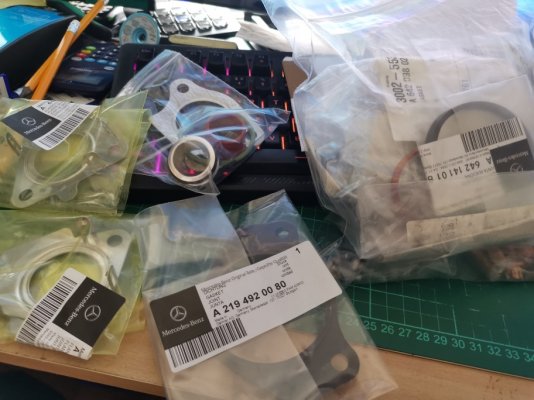
ordered the kit i need and i still have to order some of the other seals as well. I am still thinking of replacing the turbo cartridge myself and refitting, however it may just be quicker to get a replacent on an exchange basis to save time. This will allow me to have more time on removing the intake manifolds and sorting those and the oil cooler.

I have got all the parts now to make a diy boost leak smoke detector that i saw on youtube, a cheap bike pump on ebay for £4.99, a basic soldering iron that i already have, some tubing, and a couple of jubilee clamps and some baby oil with a rag, so if its nice tomorrow i will build that and see if it can fine any leaks anywhere.

To view this content we will need your consent to set third party cookies.
For more detailed information, see our cookies page.
 

Attachments

  • pipe.jpg
    pipe.jpg
    219.5 KB · Views: 7
  • pipe 1.jpg
    pipe 1.jpg
    193.8 KB · Views: 7
Update time, busy with work however, today I took a trip to Cleavedon to Avantgarde Automotives mercedes specialists. The car was put on the star system to see whats going on.

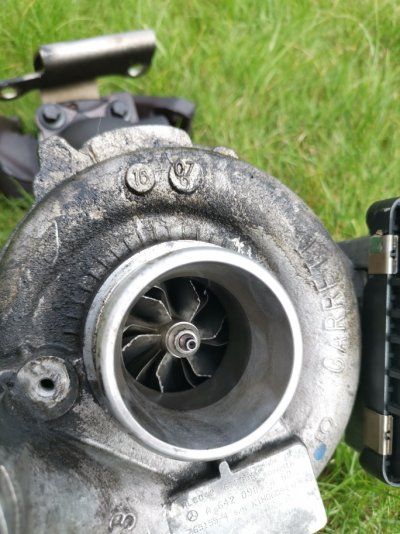
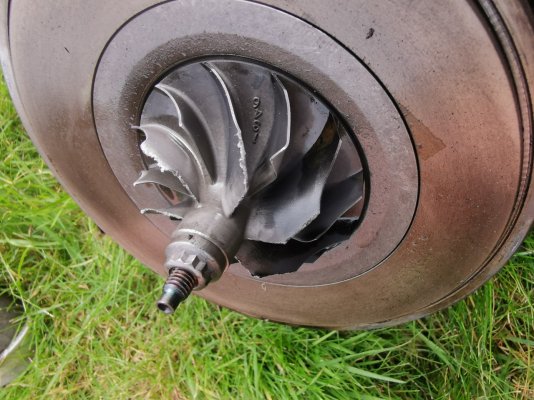
The car has been going into limp mode the past week more and more, I knew the turbo had some slight damage to the front vanes however, there was no lateral movement or other damage to it so it was put down the list of jobs to do.

Once on the diagnostics they checked everything over the car, I am glad to say nothing was found all the servicing I have done recently has paid off and there were no other errors.

What errors were found by the star? just two for the Turbo, these were also validated by doing some tests and checks also a visual inspection of the actuator linkage.

While testing the arm got stuck then came free several times, it could be the actuator itself or it could be the Vane ring in the turbo is badly coked up or both.

Error one: P0299 'Charge pressure control' Too low boost pressure
Error two: (didn't see the number sorry) Backpressure too high

The Mech said its the turbo as everything else came back good and all the new parts fitted were fine.

I was going to strip the turbo and fit a new core myself but time doesn't allow this now, I have a replacement turbo on order and my old one goes back in exchange. I am trying to figure out a way to record the job and take photos when I replace it.

Also got to fit new brake discs, pads, retainer clips and wear sensor on the rears tomorrow.

I do have pics of the fronts, and the pics of the Old inner and outer tie rods that i also replaced recently, my old inners were like baby rattles they were that loose.

So more to follw on the tread shortly.
 
Update time:

Taking a long overdue break from work next week and from the car, going to stay with relatives and try and enjoy a fortnight off.

Once I get back I will be taking everything apart and finishing things off, lots to do!!.

I am trying to figure out how to do a complete photo thread for it and setting up a you tube channel for video links try and share as much of the process as I can.

Its a big job and my first time at it so I need to make sure I can get it right!! I can do most things on a car so I am researching everything before i start.

Will organise the teardown and will have parts bins ready for keeping things in.

Thanks for being patient.

UB
 
Been looking at the online parts info, not getting what I needed.

Can anyone tell me the part numbers for the bolts for the intake manifolds, I will replace mine when it all comes off

I have a list for the turbo fitting along with a couple of spares of the one bolt.

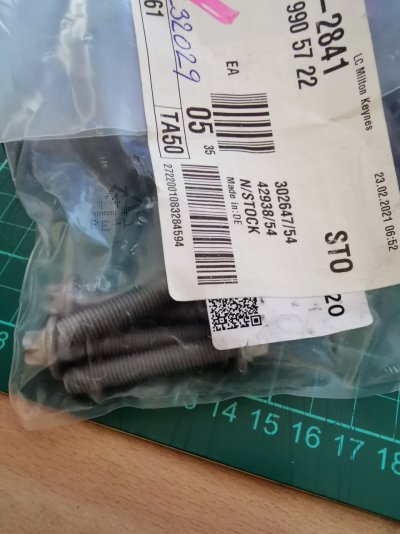
A 0019903107 turbocharger to support pillar 2 needed
N 910143008017 pillar to crankcase 4 needed
A 0009906803 turbo to exhaust manifold and other positions 12 (spare bolts included)

Also just sorted the seals for the front egr, throttle flap pipes.

A 6420980180 x 1
A 6420980280 x 1
A 6421410080 x 1 egr pipe gasket
A 6421410180 x 1
A 0139972345 x 1 o ring

I just need the intake bolts numbers and quantities now thanks.
 
Update time:

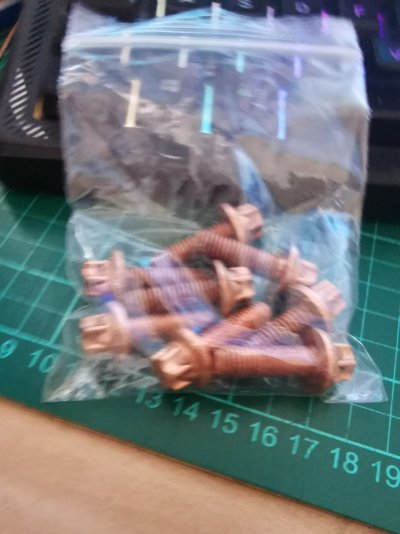
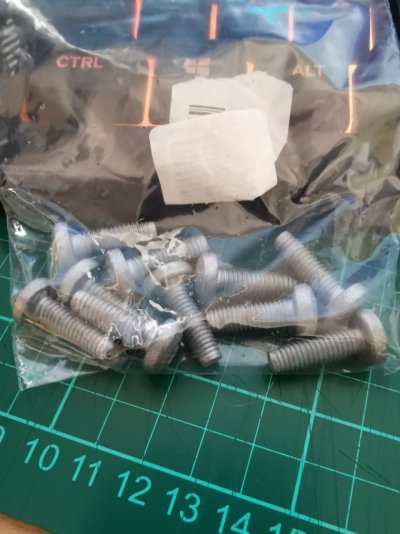
Today i went to mercedes sinclair cardiff to grab a load of parts for the car, have to wait until next friday for some of the inlet manifold bolts to come in and two from germany also picked up the copper coated bolts for the turbo along with a few others, a new set of oil cooler bolts, just need to grab the coolant apart from that its almost ready to have the work started.

To do the carbon cleaning on the head ports i have made some tools using threaded bar and some washers with ground sides in different shapes, fixed using nylock nuts so they wont come off, these and a workshop vaccum will allow me to remove the crap from the head ports to the inlet manifolds without it going back into the head chambers.

Dug out my high pressure steamer, bought some long reach round wire brushes for inside the inlet manifolds, several different typres of cleaner to get them cleaned up and some new aluminium swirl flap arms and an ultrasonic cleaner also.

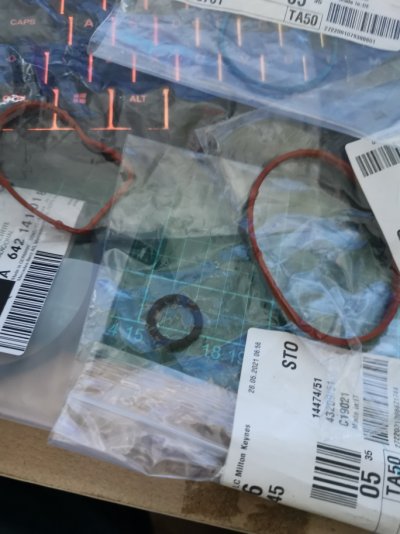
grabbed all of the seals for the front throttle flap assy to the front egr pipes.

my hallway is like a merc dealers stores shelf!
 
Update:

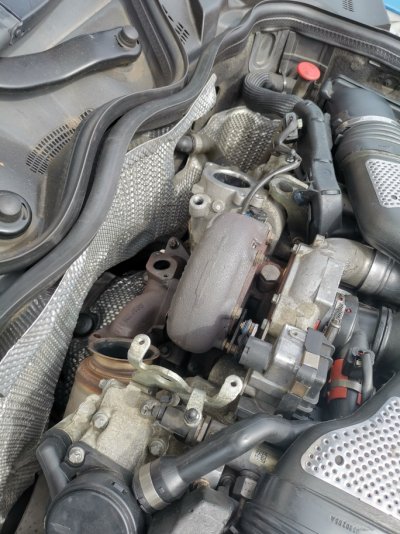
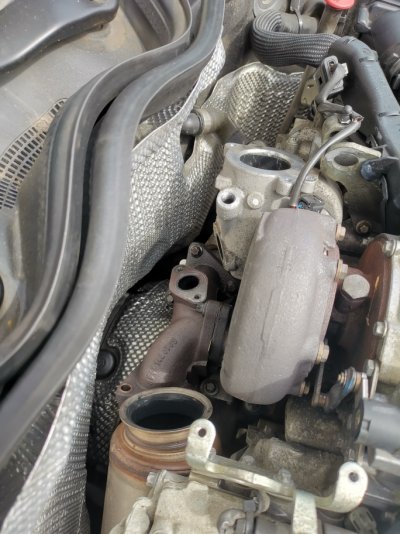
Got started today removing the turbo and checking a few things.

I bought all the gaskets and some seals, picked the bolts up as in the last post, today I just wanted to get the turbo off an inspect it.

The E12 bolts holding the turbo lower cast mounts were tough to break, but one they broke their grip I sprayed some plus gas in them and let them sit for 5 mins then they just flew out.
The two torx bolts took some pressure to remove also, once again some plus gas and they came out.

I was't able to take pics of doing that as I couldnt find me bloody phone!

The egr curved pipe came off cleanly its got some carbon build up inside but i will clean that tomorrow, also need to order the two gaskets for it as they were not in the kit.

The turbo was a pain to manouver out leaning over the engine but it eventually came out.
 

Attachments

  • s1.jpg
    s1.jpg
    216.1 KB · Views: 24
  • s2.jpg
    s2.jpg
    209.3 KB · Views: 26
  • s3.jpg
    s3.jpg
    180 KB · Views: 25
  • b1.jpg
    b1.jpg
    310.5 KB · Views: 27
  • b2.jpg
    b2.jpg
    328.8 KB · Views: 26
  • b3.jpg
    b3.jpg
    331.1 KB · Views: 27
  • 1.jpg
    1.jpg
    345.8 KB · Views: 25
  • 2.jpg
    2.jpg
    304.1 KB · Views: 27
Last edited:
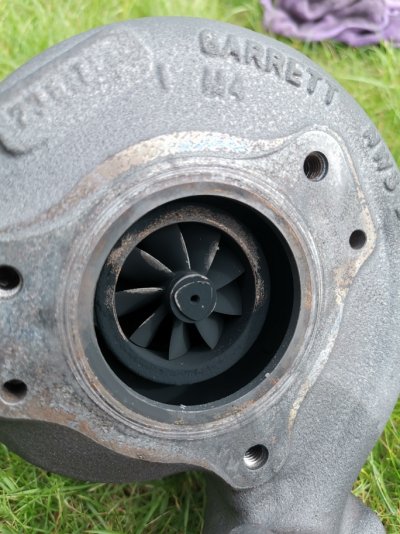
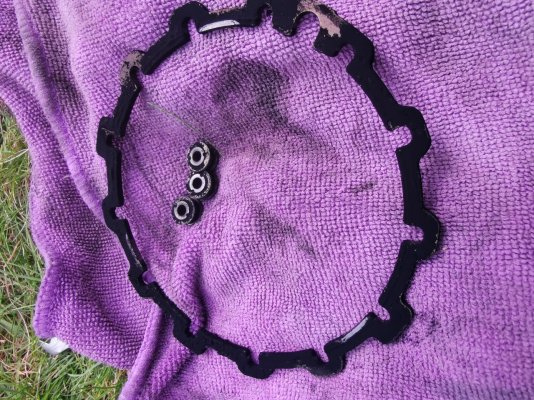
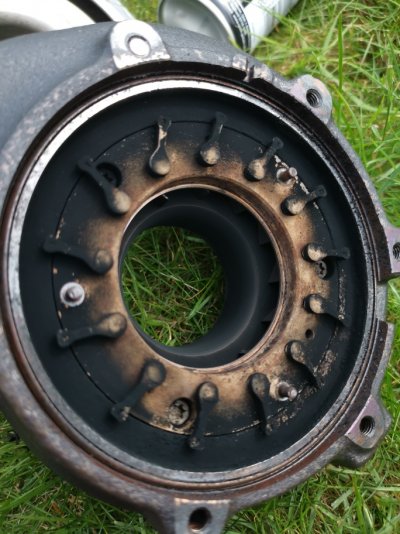
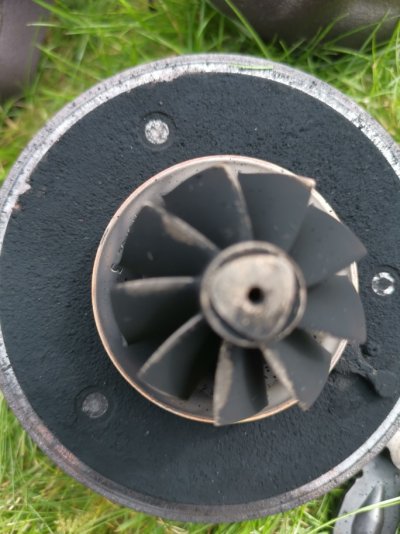
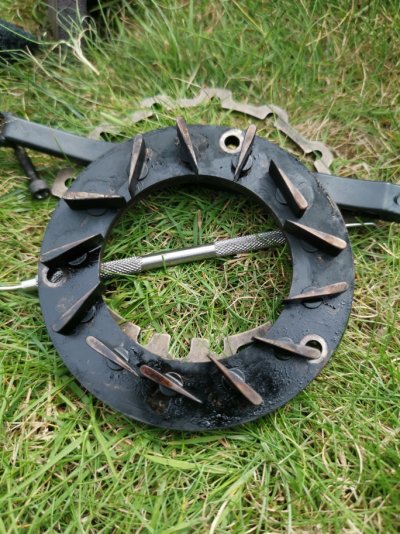
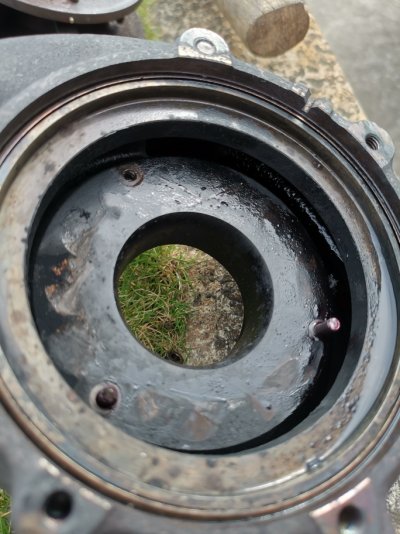
The turbo was badly clogged up with carbon, i did spay some of the wynns turbo cleaner in before which gave me a slight respite from the limp mode and sticking but as you can see it was so thick and bad that it was never going to be clear, also the damage to the vanes was really bad but had not done any damage to the turbo itself. I was going to re-core this however one of the bolts into the cast broke off and also two on of the bolts holding the variable vanes broke.

The vanes are in excellent condition as is the whole body, i gave them a clean and they came up really well with no marks or damage, I may try and rescue this turbo, not sure yet.

Picture 10 & 11 shows just how thick the build up is on the turbo.

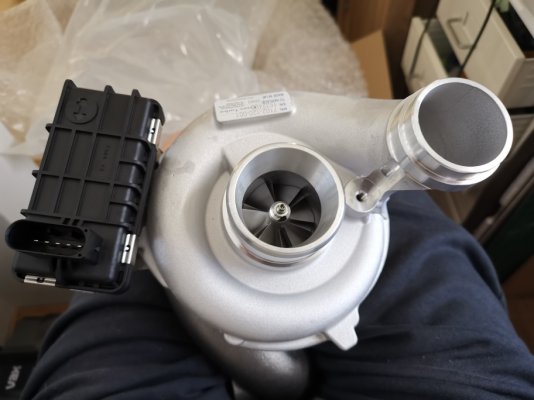
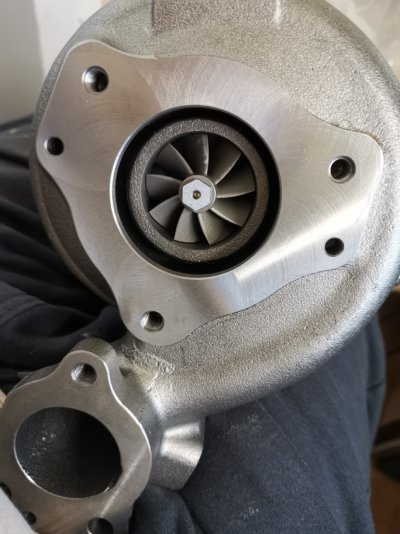
As you can see in picture T1 and T2 the new turbo is ready to be fitted, it was supplied by Essex Turbos and built over 24 hours then shipped to me.

I need to grab a couple more things this week from mercedes cardiff i have on order too.

While I had my hands in i checked the swirl flap arms for movement and they both travelled fully, no sticking, no jamming up full travel and no looseness on them.

I didnt see any oil in there around the oil cooler either, so I have to decide If i am going to continue the strip down or just clean things up and fit the new turbo for now.

More to follow!
 

Attachments

  • 6.jpg
    6.jpg
    319.8 KB · Views: 35
  • 7.jpg
    7.jpg
    298.7 KB · Views: 34
  • 8.jpg
    8.jpg
    478 KB · Views: 32
  • 9.jpg
    9.jpg
    818.9 KB · Views: 33
  • 10.jpg
    10.jpg
    272.1 KB · Views: 33
  • 11.jpg
    11.jpg
    224.6 KB · Views: 33
  • 12.jpg
    12.jpg
    414.3 KB · Views: 33
  • 13.jpg
    13.jpg
    247.1 KB · Views: 35
  • t1.jpg
    t1.jpg
    178 KB · Views: 34
  • t2.jpg
    t2.jpg
    274.2 KB · Views: 35
Update:

Complete waste of my day today, got the turbo all sorted out and fitted, got all the bolts in before i started torqing them up, The two T45 torx that bolt the turbo to the pedestal, from what i was told, stage 1 is 30nm stage 2 50nm.

got them to 30nm fine, felt good, did them a +5nm turns then each. got to 45nm on one felt smooth to turn so stopped, the other one sheared.

Luckily the sheared on was on the side that goes throug hte ear of the casting and I managed to get it out.

There is no way thes bolts are going to 50nm, can someone confirm the torque specs for me please. Now I have to order more fkn bolts to get this done, not a happy bunny today, really peed off.
 
Tomorrow you will be stronger and more determined and you will emerge victorious from battle, I’m sure
 
All showered and off out for an hour or so, try and unwind. Fkn bolts grrrrrt
 
Great work Uncle Buck . Not taking the Pi$$, but how sure are you of the accuracy of your torque wrenches. ? How old are they ? quality ? (sorry to ask) and have they been calibrated recently.

Tell me to F off if you like . Grrrr Indeed . after all that work only to have bolts shear 😡 😲
 
Great work Uncle Buck . Not taking the Pi$$, but how sure are you of the accuracy of your torque wrenches. ? How old are they ? quality ? (sorry to ask) and have they been calibrated recently.

Tell me to F off if you like . Grrrr Indeed . after all that work only to have bolts shear 😡 😲
My thoughts exactly on the accuracy, I have had it a while and I haven't had it calibrated since purchase. I am going to get a new one Monday and hopefully some new bolts at the same time. For the other bolts that only need 20nm I bought a brand new teng torque wrench, which I used to put the pedestal back on with the new gasket etc. Ah well, not to worry.
 
Update:

Today i was sent some info on the two top fitted bolts (torx T45) that bolt the turbo to the oil pedestal.

So it would seem the info i had before was incorrect ( go figure) and its not stage 1 torque to 30nm and stage 2 torque to 50nm at all.

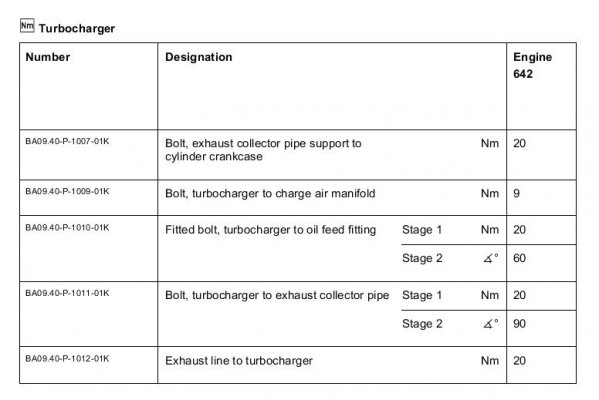
If i read the screen shots right it was just torque to 20nm and then a 60 degree turn, if this is the case and I am looking at the info correctly then no wonder the fkn bolt sheared yesterday.

Tell me I am reading this info right!

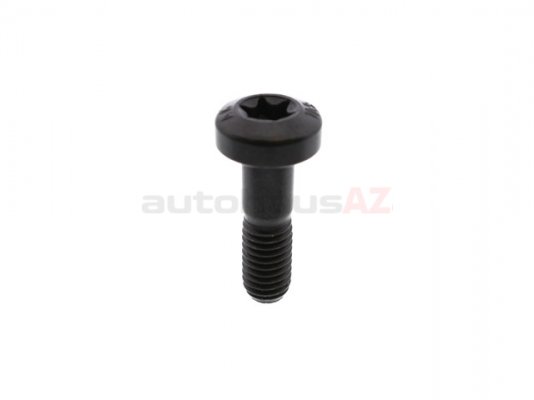
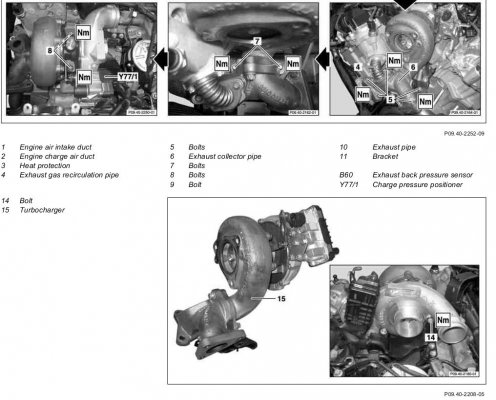
so the two torx bolts which are mercedes part : A 001 990 31 07 fitted bolts

turb bolt.jpg

Then you have the modification notes that link to BA09.40-P-1010-01K which is picture turbo 2

which links to Picture turbo 3 which clearly states:

Fitted bolt, turbocharger to oil feed fitting, Stage 1 Nm 20 Stage 2 60 degrees turn

So for my sanity tell me I am reading this correctly and the previous torque info was a pile of dog Sh*t

Thanks

UB
 

Attachments

  • turbo 1.JPG
    turbo 1.JPG
    125.3 KB · Views: 28
  • turbo 2.JPG
    turbo 2.JPG
    27.5 KB · Views: 27
  • turbo 3.JPG
    turbo 3.JPG
    53.5 KB · Views: 24
I can’t check that right now but personally I find the WIS instructions so difficult to follow, so you’re not alone…
 
I can’t check that right now but personally I find the WIS instructions so difficult to follow, so you’re not alone…
its not that I cant follow them, its just that I need someone to confirm what i am seeing. its just so that I dont blow my lid!! as the car could have been back running yesterday.
 
It’s certainly how I read it - 20nm then an extra 60 degrees (I always find this very vague).

Assuming we’re talking about the same bolt!
 
It’s certainly how I read it - 20nm then an extra 60 degrees (I always find this very vague).

Assuming we’re talking about the same bolt!
yep same bolt, the BA ref number is the same on the torque info sheet also. It is correct im checking as im reading it with and without my glasses on the make sure.

Its one of those "oh ffs you gotta be kidding me " days lol!!!!!
 
This is the next job for me on my clk, going to replace turbo, oil cooler + seals and refurb manifolds, great thread 👍
 
Update:

Back to merc tomorrow to pick up two sets of bolts, they are only a couple of quid. While there they will double check the torque info i have got now to make sure its correct, the 30nm to 50nm was a load of total B0ll**x

So all being well the car will be up and running again tomorrow ready for the full oil and filter changes.

My new bat wing came from merc newcastle thanks to @PhilG from his post before about these.

Thats it for now.

UB
 
quick question.

Whats the best way to have the car turn over but not fire up, is there a specific relay or fuse to remove? Its just so i can prime the turbo.

Thanks

UB
 

Users who are viewing this thread

Back
Top Bottom