MrGreedy
MB Enthusiast
Some more thoughts having slept on it.
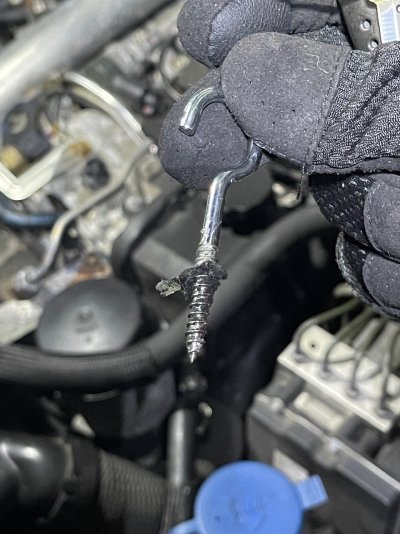
Get a much fatter screw into that thing. If it can go in at an angle and clear over the fuel rail, you might be able to get a crow bar on it to use in similar way to a slide hammer. If not, be prepared to have a think about getting that fuel rail off. How hard can it be!?
Depending on angles on the crow bar head, you could try two different approaches. Do not use this in the levering way you would normally with a crow bar, this is for precision tapping of the new, fat screw that is in the sensor!
If you are trying this route, make sure the screw actually fits and engages with the crow bar notch and isn't too fat. If it is too fat, you could gently grind some material off the shaft of the screw and under head to allow the crow bar to engage positively.
You need a crow bar with a notch in the head for nail removal (of course I have a wide selection that have been used as part of my small, 6 year house renovation project).
1.
Crow bar with an obtuse head angle, like this.
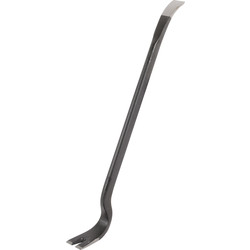
 www.toolstation.com
You might be able to get this on to the head of the screw, depending on the height of all the crap on the top of the engine/turbo pipe. You might need to remove some of that stuff to get the crow bar closer to the engine. Lay the crow bar horizontally across the top of engine, left to right, with the crow bar head on the passenger side pointing down to the screw, and the tail of the bar pointing towards the driver side. Engage the screw head with the notching of the crow bar used for nail removal. Gently tap the sharp tail/point of the crow bar with a heavy hammer. This might then act as a 24" rod that you are tapping to try and get the sensor popped out or loosened.
www.toolstation.com
You might be able to get this on to the head of the screw, depending on the height of all the crap on the top of the engine/turbo pipe. You might need to remove some of that stuff to get the crow bar closer to the engine. Lay the crow bar horizontally across the top of engine, left to right, with the crow bar head on the passenger side pointing down to the screw, and the tail of the bar pointing towards the driver side. Engage the screw head with the notching of the crow bar used for nail removal. Gently tap the sharp tail/point of the crow bar with a heavy hammer. This might then act as a 24" rod that you are tapping to try and get the sensor popped out or loosened.
2. If the angles are all wrong for 1, you could try a crow bar with an acute angled head, like this.
 Here the crow bar would again be horizontal left to right, but this time the crow bar is flipped 180 degrees and the tail of the crow bar is not across the engine, but heading out towards the passenger wing. You will probably need to raise the tail of the crow bar a bit to get best use of angles for the 'pull' when you give it a tap. Get you largest, most rubbish set of mole grips, and very firmly clamp them on to the shaft of the crow bar towards the tail end. You can then try tapping the mole grips (connected to the crow bar, connected to the screw) to act in the manner of a make shift slide hammer (just without the slide bit).
Both jobs might require a glamorous assistant to either firmly hold the crow bar in place, or GENTLY tap the long pointy end or mole grips attached to the crow bar (depending on their mechanical sympathy and awareness and how much you trust them to not just smack it with a hammer) to try and get this moving and make sure the notch stays engaged on the screw head.
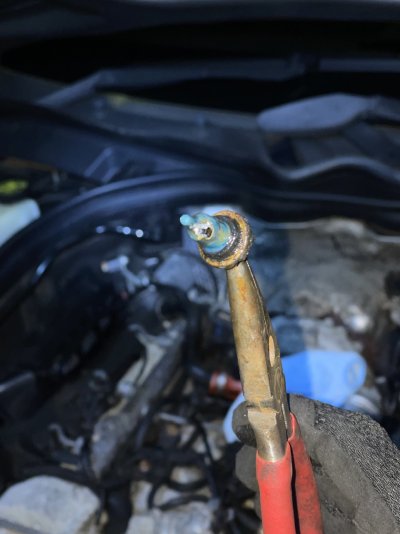
Alternatively, if you can't get the head of either of those bars in there, you might be able to robustly wire the crow bar (other implements are avaiable) to the head of the screw using some heavy gauge galvanised gardening wire or similar (I'm thinking 1-2mm strong stuff, not thin stretchy green stuff). The principle here is to leave a gap between the heavy implement and the screw head (e.g. 6-12 inches) to distance what you need to gently tap with a heavy hammer from the sensor. This wire needs to be very secure, and wihtout any kinks in, as any kicks or bends in the wire will act to reduce the pulling force, because all the pulling force will be trying to do is straighten the bent wire. The idea is again to get something on the end of it heavy that you can gently tap, which will transfer the tapping (pulling out) motion and importantly the peak loading of the tapping to hopefully start this thing moving. If you have a slide hammer with a head that won't securely engage with the screw head, you could also wire it on via this method and maybe forego the crow bars. The reason I mention them first is they are cheap and you might have them laying around, and will be excellent at transferring that shock to the screw in a controlled manner with very gentle taps with a small lump hammer.
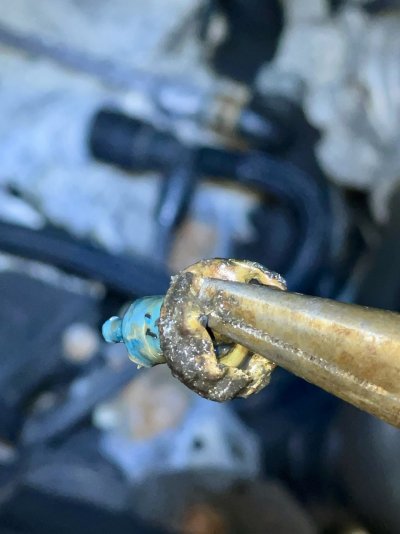
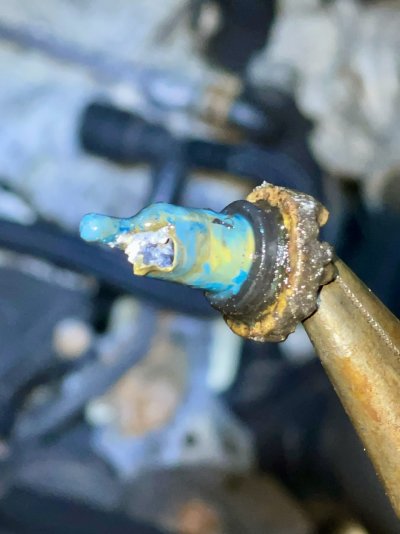
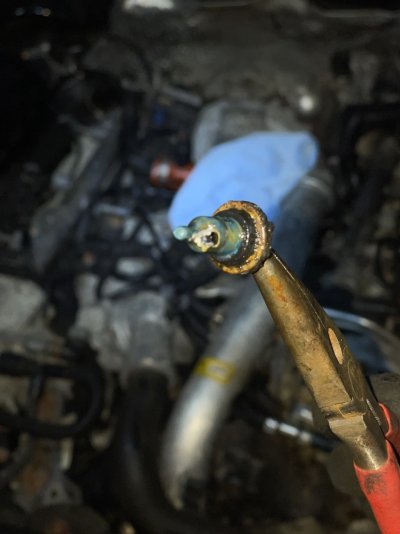
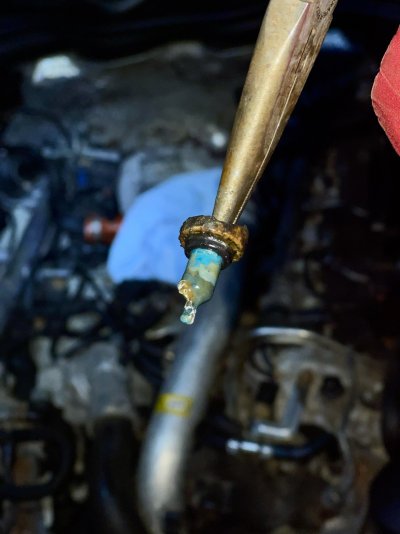
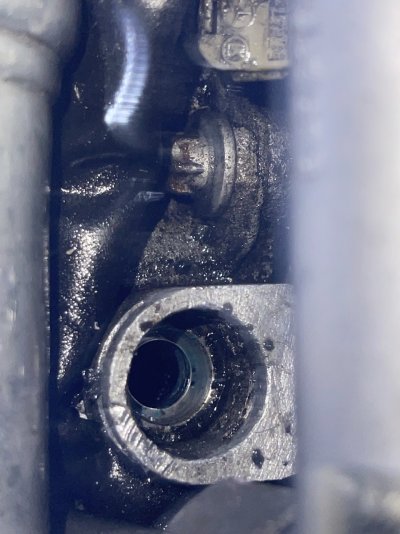
If all this achieves is pulling out the plastic resin from inside, maybe you can then very very carefully try to fold down the now exposed brass rim of the sensor, that would break the corrosion/scale bond and free the beggar.
Get a much fatter screw into that thing. If it can go in at an angle and clear over the fuel rail, you might be able to get a crow bar on it to use in similar way to a slide hammer. If not, be prepared to have a think about getting that fuel rail off. How hard can it be!?
Depending on angles on the crow bar head, you could try two different approaches. Do not use this in the levering way you would normally with a crow bar, this is for precision tapping of the new, fat screw that is in the sensor!
If you are trying this route, make sure the screw actually fits and engages with the crow bar notch and isn't too fat. If it is too fat, you could gently grind some material off the shaft of the screw and under head to allow the crow bar to engage positively.
You need a crow bar with a notch in the head for nail removal (of course I have a wide selection that have been used as part of my small, 6 year house renovation project).
1.
Crow bar with an obtuse head angle, like this.
Roughneck Heavy Duty Gorilla Wrecking Bar
Hardened and tempered, drop forged alloy steel. Bar to claw angle permits use near flat surfaces. Extra wide chisel blades and oval shank.
2. If the angles are all wrong for 1, you could try a crow bar with an acute angled head, like this.
Both jobs might require a glamorous assistant to either firmly hold the crow bar in place, or GENTLY tap the long pointy end or mole grips attached to the crow bar (depending on their mechanical sympathy and awareness and how much you trust them to not just smack it with a hammer) to try and get this moving and make sure the notch stays engaged on the screw head.
Alternatively, if you can't get the head of either of those bars in there, you might be able to robustly wire the crow bar (other implements are avaiable) to the head of the screw using some heavy gauge galvanised gardening wire or similar (I'm thinking 1-2mm strong stuff, not thin stretchy green stuff). The principle here is to leave a gap between the heavy implement and the screw head (e.g. 6-12 inches) to distance what you need to gently tap with a heavy hammer from the sensor. This wire needs to be very secure, and wihtout any kinks in, as any kicks or bends in the wire will act to reduce the pulling force, because all the pulling force will be trying to do is straighten the bent wire. The idea is again to get something on the end of it heavy that you can gently tap, which will transfer the tapping (pulling out) motion and importantly the peak loading of the tapping to hopefully start this thing moving. If you have a slide hammer with a head that won't securely engage with the screw head, you could also wire it on via this method and maybe forego the crow bars. The reason I mention them first is they are cheap and you might have them laying around, and will be excellent at transferring that shock to the screw in a controlled manner with very gentle taps with a small lump hammer.
If all this achieves is pulling out the plastic resin from inside, maybe you can then very very carefully try to fold down the now exposed brass rim of the sensor, that would break the corrosion/scale bond and free the beggar.
Last edited:


") .
.