I serviced my W203 service a petrol C180k 2005
I am a rookie – please use all my advice with that in mind!
Please post any corrections
Spark plugs
4x Bosch FR6MPP332
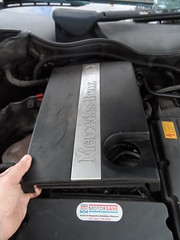
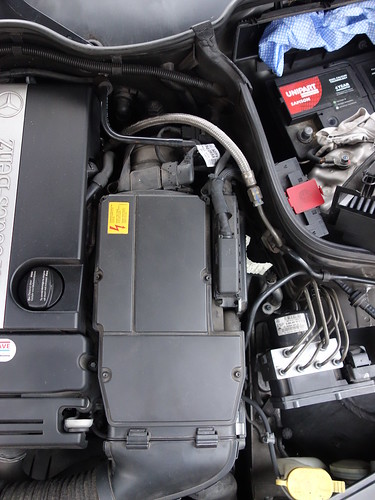
Lift off the engine cover, some folk advocate a warm engine to prevent the hard plastic engine cover breaking.
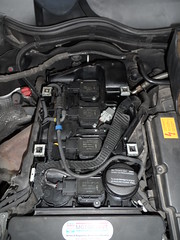
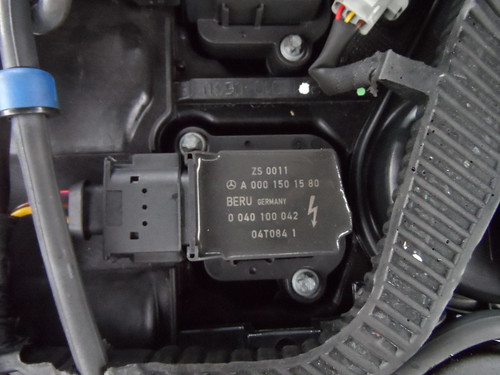
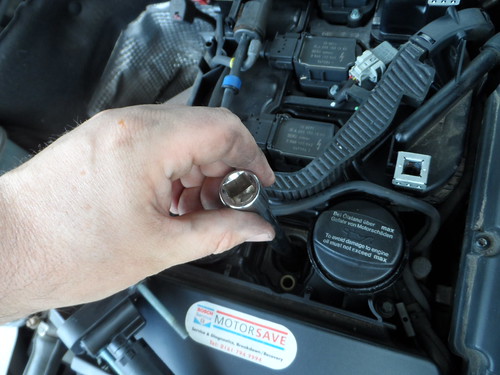
Use a TORX E8 socket to remove the 2 bolts holding the first front coil pack in and pull it out
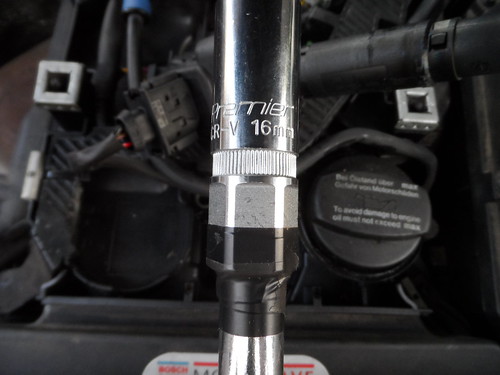
16mm ½-inch square drive spark plug socket to remove a plug, black insulation tape was used to stop the socket coming off the extension in the plug hole!
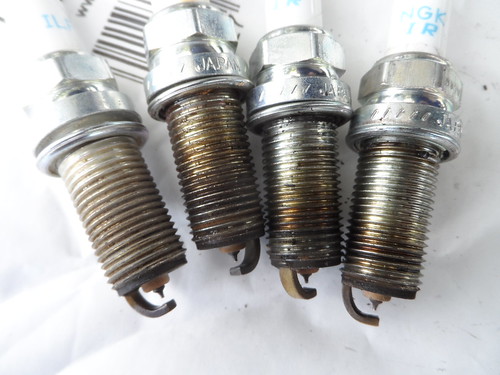
Inspect your plug! Light tan to greyish-brown deposits are good and means your Merc engine is in good condition. Get a new plug out and admire it.
Hand tighten the plug in to start with until you are confident there is no cross threading use your torque wrench - they are quite tight!
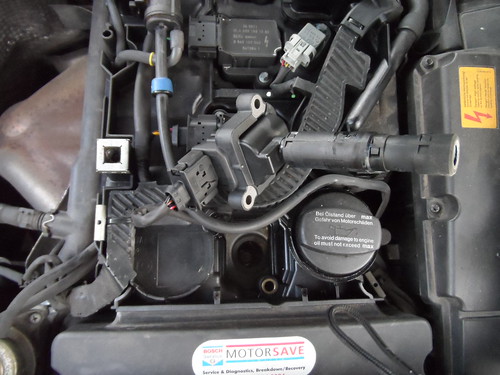
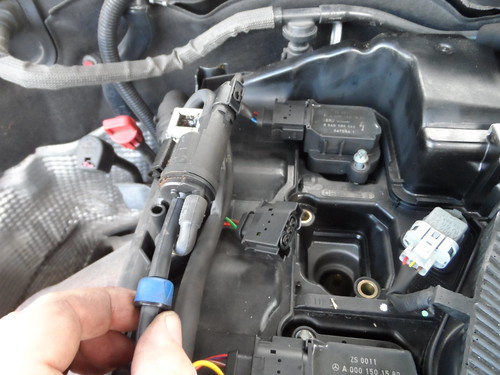
Then reverse the process, pop each coil pack on, don’t over tighten the two bolts. Move on to the next. Some of the coil packs and the item top left were unplugged and lifted out the way
Once all four are done – final check, make sure all the hoses/cables are back in place and push your engine cover back on.
Spark plugs torque settings
Up to 20/4/04 twenty five 25 Nm Eighteen 18 lbf ft
From 21/04/04 twenty eight 28 Nm Twenty one 21 lbf ft 3 Kg/m on my torque wrench
Air filter
Very easy – situated under the black plastic cover to the right of the centre of the engine. Lift out, make sure the air box is clean but don’t spray anything in there.
Pollen filter
Very easy – situated on the near side over the battery
Air filter
Oil filter
Easy, I used Mobil Engine Oil (1 ESP 5W30 5Ltr)
Top tip – make sure your new filter comes with 3 new oil seals rubber rings in the box!
I put my car up on 4 stands with a hydraulic jack and placed large blocks of wood underneath the rear axle for safety.
Remove two bolts from the rear of the front under tray
Remove the under tray behind that one that covers the rear section of the sump
Flattened cardboard boxes, a washing up bowl, few rags help catch oil
Just loosened the sump plug slightly using a socket
Mark the orientation of the oil filter housing so it can be tightened back up correctly
I ran the car, made a brew and when I returned it was up to temperature, turned the engine off
I loosened the oil filter housing just slightly with an adjustable spanner, use a big one.
Take the oil filler cap off – the big one, centre of the top of the engine with a decal of an oil can on it!
Remove the sump plug with a large extension from the nearside with care so the oil doesn’t go up your sleeve
It is probably prudent to change the copper washer for a new one
Remove the oil filter housing over a tray to catch the oil
Remove the old filter – it just pulls off the central tube
Clean up the plastic housing, remove all 3 rubber rings and note where they were – I used a small electrical screwdriver to do this
Fit the 3 new rubber rings (make sure they come with your new filter). Then push the new filter into place
Pop a bit of oil on the rubber seals
Fit the new oil filter housing and tighten it up manually and then with your big adjustable spanner – it has the torque setting on the top – I didn’t have a socket that fit it so I just tightened and pinched it up and my mark was lined up same as before.
The torque settings:
1.8 litre engine twenty four 24 Nm or eighteen 18 lbf ft
2.0 and 2.3 litre twenty five 25 Nm or eighteen 18 lbf ft
Once you are satisfied the sump is empty fit the sump plug, make that fairly tight.
Torque engine oil drain plug
Thirty 30 Nm or twenty two 22 lbf ft
Pour in 5L of oil through the oil filler – use a funnel, rags/plastic bags to prevent spilling oil on your engine
You can lower your car, drive and then retest the oil using the dash facility
Mine said the oil level was fine.
The Haynes guide says the 1.8 takes 5.5L of oil
2.0 and 2.3 takes 7.0L of oil
Fuel Filter
This was moderately difficult
Chock the front wheels, jack the car up – you can use the centre of the rear wheels there is a big cross member there, bit of wood, jack it up, two stands in the rear jacking points, I took the hydraulic jack out and placed a large block of tree trunk under the centre of that rear cross member so I could not be squished.
Incidentally, on near side where the fuel filter is, place the jack stand so that it does not trap the edge of the black plastic under tray so you can lift it down there.
Get comfy, big piece of cardboard, piece of foam to lie on.
Gloves. Safety specs are a must, keeps rust out your eyes and fuel. I happen to have fire extinguishers.
Take the petrol cap off to release the pressure.
Remove the rear part of the black plastic under tray and use something to hold it down.
There are just two black plastic nuts, 10mm socket
You can visualise your fuel filter.
Use a TORX T20 to remove the bolt in the black plastic retaining bracket
I used a medium sized flat head screwdriver to prise off the nearside hose clips and hoses, there are 2 on each side. Just prise them off, they ping apart fairly easily. Note which way the filter fits.
I used zinc plated mini fuel hose line hose clips, you need four in total, I understand these fuel line hoses are more secure than worm type/jubilee clip type. I used:
1x 10-12mm on the thinnest pipe which goes to the centre of the raised fuel pipe in the centre of the filter
3x 14-16mm on the other three pipes
Very little petrol actually comes out. Hold your finger over the pipes, pop a clamp over each hose in a favourable position so you can tighten them easily and push it home on the new filter.
Doing the offside (facing the exhaust pipe) was the hardest side and the centre large pipe took a bit if moving.
Once again as soon as they are off, pop on your clips and push them home on the filter.
At this stage I had a little petrol on the rag and cardboard and I took that out of the way.
Tighten the 4 clips, refit the filter & bracket, start your engine and run it for a bit, I had no leaks.
Refit the under tray.
Put your petrol cap on and lower your car and off you go.
My car started first time, no problem.
The old filter had a lot of petrol in it and it was satisfying to see lots of black bits coming out of it. It was dated 2004 and I wonder if it was the factory original.
I am a rookie – please use all my advice with that in mind!
Please post any corrections
Spark plugs
4x Bosch FR6MPP332
Lift off the engine cover, some folk advocate a warm engine to prevent the hard plastic engine cover breaking.
Use a TORX E8 socket to remove the 2 bolts holding the first front coil pack in and pull it out
16mm ½-inch square drive spark plug socket to remove a plug, black insulation tape was used to stop the socket coming off the extension in the plug hole!
Inspect your plug! Light tan to greyish-brown deposits are good and means your Merc engine is in good condition. Get a new plug out and admire it.
Hand tighten the plug in to start with until you are confident there is no cross threading use your torque wrench - they are quite tight!
Then reverse the process, pop each coil pack on, don’t over tighten the two bolts. Move on to the next. Some of the coil packs and the item top left were unplugged and lifted out the way
Once all four are done – final check, make sure all the hoses/cables are back in place and push your engine cover back on.
Spark plugs torque settings
Up to 20/4/04 twenty five 25 Nm Eighteen 18 lbf ft
From 21/04/04 twenty eight 28 Nm Twenty one 21 lbf ft 3 Kg/m on my torque wrench
Air filter
Very easy – situated under the black plastic cover to the right of the centre of the engine. Lift out, make sure the air box is clean but don’t spray anything in there.
Pollen filter
Very easy – situated on the near side over the battery
Air filter
Oil filter
Easy, I used Mobil Engine Oil (1 ESP 5W30 5Ltr)
Top tip – make sure your new filter comes with 3 new oil seals rubber rings in the box!
I put my car up on 4 stands with a hydraulic jack and placed large blocks of wood underneath the rear axle for safety.
Remove two bolts from the rear of the front under tray
Remove the under tray behind that one that covers the rear section of the sump
Flattened cardboard boxes, a washing up bowl, few rags help catch oil
Just loosened the sump plug slightly using a socket
Mark the orientation of the oil filter housing so it can be tightened back up correctly
I ran the car, made a brew and when I returned it was up to temperature, turned the engine off
I loosened the oil filter housing just slightly with an adjustable spanner, use a big one.
Take the oil filler cap off – the big one, centre of the top of the engine with a decal of an oil can on it!
Remove the sump plug with a large extension from the nearside with care so the oil doesn’t go up your sleeve
It is probably prudent to change the copper washer for a new one
Remove the oil filter housing over a tray to catch the oil
Remove the old filter – it just pulls off the central tube
Clean up the plastic housing, remove all 3 rubber rings and note where they were – I used a small electrical screwdriver to do this
Fit the 3 new rubber rings (make sure they come with your new filter). Then push the new filter into place
Pop a bit of oil on the rubber seals
Fit the new oil filter housing and tighten it up manually and then with your big adjustable spanner – it has the torque setting on the top – I didn’t have a socket that fit it so I just tightened and pinched it up and my mark was lined up same as before.
The torque settings:
1.8 litre engine twenty four 24 Nm or eighteen 18 lbf ft
2.0 and 2.3 litre twenty five 25 Nm or eighteen 18 lbf ft
Once you are satisfied the sump is empty fit the sump plug, make that fairly tight.
Torque engine oil drain plug
Thirty 30 Nm or twenty two 22 lbf ft
Pour in 5L of oil through the oil filler – use a funnel, rags/plastic bags to prevent spilling oil on your engine
You can lower your car, drive and then retest the oil using the dash facility
Mine said the oil level was fine.
The Haynes guide says the 1.8 takes 5.5L of oil
2.0 and 2.3 takes 7.0L of oil
Fuel Filter
This was moderately difficult
Chock the front wheels, jack the car up – you can use the centre of the rear wheels there is a big cross member there, bit of wood, jack it up, two stands in the rear jacking points, I took the hydraulic jack out and placed a large block of tree trunk under the centre of that rear cross member so I could not be squished.
Incidentally, on near side where the fuel filter is, place the jack stand so that it does not trap the edge of the black plastic under tray so you can lift it down there.
Get comfy, big piece of cardboard, piece of foam to lie on.
Gloves. Safety specs are a must, keeps rust out your eyes and fuel. I happen to have fire extinguishers.
Take the petrol cap off to release the pressure.
Remove the rear part of the black plastic under tray and use something to hold it down.
There are just two black plastic nuts, 10mm socket
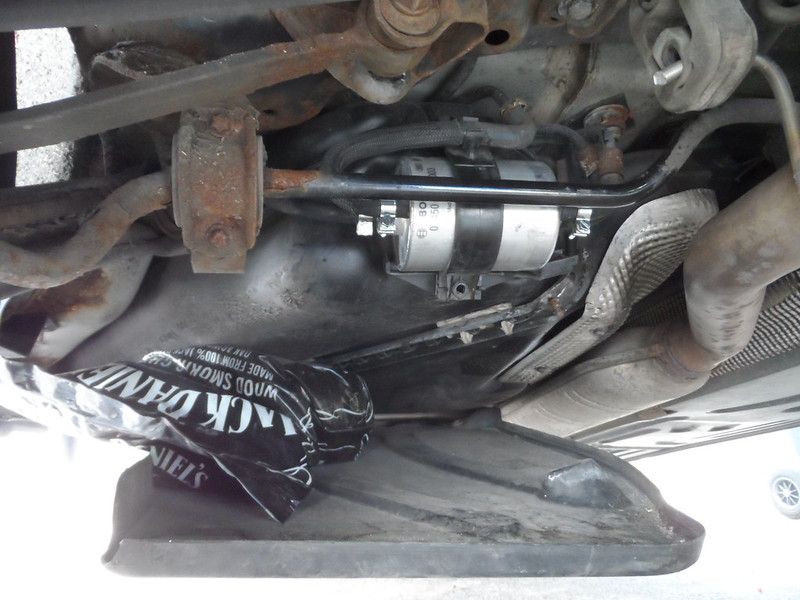
You can visualise your fuel filter.
Use a TORX T20 to remove the bolt in the black plastic retaining bracket
I used a medium sized flat head screwdriver to prise off the nearside hose clips and hoses, there are 2 on each side. Just prise them off, they ping apart fairly easily. Note which way the filter fits.
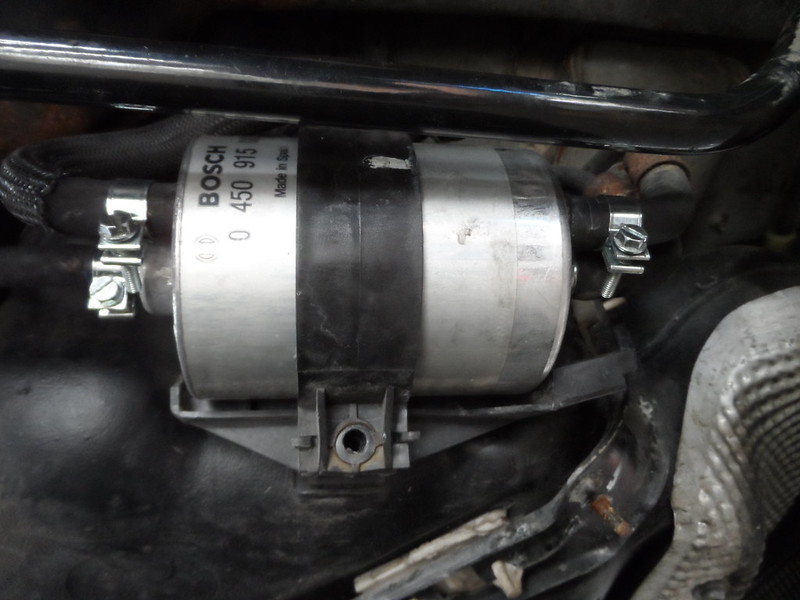
I used zinc plated mini fuel hose line hose clips, you need four in total, I understand these fuel line hoses are more secure than worm type/jubilee clip type. I used:
1x 10-12mm on the thinnest pipe which goes to the centre of the raised fuel pipe in the centre of the filter
3x 14-16mm on the other three pipes
Very little petrol actually comes out. Hold your finger over the pipes, pop a clamp over each hose in a favourable position so you can tighten them easily and push it home on the new filter.
Doing the offside (facing the exhaust pipe) was the hardest side and the centre large pipe took a bit if moving.
Once again as soon as they are off, pop on your clips and push them home on the filter.
At this stage I had a little petrol on the rag and cardboard and I took that out of the way.
Tighten the 4 clips, refit the filter & bracket, start your engine and run it for a bit, I had no leaks.
Refit the under tray.
Put your petrol cap on and lower your car and off you go.
My car started first time, no problem.
The old filter had a lot of petrol in it and it was satisfying to see lots of black bits coming out of it. It was dated 2004 and I wonder if it was the factory original.
Last edited:
