• The Forums are now open to new registrations, adverts are also being de-tuned.

CLK 320 Just bought - advice

Or the super duper alloy ones (possibly still available from the forum)

You forgot LED sidelights from Killerhertz (forum member) MUCH better and brighter that the standars incandescents.

Sounds like some nice mods and fixes - enjoy!

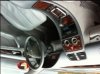
I tried the Canbus LED sidelights but found they look a little awkward colour wise next to halogen bulbs. Would look great next to Xenon's though.
 
Don't forget the gearlever chrome surround!! :)

MUCH better than the original piece of plastic (IMHO of course)
 
Or the super duper alloy ones (possibly still available from the forum)

You forgot LED sidelights from Killerhertz (forum member) MUCH better and brighter that the standars incandescents.

Sounds like some nice mods and fixes - enjoy!

Thanks Ted, encouragement always helps!

The number plate LED's give the car a nice modern appearance and really lift the car over and above the yellowy colour of the originals. It may well be worth doing these at the same time as your rear lights as you have to loosen the boot trim to do either. With the boot open you will see two black retaining pins, use a small flathead to lever the centre part out and then remove the remove the body. There are two on either side. Then pull the carpet down from the area around the boot catch (be careful to lift it over the pin switch for the boot light). With the carpet held down you will be able to get at the bulbs with some perseverence (or a helper). Whilst you are there you will notice that the inner boot mounted rear lights have a bolt (8mm i think) on the inside that you can only get to with the liner pulled back. Undo this then remove the two outer bolts from the units and then you can remove and clean the green away!
The interior LEDs look lovely IMO and dim down just like the originals - a very satisfying job and one which most of my family and friends have now had replicated.
I had AMG pedals from an SLK in a W124 that I owned briefly last year - is that what everyone else has been buying?
 
Don't forget the gearlever chrome surround!! :)

MUCH better than the original piece of plastic (IMHO of course)

Is that the SLK one? I have the part number for it if anyone wants it?
 
£90 per Michelin is excellent value!
Regards
John

They were actually £88 so very good VFM - high;y recommended as the car drives with a lot more feel and steering accuracy. The traction light hardly comes on in the wet now too.
 
I saw that a month back and liked it. Usually around £23 if I remember. I will keep a look out for it on fleabay. May try the scrappie for an SLK and see if that fits
 
SLK style white/beige heater controls in - reasonably easy swap out job. Make sure you line the heater controls up before fitting and if you get any problems then pull the control knobs out and reposition them. Just awaiting chrome rings and gearbox surround. Will post pics when completed.
 
Some may scoff at the 'tacky' chrome, but I think it lifts the interior a treat.

Looks great.
 
Thank you. I think it matches well with the existing chrome in the cabin. If there were no chrome then it would look out of place but as is I think it suits. Others opinion may differ but I personally like the changes an everyone who has seen it so far agrees it looks better. Some ambient lighting is my next challenge and as duh I am looking for a W210 auto dimming mirror with ambient lighting attached.
 
The car...
 

Attachments

  • merc.JPG
    merc.JPG
    41 KB · Views: 142
Last edited:
Not a comment on the white heater dials? *isnt feeling the love*
 
Forgot to mention I sanded and polished the headlights and replaced the bulbs with philips extreme 100% brighter. Did the world of good for night time driving

Thanks for the thread , very interesting for someone like me (very early days of a hobby). Can you please explain how you sand and polish headlights.
 
Thanks for the thread , very interesting for someone like me (very early days of a hobby). Can you please explain how you sand and polish headlights.

I was just about to ask that too.....what grade wet and dry paper did you use?

My headlights have discoloured and have a yellowish hue about them, looks like it would rub off but don't want to wreck the plastic lenses in the process.
 
The reason the headlights go cloudy is that they have a layer of clearcoat on them and once that gets penetrated water gets behind it and discolours it creating that awful yellow hue.

To repair:
The key here is to mask the area around the headlights thoroughly and use double thickness of tape. Start with an 800 grit - leave it in a bucket of water for 10 mins or so then start sanding the headlight in horizontal lengths, keep wetting all the time. Dont worry if things dont look great at this time as that will come in time. Next using the same grade go lengthways across the light. Dip some 1000 grit in the water for 10 mins and then repeat the process. Next using the 1500 do the same and then if you need to go to 2000 grit. I used autosol to give a final finish. Total time taken was around an hour.

A different guide than mine - wouldnt remove the headlights unless you really feel the need to drop your whole front bumper http://forums.mercedesclub.org.uk/showthread.php?t=25781
 
Last edited:

Users who are viewing this thread

Back
Top Bottom