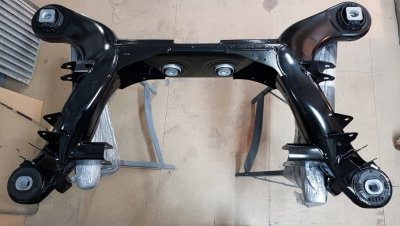
Familiar E55 W211 Moved to New Home Further North

Page may contain affiliate links. Please see terms for details.
I'm hoping that I'm not doing the "teaching how to suck eggs" here Pat, but have you tried STRIP AND CLEAN PADS for those scabby areas under the subframe?

I've linked to one specific make as I found them to be the best though obviously others are available. I use the 75mm ones on a little air sander I acquired from somewhere and they really rip through it and leave a finish good enough to apply etch primer. A couple of coats of colour, then a protection of your choice. I used Bilt Hamber on mine.

Never used those particular ones but may give them a try, we use some other ones but they never seem to live up to expectations.


You probably know but DON'T get POR on your skin or you'll end up like a Dalmatian for about a month. :D

Yes, it sticks like hell, I usually wear 2 sets of gloves that usually end up with the fingers stuck together, its good stuff though but the surface has to be prepared correctly or it wont stick.
Great right on top of rust but then if it wasn't it wouldn't live up to its name Paint Over Rust. ;)
 
I tried POR on my exhaust manifolds. After they were sand blasted and degreased.

All per POR’s instructions. Boy it looked great. Until........ I jet-washed the engine bay and the POR fell off.

Not happy about that. I have since read that POR and Jet Wash do not mix?


Sent from my iPhone using Tapatalk
 
I tried POR on my exhaust manifolds. After they were sand blasted and degreased.

All per POR’s instructions. Boy it looked great. Until........ I jet-washed the engine bay and the POR fell off.

Not happy about that. I have since read that POR and Jet Wash do not mix?

What we have found is that on anything smooth the POR just does not bind to it.
We rough everything up and use some metal etch firs then apply the POR and it works.

I remember one of the guys doing the engine bay in an Imp and the POR jut flaked right off as the surface was too shiny.
 
Wow oh WOW! that looks MINT! , With referance to the manifolds, i sprayed mine with weld through primer and they stayed looking fresh in my ownership of over a year though it was only a w126 380 se, the 55's do get hot under there!
 
Wow oh WOW! that looks MINT! ,

Should do, was brand new before I rubbed it down. :)
The epoxy resin on it looks quite good and is very durable.


With referance to the manifolds
, i sprayed mine with weld through primer and they stayed looking fresh in my ownership of over a year though it was only a w126 380 se, the 55's do get hot under there!

You mean the exhaust?
Strangely we were talking about this today trying to determine what we will be painting things with.

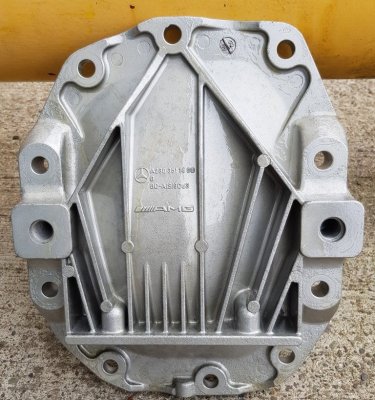
Got some high temperature stuff for the diff. end but it has to be baked.
The part is too big for our oven at work so I'll have to sneak it home one night the wife is out. ;)
 
Yes Pat, Exhaust Manifolds to head, It was a greeny grey colour which doesnt sound nice lol but once dried it looked spot on. :)
 
Yes Pat, Exhaust Manifolds to head, It was a greeny grey colour which doesnt sound nice lol but once dried it looked spot on. :)

This one has Kleeman headers so should be stainless. I've only removed the exhausts below the headers for now.

Front end is a job for over winter, once I've got everything back together will be doing same to front end including new front subframe.

I really just want to do all the major stuff on the rear for now and leave front for phase 2 except for discs/calipers for now.
 
LOL, Oh Pat i totally forgot about those pmsl, sorry i'm a numpty i remeber when Alps had those 1st fitted, The car sounds epic doesn't it :rock:
 
The car sounds epic doesn't it :rock:

As far as I can remember but it's been a while and my memory is not what it was. :)
Seriously though I started it a few weeks ago before the exhaust came off and it sounds magnificent.
 
I can see this car being museum piece lol thats a complement btw, Simply to good to use!!

Certainly wont get any day to day use, will be kept for outings and shows next year (weather permitting).

I've got my 2 oil burners in a W211 E220 and W212 E250 for day to day use, favourite one is the W211, drive this one every day.
 
Certainly wont get any day to day use, will be kept for outings and shows next year (weather permitting).

I've got my 2 oil burners in a W211 E220 and W212 E250 for day to day use, favourite one is the W211, drive this one every day.

Same here, love my oil burner :D
 
This is rashman style on a whole new level :D
 
Done some tests to see how the POR is going to look once applied.

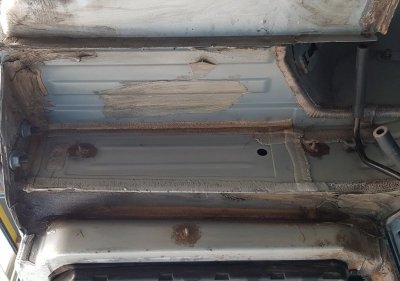
As an example this is the right side of the car cleaned up and flattened off with some 240 grit.

20180920_165121a.jpg

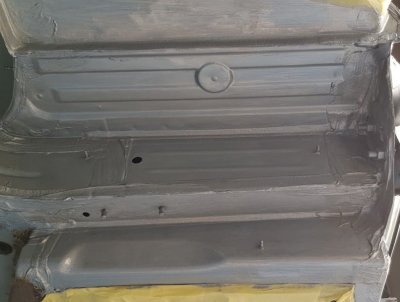
Same done on the left side but then one coat of POR applied.

20180920_165140a.jpg

POR has then been tested and it's hard as nails and stuck solid so no problems with the application.
Only problem now is that I'll have to flatten the POR off again so that I can go ahead and do 3 full coats of it.

These areas are actually covered by the two rear heat shields either side so not really seen so were seen as an ideal choice to test the coating out.
 
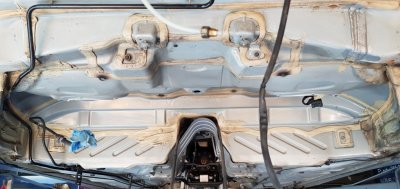
So whilst trying to get in and rub down areas today it was a bit of a pain around the tank area and at the top lip it certainly needed a bit of treatment.

There was only the tank straps, one nut at the top and the electrical connections as well as the hose from the outlet holding the tank in.
Figured it would be quicker removing the tank than it would be to mask areas up and try and work around it.

Will also be a good opportunity for cleaning the tank it.

Good news is the tank was bone dry, electrical connections clean and the area on the car above the tank very clean.
I'll be coating everything from the rear up to the line of seam sealer where you can see the black rubber tank bump stops marks at 3 & 9 o'clock.
20180921_163838.jpg
 
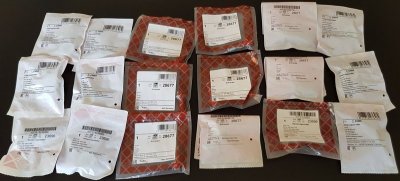
Went and picked up the bolts for the rear wheel bearings as well as new lock nuts for the entire back end.

20180922_110933.jpg

Ended up getting the bolts for £2.58 and the new lock nuts for £0.66p
 

Users who are viewing this thread

Back
Top Bottom