• The Forums are now open to new registrations, adverts are also being de-tuned.

intake manifolds, oil cooler seals

Forgot to add, the air intake temp sensor has one of its clips broken off it, I have now ordered a new replacement: Part number A 6511530028
 
...Hence my thinking that the manifolds are probably full of crud and they are randomly sticking and also causing the boost issue or it could be the throttle flap sticking or both...

...I have everything here to do the manifolds, might as well get them off, cleaned up regardless of how much crud is in them and do the oil cooler seals as well...
I thought you'd already tackled the inlet manifolds to be honest. That was how you opened the thread.
When I cleaned mine, the EGR cooler pipe had WAY less carbon gunk compared to the inlet manifolds.

Definitely get them looked at because I've seen some photos on the forum of various Merc inlet manifolds that have almost been beyond belief.

Good luck
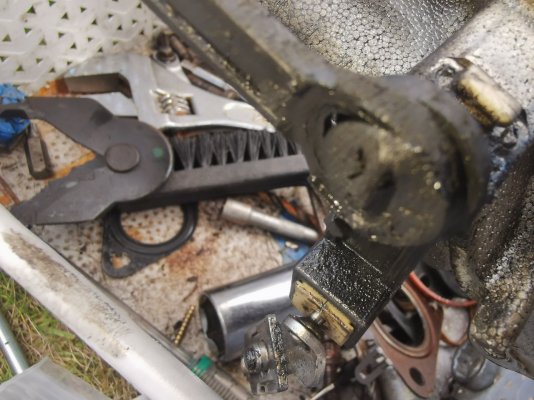
I never got to take them off, with needing the car to get to work I had to do all of the more easily accessible work first. I have a few more seals and things to buy today online and some to order. Will have to book a few days off now to get this done. It's OK.
 
Update:

Hopefully getting thursday, friday and next monday off work, I have just finished ordering everything i need seals and extra gaskets wise.

I am hoping to get it all done over the 5 days and back together, lots to do, but i am now a dab hand at taking the turbo, bat wing, air boxes, fuel filter, swirl flap motor etc on and off.

spent the past few days researching everything, checking torque requirements and will be printing things out tomorrow.

To keep track of bolts etc i will have lots of little bags with labels and where i can bolts kept on parts or through cardboard in the orders they come off.

Expect pics as usual, i will try and get plenty and get some details down too.

UB
 
Update:

Right i am now off for 5 days, plenty of time to take things apart again and get the manifolds off and truly F**k the car up.... i mean Fix the car up.

I have now taken a large quantity of parts off the car engine after work, airboxes turbo pipe, resonator, turbo shield, back pressure sensor, throttle assembly and a few other parts before it got dark.

Up early tomorrow in the cold to get on with things, hopefully I will have the manifolds off by tomorrow afternoon ready to clean.

Will grab pics along the way.

UB
 
Update:

Today was an early start, after grabbing my tools and everything else i needed i started taking things apart.

Off came the turbo, fuel filter, and a couple of brackets first, following that i took off the fuel pipes to the injectors, i found a video online of someone working on these and how to take them off, very helpful ( i will link the video at the right time here when i find it again)

With the fuel pipe out of the way I took the fuel rail off after diconnecting the metal fuel pipes that connect to it to help with correct placement i put masking tape around them, numbered 1-3 strips for each one just to help me afterwards for locations.

I used a bungee cord to keep the loom back from the engine so i could access the inlet manifolds.

The undertray at the front of the engine is removed already, so I put a catch try under the car and took the coolant pipe off the inlet manifold and let it drain into the tray.

Once the coolant had drained out i then proceeded to take the inlet manifolds off, I used a sheet of cardboard with holes punched in to put them in order of removal. The reason for doing this is so that I can match all the new ones with the old ones and fit them instead of the old ones.

I took the thermostat off as I have a new seal for that and wanted it away from the inlet manifold when i start cleaning, I also have a new coolant pipe to go on when its refitted.

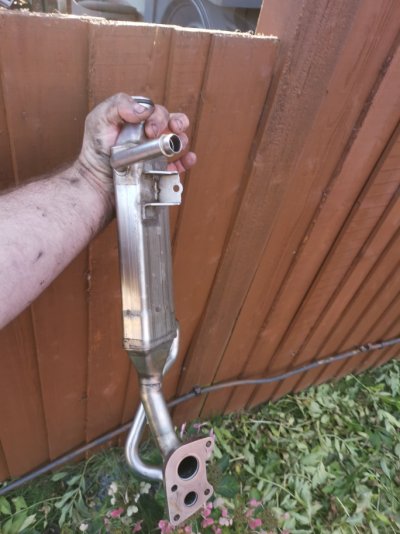
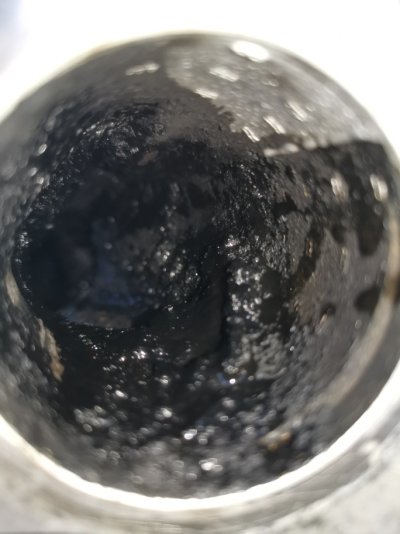
With the inlet manifolds off i then removed the heat exchanger bolted to the underside of the one manifold, it was stinking dirty inside and needed cleaning out also.

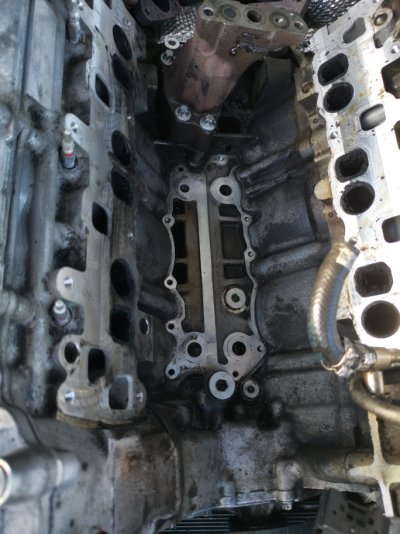
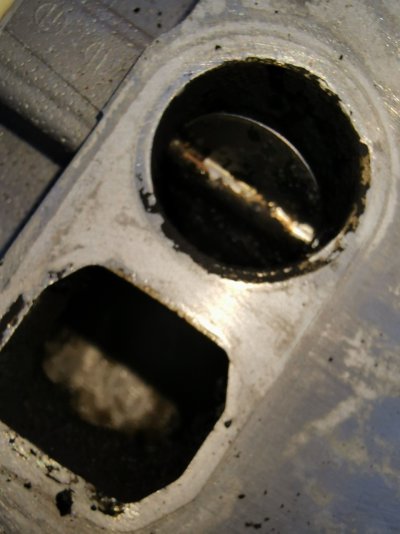
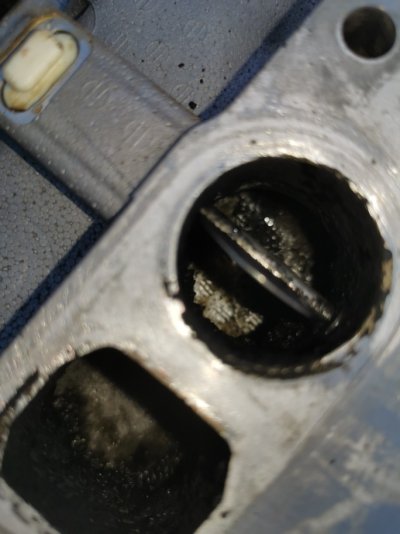
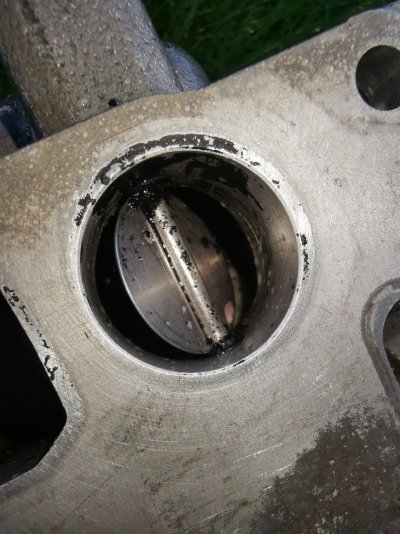
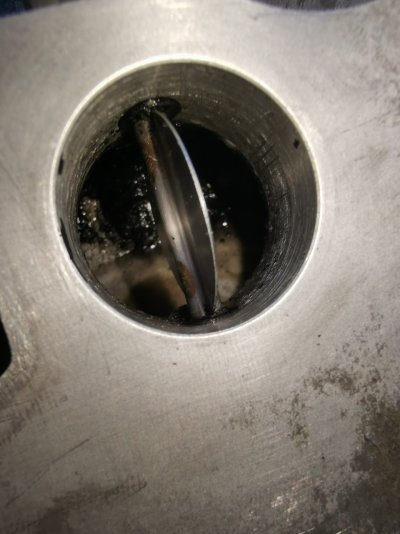
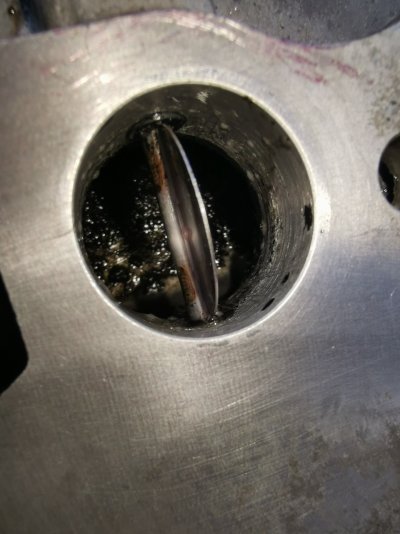
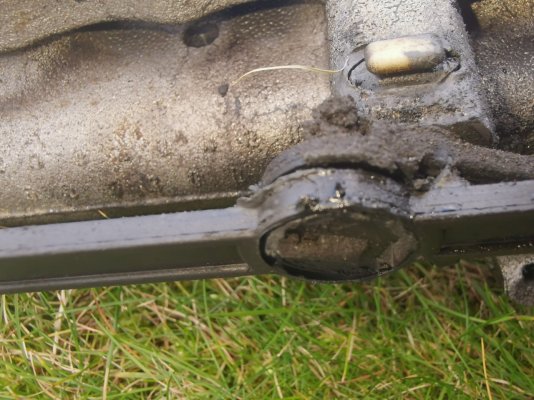
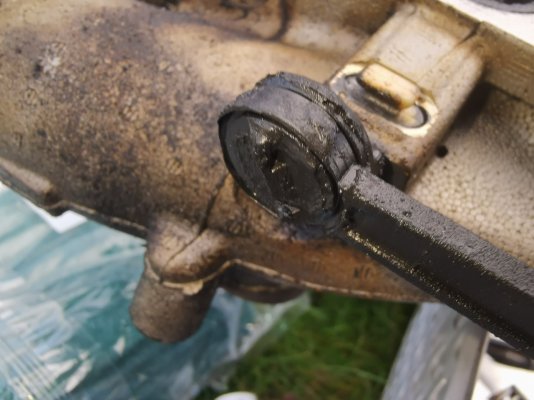
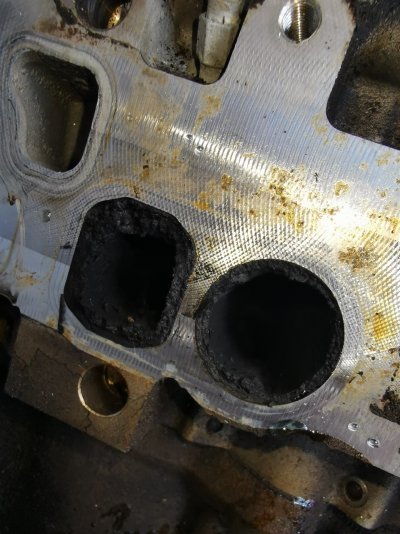
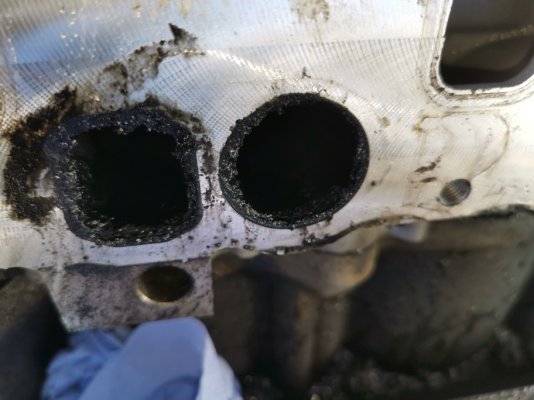
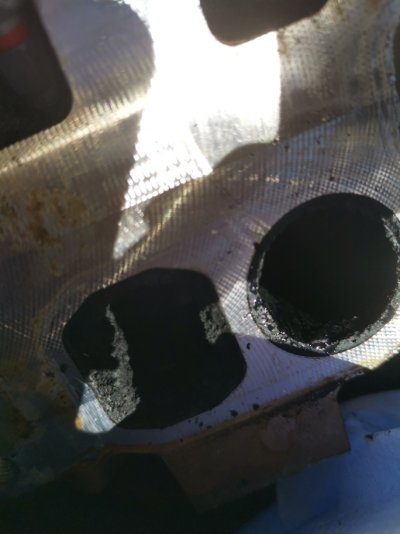
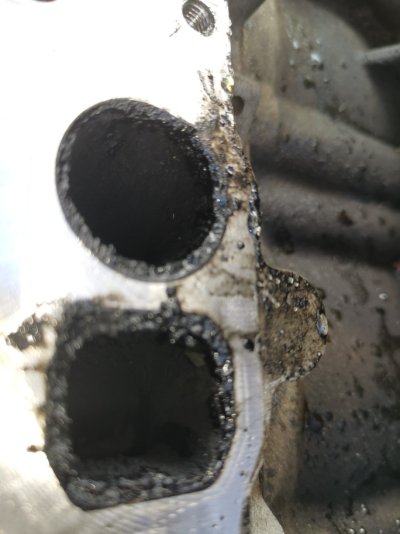
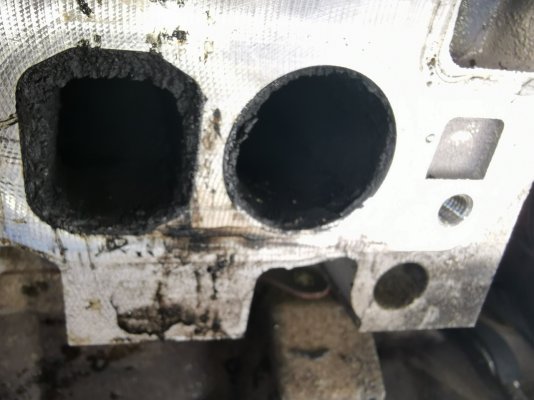
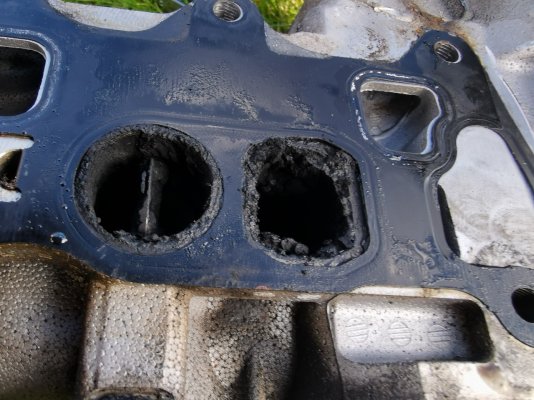
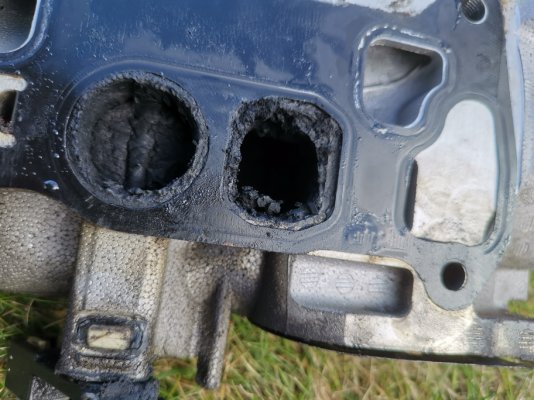
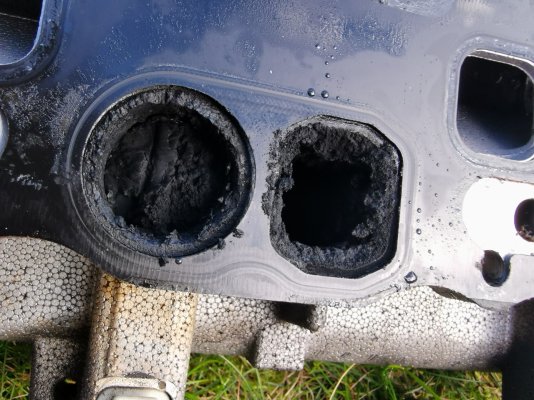
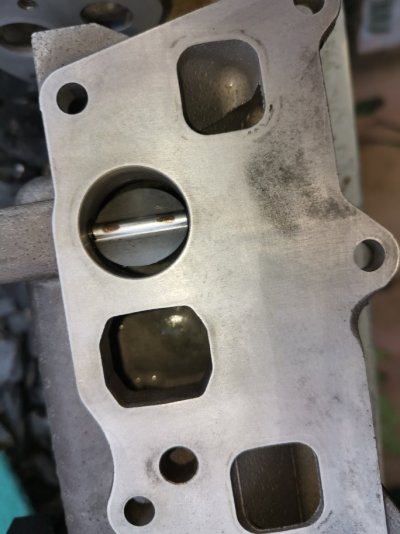
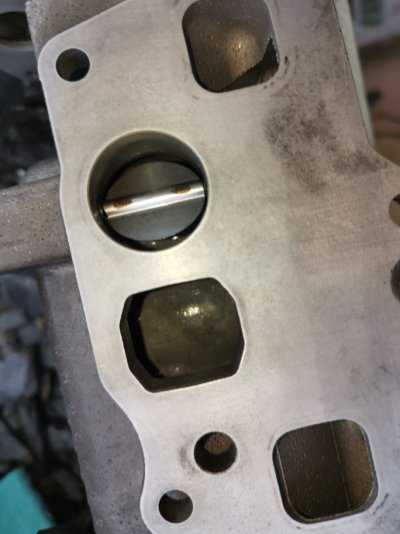
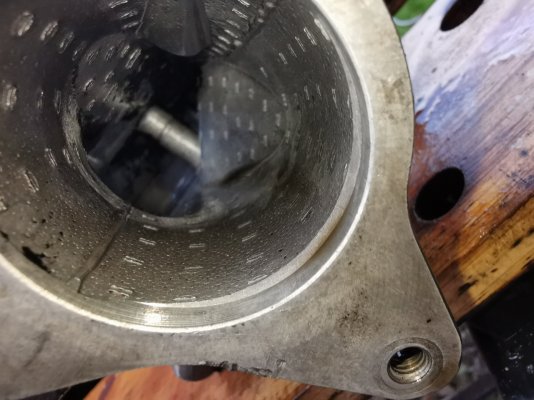
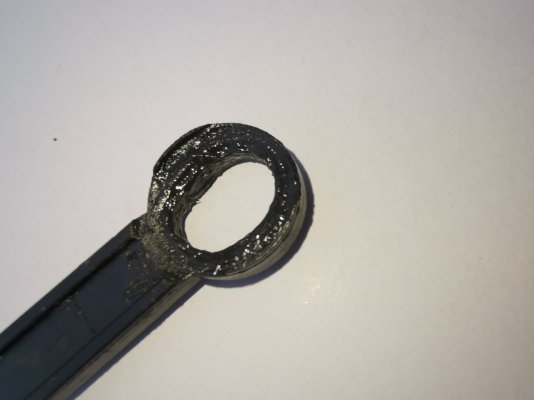
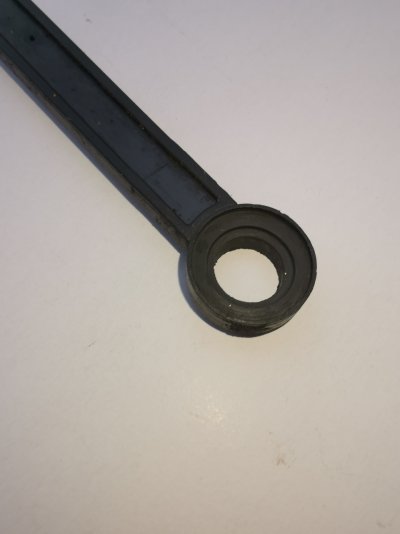
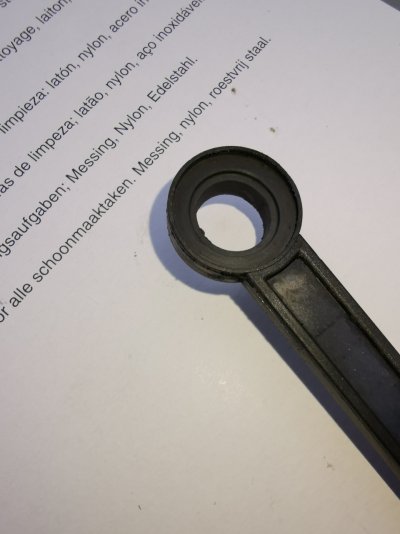
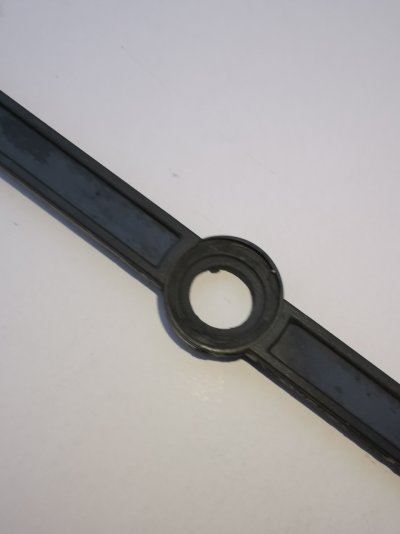
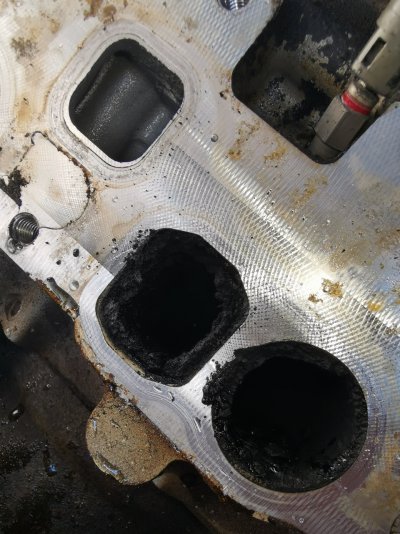
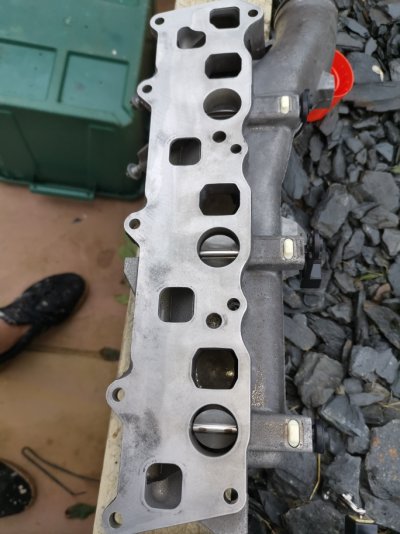
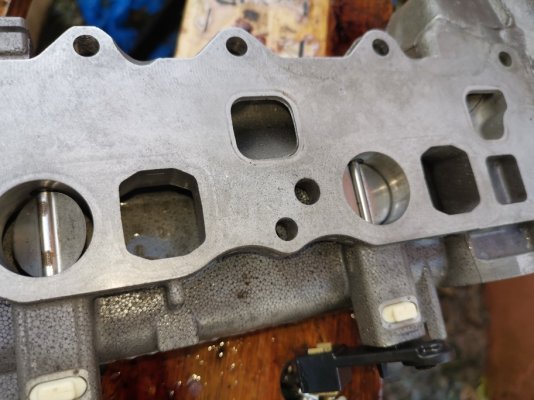
As you can see on the pictures both inlet manifolds are totally carboned up and the swirl flap arms are stretched, so much so on the egr side the swirl flap arm was so bad you could close one flap and the others barely moved.

The carbon build up in the swirlflaps had made a lip around where they closed and one was slightly bent also.

Once removed i took the coolant sensor out of the one manifold and then sprayed a copious amount of mr muscle oven cleaner inside them and left them to soak along with the heat exchanger.

I then spent some time cleanign the crud in the middle of the engine, I put the oil turret back on and left the oil cooler in place while i sprayed cleaner in and got scrubbing. I managed to get a lot of it removed today with more to do tomorrow.

Tomorrow I will be spending the day cleaning the manifolds first then the area around the oil cooler, once all i clean I can then fit the oil cooler with the new seals and bolts that i have.

Lots more to do, will update tomorrow.

Until then heres the pics so far.
 

Attachments

  • arm1.jpg
    arm1.jpg
    408.2 KB · Views: 41
  • head port 1.jpg
    head port 1.jpg
    565.7 KB · Views: 43
  • he2.jpg
    he2.jpg
    198.1 KB · Views: 47
  • cleaning.jpg
    cleaning.jpg
    285.6 KB · Views: 45
  • cl7.jpg
    cl7.jpg
    160.9 KB · Views: 48
  • cl5.jpg
    cl5.jpg
    282.4 KB · Views: 45
  • cl4.jpg
    cl4.jpg
    166.4 KB · Views: 48
  • cl3.jpg
    cl3.jpg
    558.8 KB · Views: 44
  • cl2.jpg
    cl2.jpg
    307.7 KB · Views: 44
  • cl1.jpg
    cl1.jpg
    314.7 KB · Views: 43
  • arm3.jpg
    arm3.jpg
    482.6 KB · Views: 43
  • arm2.jpg
    arm2.jpg
    319.1 KB · Views: 43
  • head port 2.jpg
    head port 2.jpg
    514.1 KB · Views: 42
  • head port 4.jpg
    head port 4.jpg
    190 KB · Views: 43
  • head port 3.jpg
    head port 3.jpg
    153.3 KB · Views: 41
  • head port 5.jpg
    head port 5.jpg
    158.1 KB · Views: 38
  • head port 6.jpg
    head port 6.jpg
    302.1 KB · Views: 34
  • in 4.jpg
    in 4.jpg
    518.2 KB · Views: 35
  • in1.jpg
    in1.jpg
    317.7 KB · Views: 36
  • in2.jpg
    in2.jpg
    572.7 KB · Views: 42
more pics:

This is the heat exchanger under the passenger inlet manifold, it was also full of carbon, I filled it with mrmuscle and blocked off the entrances. You could not see anything through it before, after a good soak and a blast through the pressure washer it cleaned it all out, I will probably do it again tomorrow and that should be that done.
 

Attachments

  • he2.jpg
    he2.jpg
    198.1 KB · Views: 19
  • IMG_20211104_154551_resized_20211104_060704275.jpg
    IMG_20211104_154551_resized_20211104_060704275.jpg
    219 KB · Views: 20
  • he4.jpg
    he4.jpg
    233.9 KB · Views: 20
  • he5.jpg
    he5.jpg
    227.6 KB · Views: 20
Wow, some of those are bad! Could be the cause of the engine issues. Fingers crossed when this is all started, back to normal.

When I was cleaning the inlet manifolds, and the worst of the gunk had been scraped out with a large wooden lollipop type stuck, I used a combination of bottle brush cleaners and old toothbrushes along with carb cleaner, and I found the agitation of the carb cleaner with the brushes really helped shift the thick gunge.
I think so more than likely with the swirl flaps not being able to close or open in sync and the amount of shit in there, no onder the pressure was off when boosting. And with the heat exchanger being crudded up also that didnt help. Calling a company that does vave port walnut blasting to see if they come to the house to do it while the inlets are off being cleaned. Hopefully they can as they are covered in crap also.
 
Update:

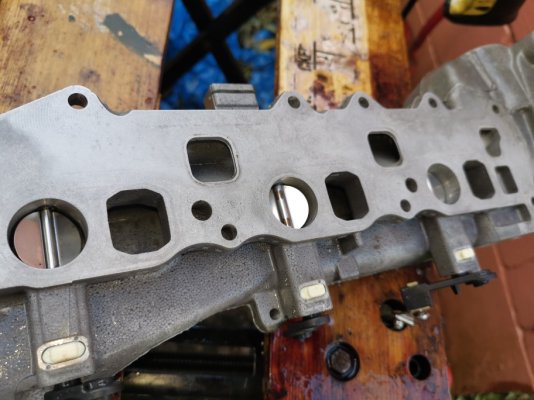
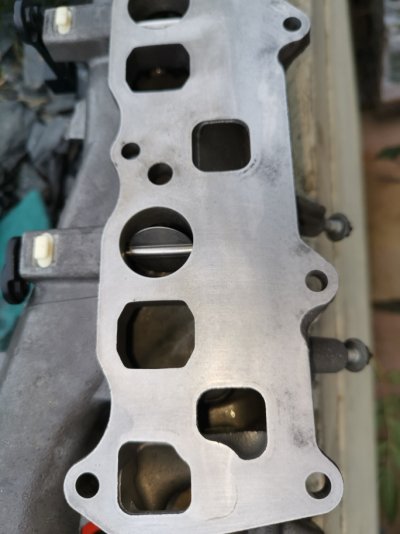
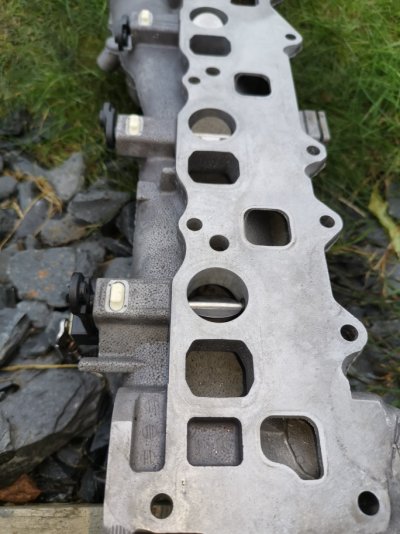
Spent today working on the inlet manifolds, lot's of Mr Muscle and left to soak for 30 mins, then a blast from the pressure washer carefully away from the swirl flaps.

After the rinse another liberal coating of oven cleaner again, I repeated this for a few hours back and fore.

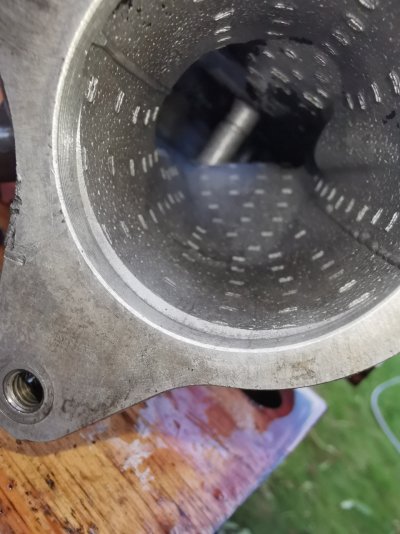
When i needed to clean around the swirl flaps, i used a stiff toothbrush and I sprayed some Bilt and Hamber wheel cleaner in there, took a min or so and went bright red and using a cut down brush I got rid of all the crud around the swirl flaps follwed by a rinse off.

It took the best part of the day to get them cleaned up.

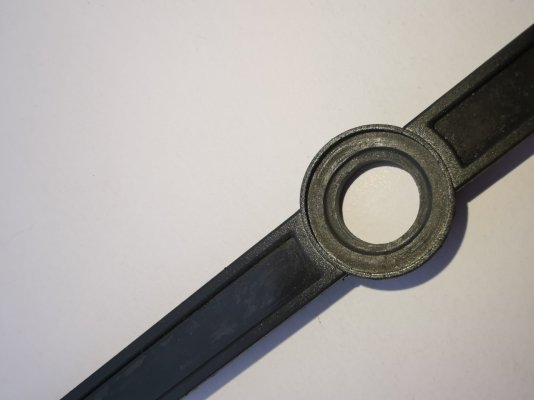
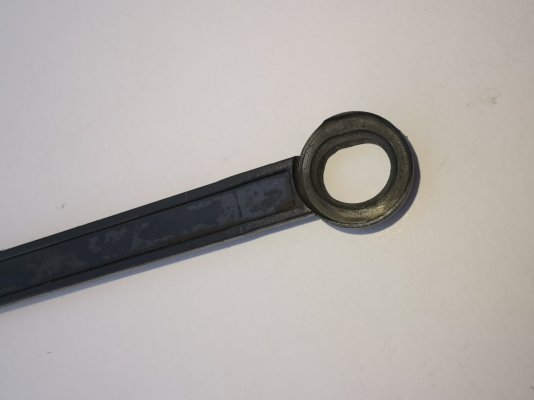
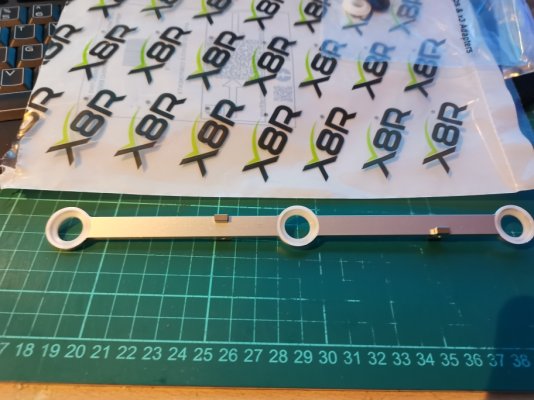
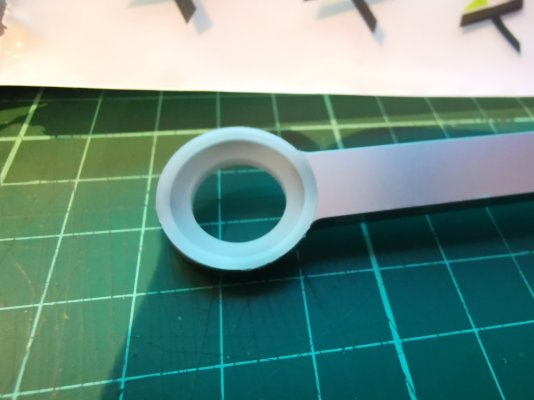
The swirl flap arms are shot they are deformed and no good so yesterday I called X8R after looking at their you tube video showing the Metal replacement arms.
I ordered them straight away and they gave me free next day postage which was really good of them.

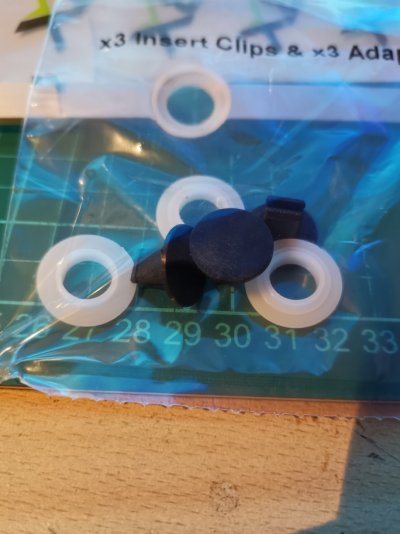
They arrived this morning and they look really good, the aluminium is good quality and the clips and adapters are also built well, this will cure the sloppyness in the swirl flap links, the actual mounts are not deformed and are sound.

Tomorrow I am off out for breakfast with the kids, when I get back I am re-fitting the manifolds and starting to rebuild, possibly finishing tomorrow and then topping the coolant off.

Pics as usual.
 

Attachments

  • man 6.jpg
    man 6.jpg
    239.5 KB · Views: 35
  • man1.jpg
    man1.jpg
    262.1 KB · Views: 34
  • man.jpg
    man.jpg
    216.2 KB · Views: 36
  • man2.jpg
    man2.jpg
    160.1 KB · Views: 36
  • man3.jpg
    man3.jpg
    193.1 KB · Views: 35
  • man4.jpg
    man4.jpg
    170.4 KB · Views: 34
  • man5.jpg
    man5.jpg
    262.8 KB · Views: 37
  • port 1.jpg
    port 1.jpg
    416.5 KB · Views: 37
  • port.jpg
    port.jpg
    401.9 KB · Views: 36
  • sa1.jpg
    sa1.jpg
    194.5 KB · Views: 36
  • sa2.jpg
    sa2.jpg
    235 KB · Views: 35
  • sa3.jpg
    sa3.jpg
    187.3 KB · Views: 33
  • sa4.jpg
    sa4.jpg
    181.1 KB · Views: 32
  • sa6.jpg
    sa6.jpg
    246.7 KB · Views: 30
  • sa5.jpg
    sa5.jpg
    173.1 KB · Views: 33
  • x1.jpg
    x1.jpg
    193.3 KB · Views: 32
  • x2.jpg
    x2.jpg
    231.1 KB · Views: 30
  • x3.jpg
    x3.jpg
    170.7 KB · Views: 34
Update:

It has been a busy and cold day today, I have a lot of photos to go through and organise, not much left to do. It was definatly easier taking things off than fitting them back on!!

Where I can I will give info on torque settings and part numbers etc.
 
Thanks for sharing your experience. I have the om642 so i expect that i will follow in your footsteps at some time in the future.
 
Only in the summer months buddy :)
I can agree with that, its bloody cold and windy, had to put a make shift wind break up on the side of the hood yesterday using thick plastic sheeting and held in place with two squeeze clamps and tucking it into the wheel arch. did the job though!

I really wish i had a nice garage to tuck it in to work on..
 
Hello,
I have been following this thread with some interest as my latest 05/06 211 with now 78,000 miles on it has been leaking oil for some time, according to the old MOT's, and this week, while I am home in Northampton, I bought a big bag full of gaskets and seals from Mercedes in Northampton ( very helpful in the parts dept ) with a view to doing the cooler seals.
Not only but also, since I bought the car in May, it has suffered with lack of boost and goes into limp mode if I try to toe it. Strangely there are no codes coming up for this, so I was hoping that stripping everything down my reveal something seized up as it had been standing for some long time. I did replace the turbo boost sensor, but stopped at the price of a batwing. !
Fortunately, I can still manage the journey up to Scotland as 80mph is just 2000 rpm and I can drop a gear using the Tiptronic.
So, for Ollie,............. please, I was wondering what the adaptions are and why they are needed to be reset.
When I get back up to Leven, my nearest dealer would be Edinburgh if I needed any reset of this kind.
Thanks.......... Steve.
Not all diagnosis equipment will pull all the codes. If you have limp mode you will have a code 100%. The code is 50% of the info. The guided tests will point you to the cause usually. Its often better value to get it diagnosed by someone that knows what they are doing with the right equipment. See my sticky in the engine section.
 
Update:

It has been a busy and cold day today, I have a lot of photos to go through and organise, not much left to do. It was definatly easier taking things off than fitting them back on!!

Where I can I will give info on torque settings and part numbers etc.
WIS will give you all the torque settings. Or call me again and I can look them up for you. Sorry I couldn't talk in the week. I love helping people out but I was massively up against it in the workshop.
 

Users who are viewing this thread

Back
Top Bottom